
Last Updated on March 16, 2024
Organic Light Emitting Diode or OLED display gives better visibilty than the normal LCD display and it provides better flexibility in all over the size. It is available as monochrome or color display, we can choose different size of OLED display depends on our prototype. In this tutorial we have taken 0.96″ inch i2c oled display as an example.
It can be termed as 128×64 oled display, there are three different sub category of OLED display available in the market.
1. 0.96″ OLED Display Module in Blue and Yellow Color
2. 0.96″ OLED Display Module in Blue Color
3. 0.96″ OLED Display Module in White Color
These are controlled by SSD1306 – 128 x 64 Dot Matrix OLED/PLED Segment/Common Driver with Controller.
Lets start with a simple Arduino OLED Interfacing to say Hello world.
Arduino OLED Connection
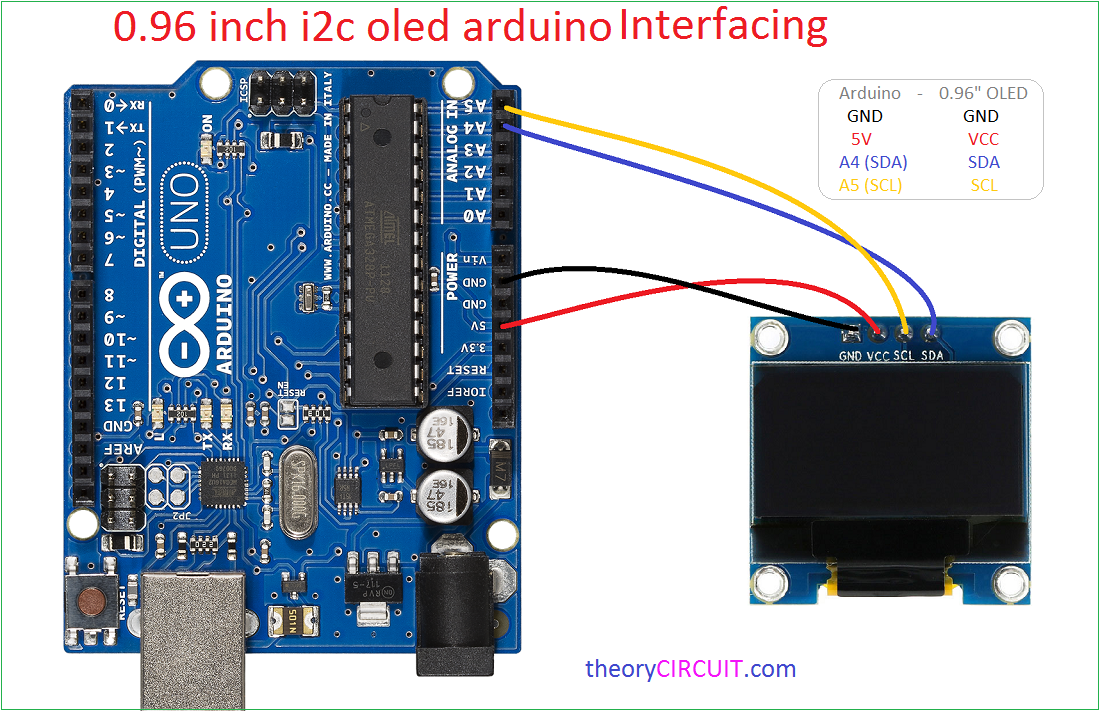
Connect Arduino and OLED I2C display as show in image, Gnd to Gnd pin of Arduino, Vcc to 5V pin, SDA to A4 pin and SCL to A5 pin of Arduino (refer the I2C pin of your Arduino board). Then connect Arduino UNO board to computer USB to upload Sketch.
Before this process get the OLED display library and instal it in your Arduino IDE library.
https://github.com/adafruit/Adafruit_SSD1306
https://github.com/adafruit/Adafruit-GFX-Library
To proceed with example codes and using the library, we need to get the I2C address of our hardware that is our I2C OLED display address to get the address use I2C scanner sketch.
http://playground.arduino.cc/Main/I2cScanner
In most case the I2C OLED display address may be 3x0C, check it once before you program.
Note:-
- Example Arduino Codes for OLED display available in Adafruit Library.
- Some OLED may have more than four pins that may not I2C check it once before you proceed.