Last Updated on March 16, 2024
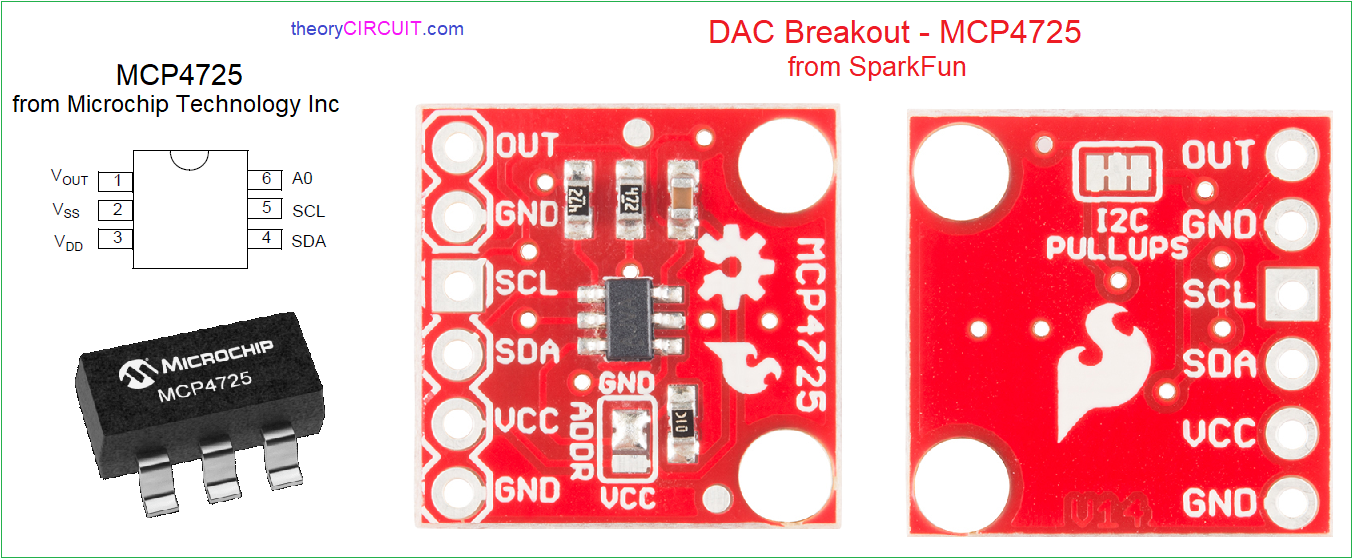
To give more power to Arduino board DAC (Digital to Analog Converter) interfaced through breakout board and detailed Arduino DAC Tutorial given in this article for the best understanding. Here DAC IC MCP4725 based breakout board is used because it is 12-Bit Digital-to-Analog Converter with EEPROM Memory, this IC utilize low power and gives high accuracy output.
This IC comes in sot package hence better to go with breakout board in this tutorial we used Sparkfun I2C Breakout MCP4725 board. By using this board we can obtain Analog voltage from Arduino board depends on the digital input and it accepts input in I2C format.
MCP4725 DAC IC
Features and Applications of MCP4725
This IC provides 12 bit resolution and on board Board Non-Volatile Memory (EEPROM). It can be addressed by external A0 address pin, and operates in Normal or Power-Down Mode. It takes wide range of input supply voltage as 2.7V to 5.5V from single supply source. This IC provides eight address through I2C and have Extended Temperature Range: -40°C to +125°C.
Applications
- Sensor Calibration
- PC Peripherals
- Data Acquisition Systems
- Low Power Portable Instrumentation
MCP4725 i2c DAC Arduino Interface
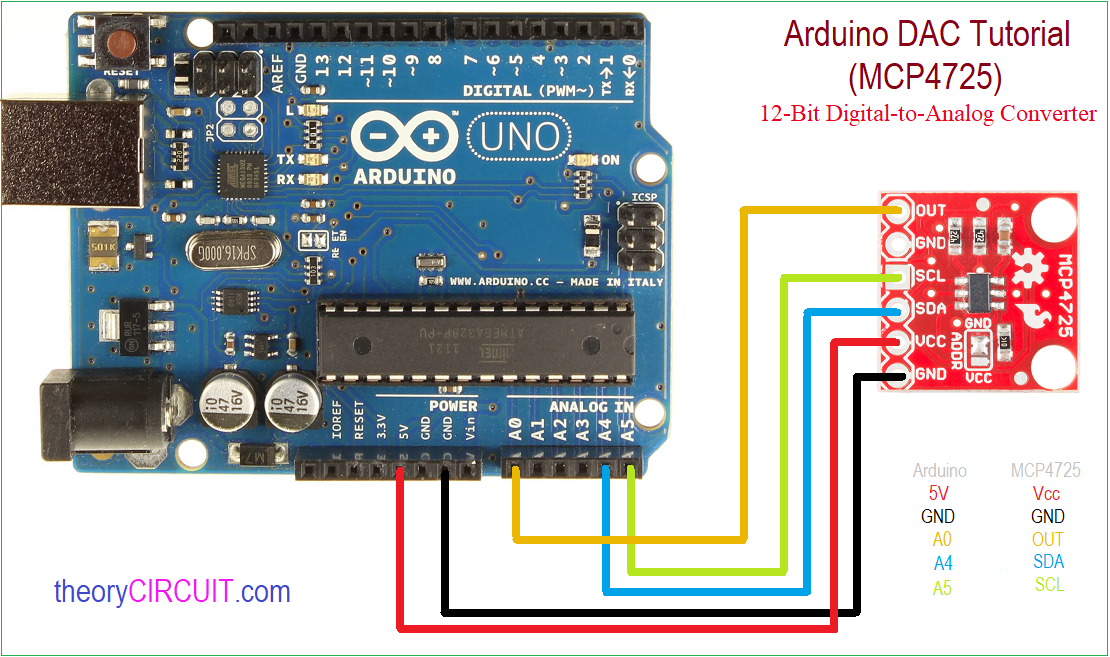
Construction & Working
Connect 5V pin and GND pin of Arduino board to Breakout board VCC and GND pin then connect A4 (SDA), A5 (SCL) pins with corresponding I2C pin of MCP 4725 brakout board. If you using other Arduino board then refer and use the corresponding I2C pins. Output pin of MCP4725 is connected with Analog pin A0 by the way we can measure and display the Analog voltage obtained from MCP4725 in serial monitor, you can also measure by using digital voltmeter or multimeter.
Arduino MCP4725 Code
/*
 * Arduino Digital to Analog Coverter MCP4725 Interface code
 * Library from Adafruit-MCP4725
 * see text at www.theorycircuit.com
 */
#include <Wire.h>           //wire library
#include <Adafruit_MCP4725.h> // MCP4725 library from adafruit
#define analogVin A0          // Analog voltage input to A0

Adafruit_MCP4725 MCP4725;

void setup(void) {
  Serial.begin(9600);
  MCP4725.begin(0x60); // Default I2C Address of MCP4725 breakout board (sparkfun)

}

void loop(void) {

    uint32_t MCP4725_value;
    int adcValueRead = 0;
    float voltageRead = 0;

    float MCP4725_expected_output;


    for (MCP4725_value = 0; MCP4725_value < 4096; MCP4725_value = MCP4725_value + 15)
    {
      MCP4725_expected_output = (5.0/4096.0) * MCP4725_value;
      MCP4725.setVoltage(MCP4725_value, false);
      delay(250);
      adcValueRead = analogRead(analogVin);
      voltageRead = (adcValueRead * 5.0 )/ 1024.0;

      Serial.print("MCP4725 Value: ");
      Serial.print(MCP4725_value);

      Serial.print("\tExpected Voltage: ");
      Serial.print(MCP4725_expected_output,3);

      Serial.print("\tArduino ADC Value: ");
      Serial.print(adcValueRead);

      Serial.print("\tArduino Voltage: ");
      Serial.println(voltageRead,3);
    }
}
Note:-
MCP4725 Arduino Library from Adafruit.
MCP4725 Breakout board from Sparkfun.
I want to connect the output of mcp 4725 to the heater of a gas sensor.(FIS GAS SENSORE SP3-AQ2)
Heater resistance = 57 OHM and Heater power consumption is 315 mw
Can I connect the circuit output directly to the heater?If not, please advise what to do
yes you can but before that check the output specification of MCP 4725 from its datasheet.
the max output of the MCP4725 is 25ma. Assuming 5V. 5V * .025A = 0.125W. So no.