Last Updated on March 16, 2024
To know discrete Resistors Value, we use Color code technique or use Multimeter else we can use Arduino to calculate the Unknown Resistor value by using known Resistor, Voltage and Current flow.

This simple schematic diagram has two Resistors called R1 (known value) and Rx (unknown value) by applying constant Vcc and then calculating Vx (Voltage across Rx) & I (Current) value will give the exact Resistance value of Rx. Here Rx = Vx/I, by applying this circuit in Arduino, the voltage across R1 is VR1 = 5 – Vx, and then the current I = 5-Vx/R1, here R1, Rx are connected in series so the current flow through each resistors are same.
Arduino measures Voltage across Unknown Resistor using Internal ADC and performs calculations as per the code and gives unknown Resistor value.
Arduino Ohm meter schematics
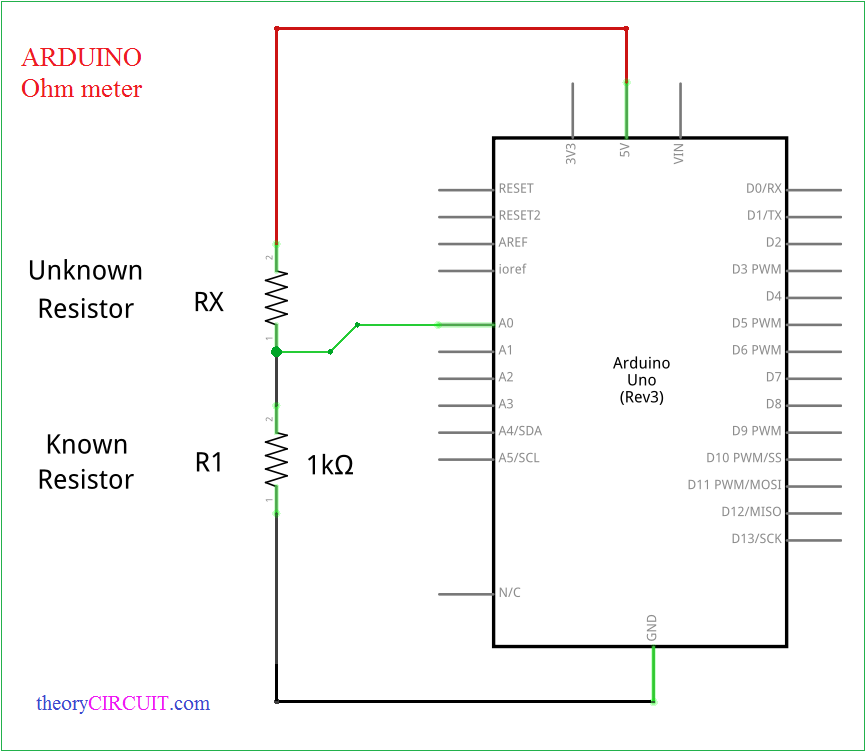
Connect +5V supply from Arduino board to unknown Resistor then connect another terminal to known Resistor (1KΩ) then ground the known Resistors another terminal. Connect the two Resistors junction point to A0 (Analog input pin 0)
Arduino Code for ohm meter
int Ao= 0;
int raw= 0;
int Vin= 5;
float Vout= 0;
float R1= 1000;
float R2= 0;
float buffer= 0;

void setup()
{
Serial.begin(9600);
}

void loop()
{
raw= analogRead(Ao);
if(raw)
{
buffer= raw * Vin;
Vout= (buffer)/1024.0;
buffer= (Vin/Vout) -1;
R2= R1 * buffer;
Serial.print("Vout: ");
Serial.println(Vout);
Serial.print("R2: ");
Serial.println(R2);
delay(1000);
}
}
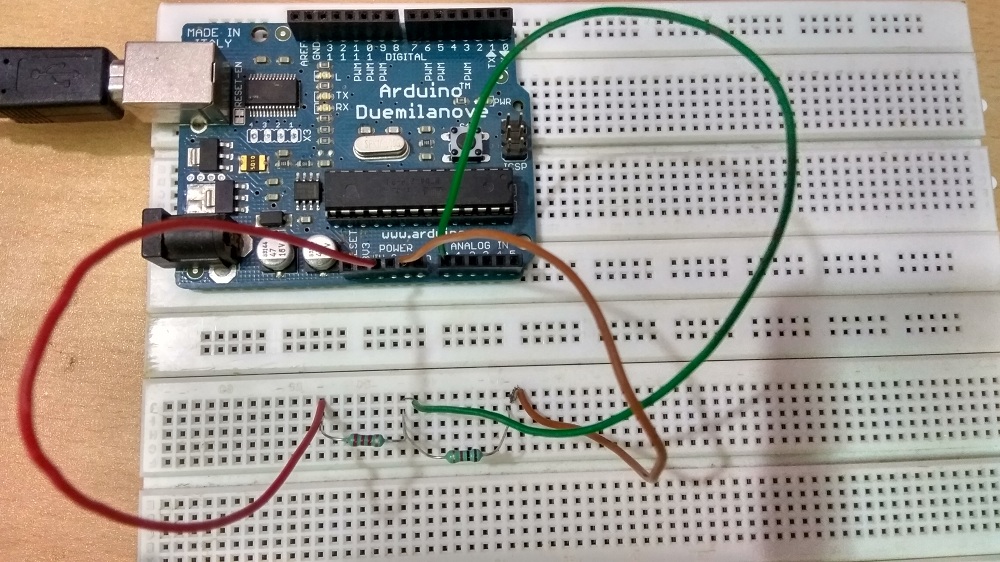
Connect the Resistors and Arduino as shown in the schematics and upload the above arduino code, then see the result in serial monitor.
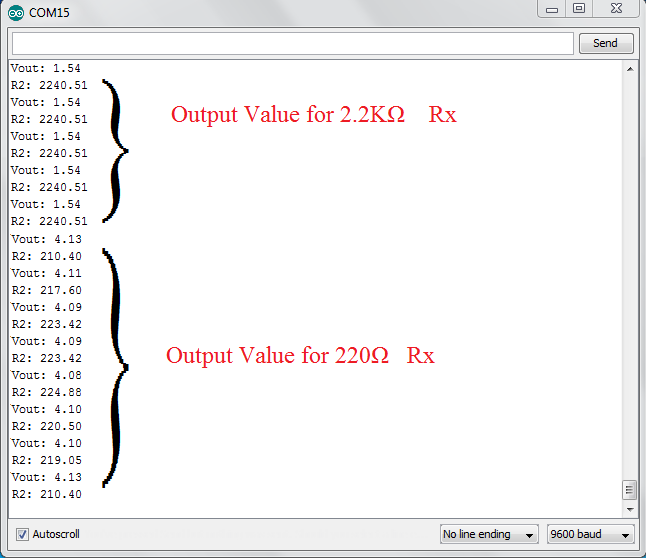
Screenshot