
Last Updated on March 31, 2024
Fast pace growth of Internet of Things (IoT) devices leads to wide market opertunities for semiconductor and software companies. The Design challenges they facing are putting Wi-Fi, Bluetooth, I2C like peripherals inside small form factor Component. In recent days countable number of semiconductor companies comes up with dedicated Microcontrollers and devices for IoT Design. Here is the notable one, ESP32 MCU from ESPRESSIF is feature rich Microcontroller device with integrated Wi-Fi and Bluetooth Connectivity For Engineers, Designers and Up coming Learners in the field of IoT.
This 3$ esp32 espressif Module takes important place in embedded electronics and IoT applications. It contains a single / dual-core 32 bit Tensilica LX6 processor, built in Wi-Fi and Bluetooth connectivity SoC and for Communication with external peripherals GPIO, SPI, I2C, and UART interfaces. All these extraordinary features makes this chip and module as a preferable choice for wide range of projects like from simple sensor nodes to advanced smart home devices and industrial automation systems. With tons of tutorials and guide available in the Internet this chip attracts hobbyists, students and Electronics makers.
ESP32 Module Pinout
Most of the Module comes with printed Pin details, Development boards made with ESP32 chip will have different pinout depends on their versions. Refer datasheet of your Development boards before jump into projects. Here we use ESP32 DEV Kit V1 and the following picture shows PCB Silkscreen of Pins.
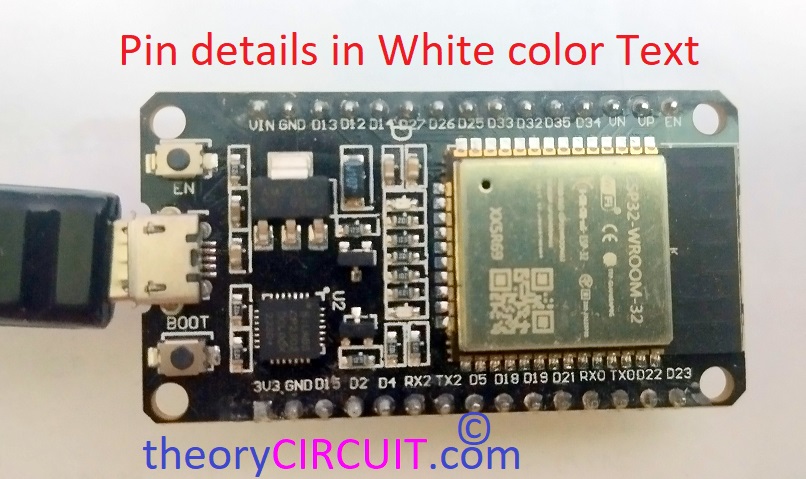
ESP32 Multifunction Pin Details

As you have noticed, All pins are Multifunction pins other than bias and Enable pins.
Programming ESP32 Module
You may ask, how to program ESP32 module? Quick answer for that question is, it is super easy. Infact ESP32 can be programmed in many ways, how many ways to program esp32? The answer is,
- Arduino IDE C++ using the Arduino core for the ESP32
- Micropython
- JavaScript
- Espressif IDF (IoT Development Framework)
- LUA Programming Language …. and more
In this Article we are going to program ESP32 module by using Arduino IDE and follow these steps before entering into coding or programming.
Required Components
- ESP32 Dev Module
- Micro USB B Cable (Data cable)
- Computer with Arduino IDE
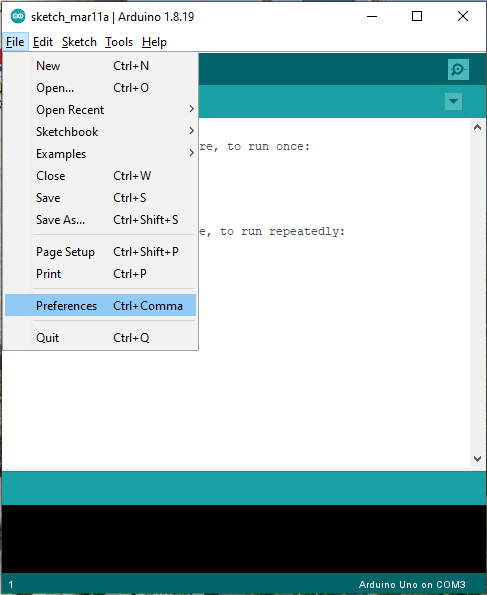
Step 1 – Go to Preferences in Arduino IDE file section.
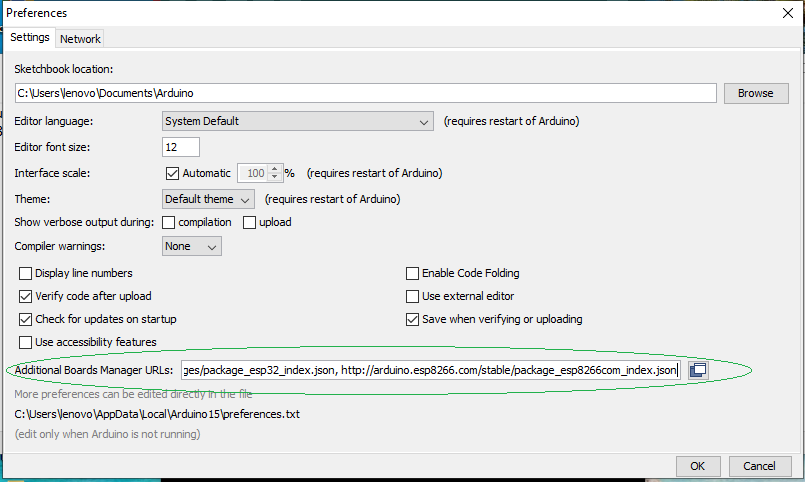
Step 2 – Paste the following link in the “Additional Boards Manager URLs field” and click OK.
https://raw.githubusercontent.com/espressif/arduino-esp32/gh-pages/package_esp32_index.json, http://arduino.esp8266.com/stable/package_esp8266com_index.json
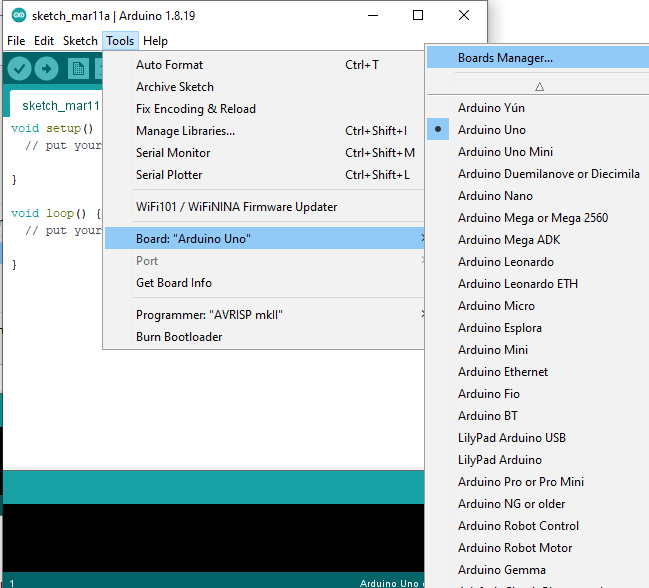
Step 3 – Go to Tool->Board->Board Manager then click Boards Manager…
Step 4 – Type esp32 in the field, then esp32 option will appear and choose the latest version. If esp32 option not appears check the URLs are right as like as in the step 2.
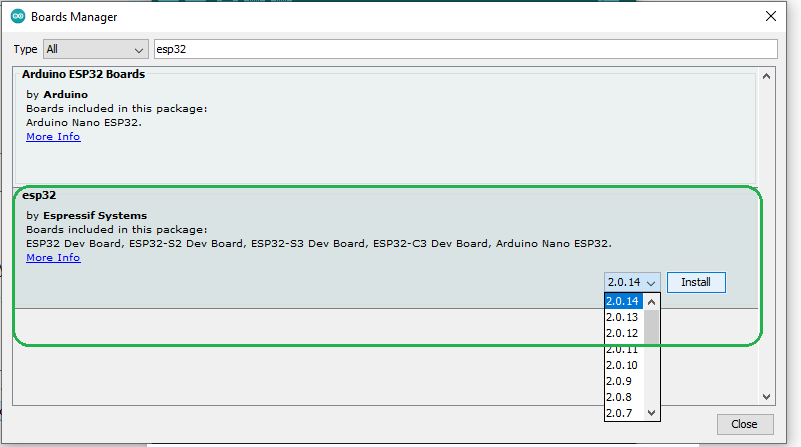
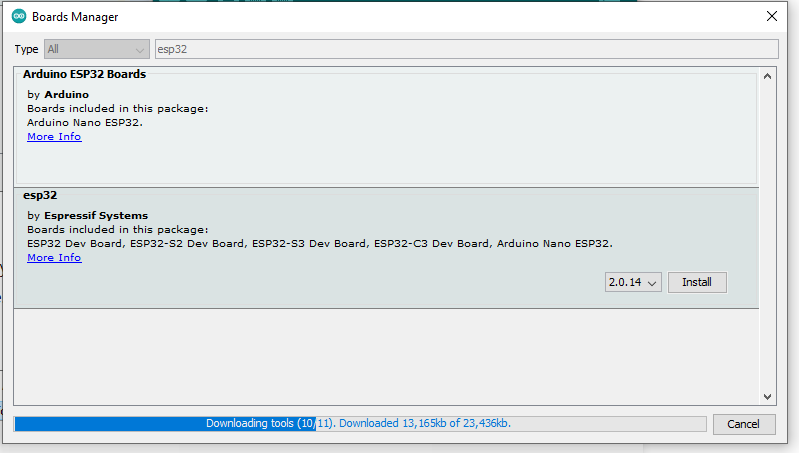
Step 5 – Click Install and wait some times…,
Step 6 – Choose ESP32 Dev Module as Board through, Tools -> Board -> ESP32 Arduino -> ESP32 Dev Module in Arduino IDE.

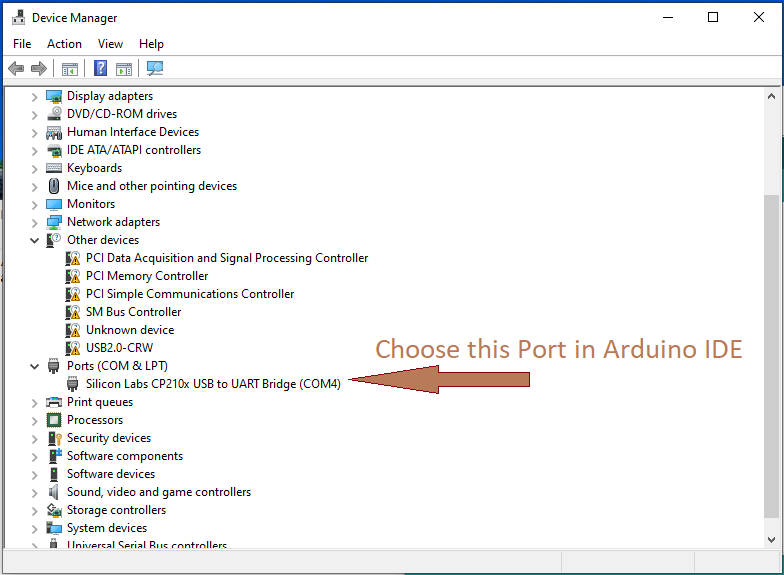
Step 7 – Choose the Port in Arduino IDE (Tools -> Port) as you detect in Device manager of computer. This will appear when you connect your ESP32 module with computer through USB port. For us it shows ‘COM4’ it differs depends on computer and choose yours.
Now our Hardware and Software setup is over. Here the basic LED blink code to test ESP32 Dev Module.
ESP32 Arduino LED Blink Code
/* Code from theoryCIRCUIT.com */

int LED = 2; //On board LED pin of ESP32 Dev Module

 void setup()
 {
  pinMode (LED, OUTPUT);
  }
 void loop()
 {
  digitalWrite(LED, HIGH);
  delay(50);
  digitalWrite(LED, LOW);
  delay(500);
 }
Upload the Sketch and you can see the process as shown below,

Some board shows error, in that case press and hold BOOT while Uploading Sketch release after Done. If it again shows error check the Chosen board in the Arduino IDE and select the board name depends on your hardware.
Working!

On board LED (Blue Color) connected in Pin 2 of ESP32 blinks based on the Uploaded Code.