
Last Updated on March 31, 2024
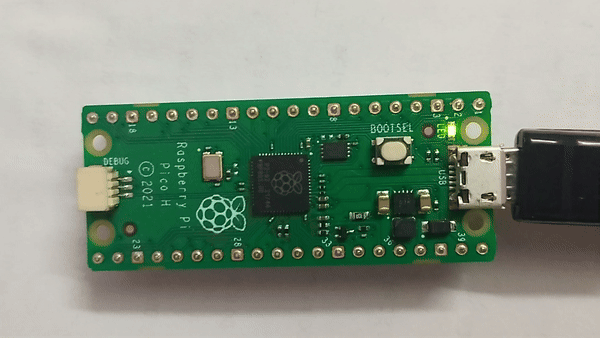
If you are new to Pico then this Guide to Start Programming with Raspberry Pi Pico article will help you getting started. Raspberry Pi Pico Board was introduced by Raspberry Pi foundation in January 2021 with a retail price of $4. This Board contains single microcontroller chip called RP2040 and it was fully designed by Raspberry Pi UK. RP2040 requires minimal external circuit to operate. Some of the key features are,
- RP2040 microcontroller chip have 2MB Flash Memory
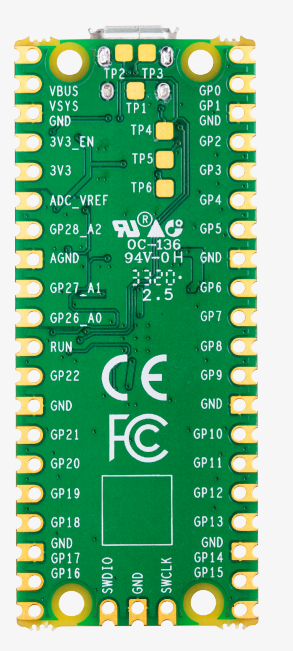
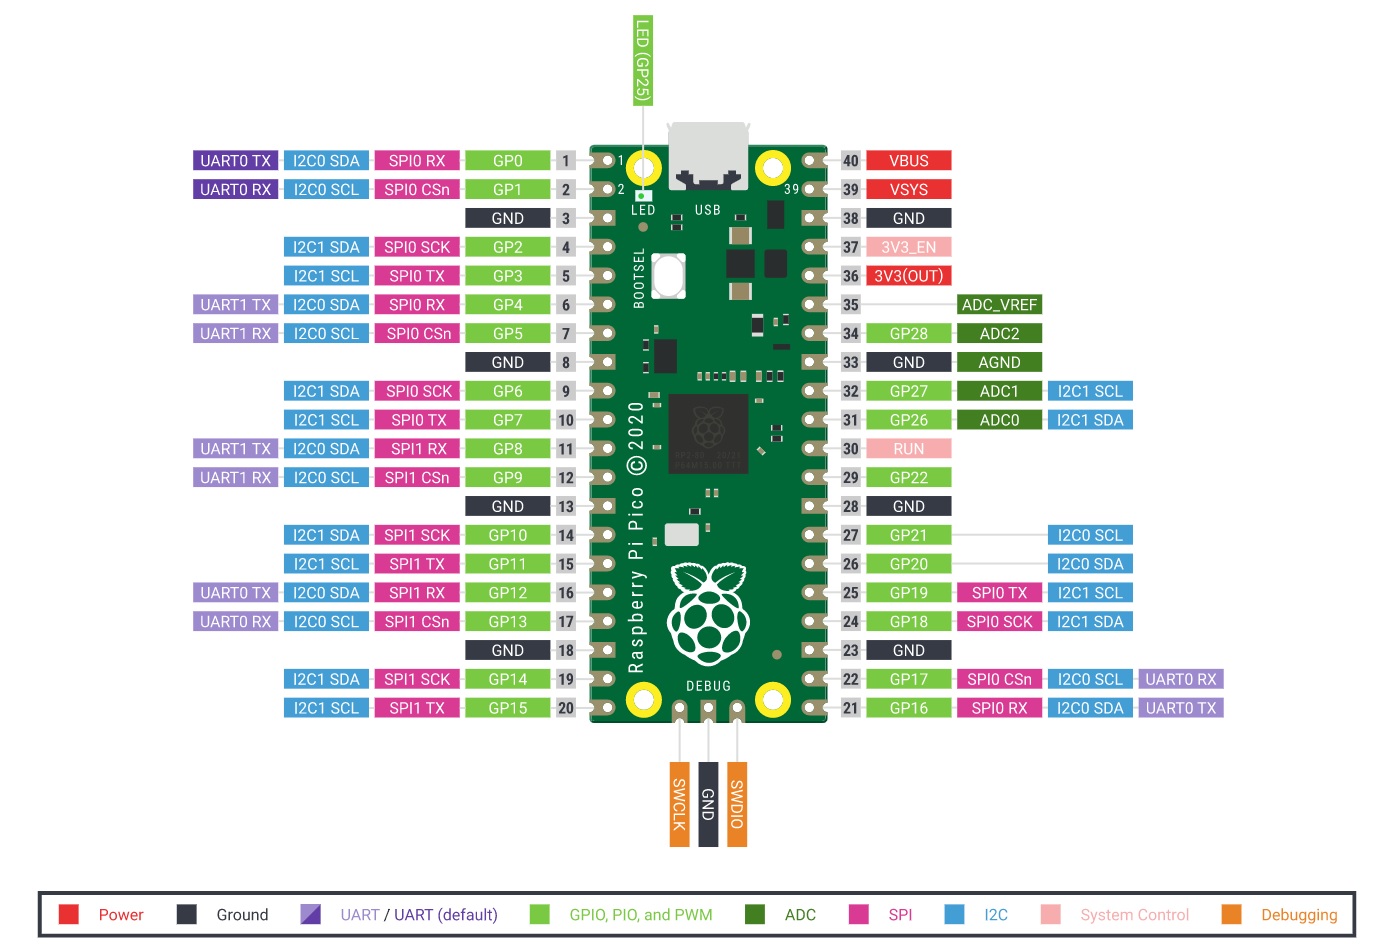
- Total 40 Pins (All are multifunction Pins other than Bias Pins)
- 26 multi-function 3.3V General Purpose I/O (GPIO)
- 23 GPIO are digital-only and 3 are ADC capable
- Dual-core cortex M0+ at up to 133MHz
- 264kB multi-bank high performance SRAM
- 12-bit 500ksps Analogue to Digital Converter
- 2 × UART, 2 × I2C, 2 × SPI, 16 × PWM channels
- 1 × Timer with 4 alarms, 1 × Real Time Counter
- 3-pin ARM Serial Wire Debug (SWD) port
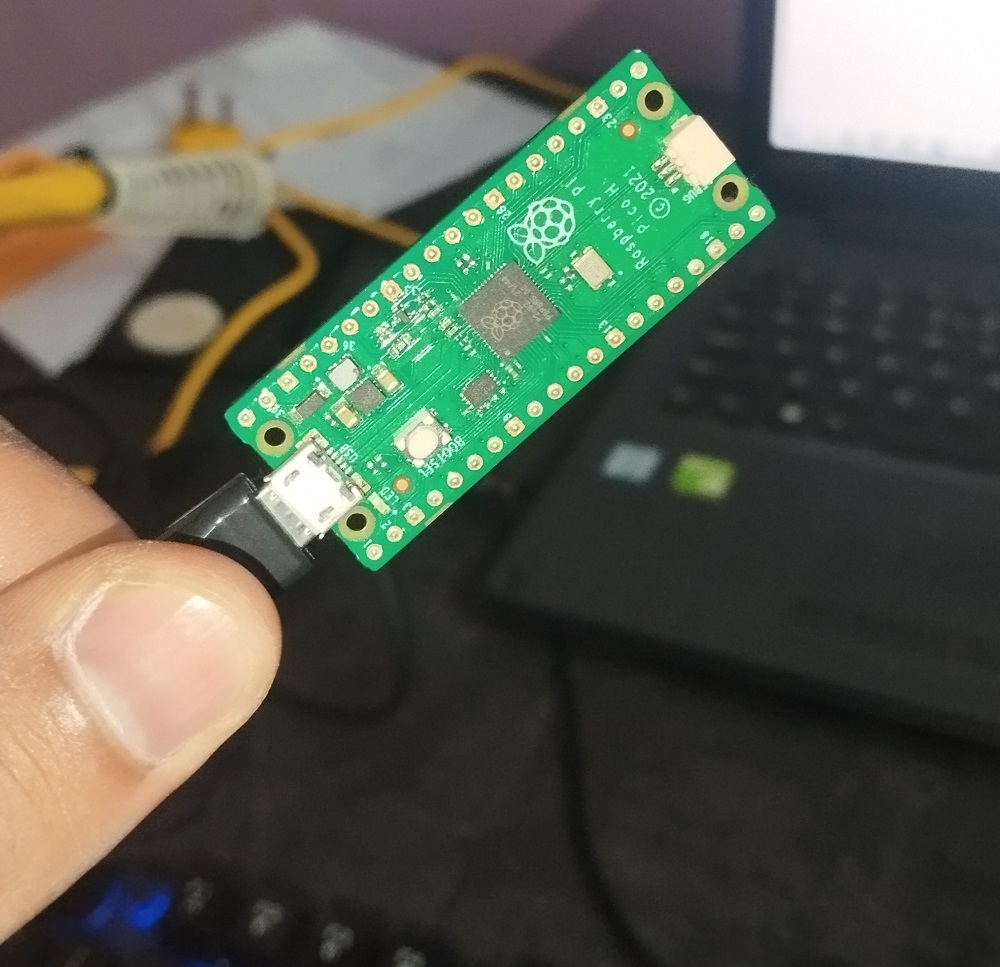
- It uses Micro USB B port for power and Data
- It Can emulate interfaces such as SD Card and VGA
Raspberry Pi Pico Pin Configuration
micropython
As we know Python programming language used in many applications and domains. For to program Microcontrollers and Chip a programming language compatible with python is being used that is called as MicroPython. The MicroPython consists of a Python compiler to bytecode and a runtime interpreter of that bytecode. To know more…https://micropython.org/
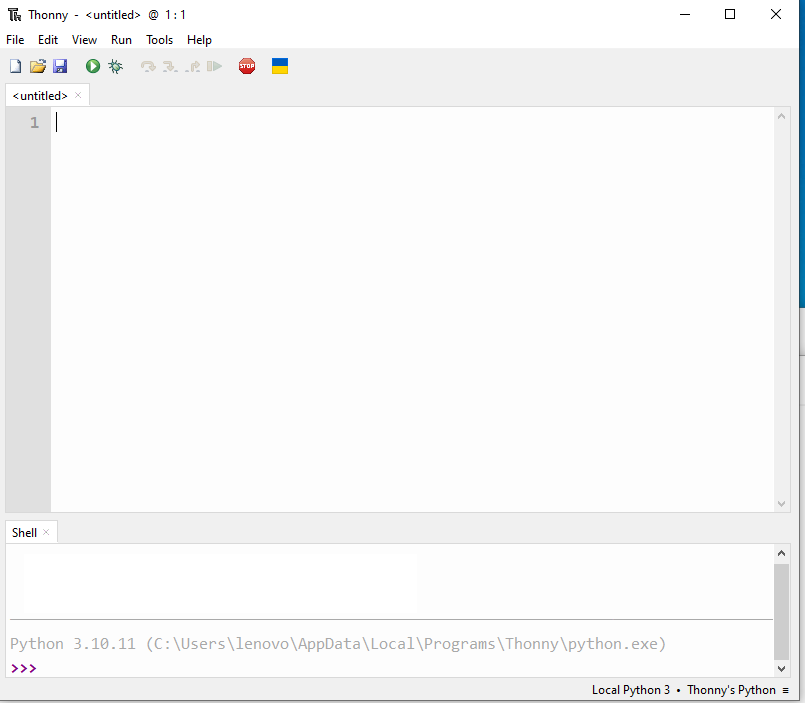
Thonny
In simple words Thonny is Python IDE for beginners, like we use Arduino IDE to program Arduino boards. Thonny comes with Python 3.10 built in, so just one simple installer is needed and you’re ready to learn programming… https://thonny.org/
Steps to Start with Raspberry Pi Pico
Follow these steps to start with Raspberry pi Pico board from Installation to make on board LED blink experiment.
Tools Required
- Raspberry Pi Pico board
- Micro USB B Cable (USB A Type to Micro USB B Type – Data Cable)
- Computer
Step 1
In you Computer Install Thonny IDE and then Open it.
Step 2
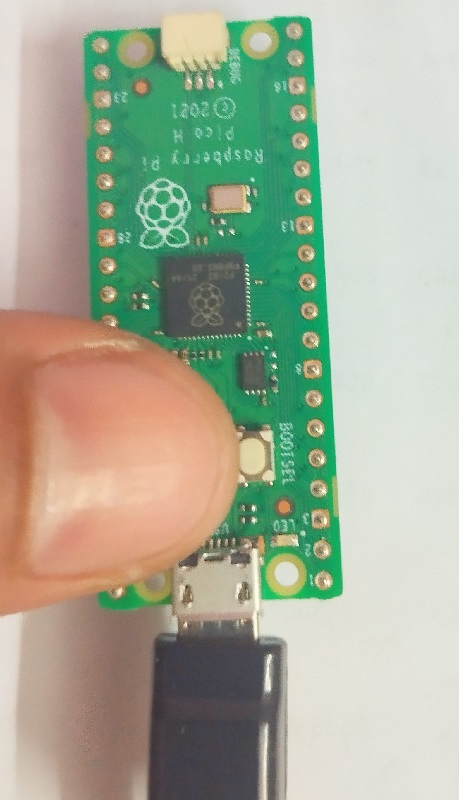
Plug in your Raspberry pi Pico board to the computer USB port while press and hold BOOTSEL button on the pico board.
Step 3
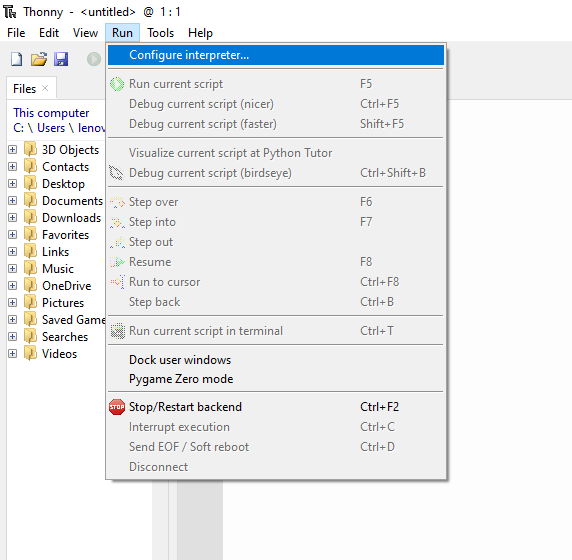
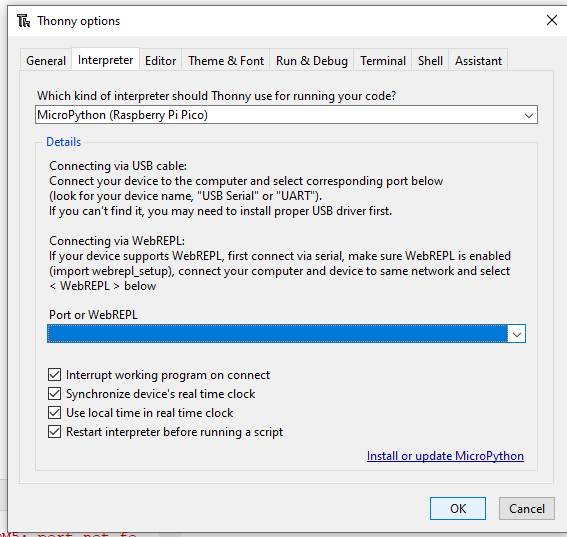
After step two, your Pico board enters into Bootloading mode. Now Go to Thonny IDE and Select Configure Interpreter.
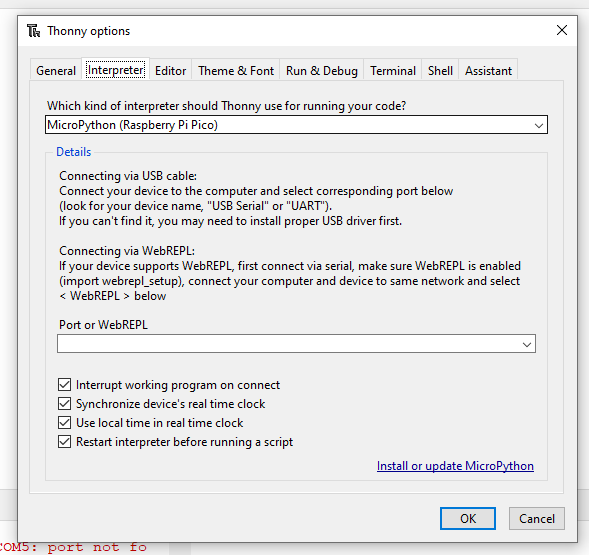
Click Install or Update MicroPython link in blue color (This to update the Micropython pack)
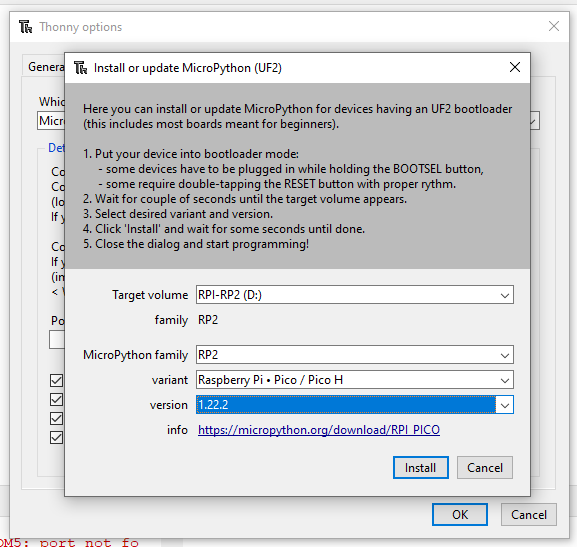
Continue, select the configurations as shown below. Then click install.
After completion it shows Done Message.
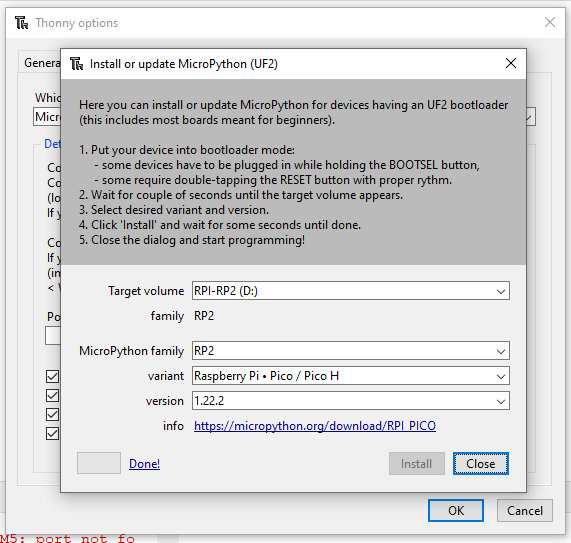
Then Select “MicroPython (Raspberry Pi Pico)” option in dropdown list. Then click OK.
Step 4
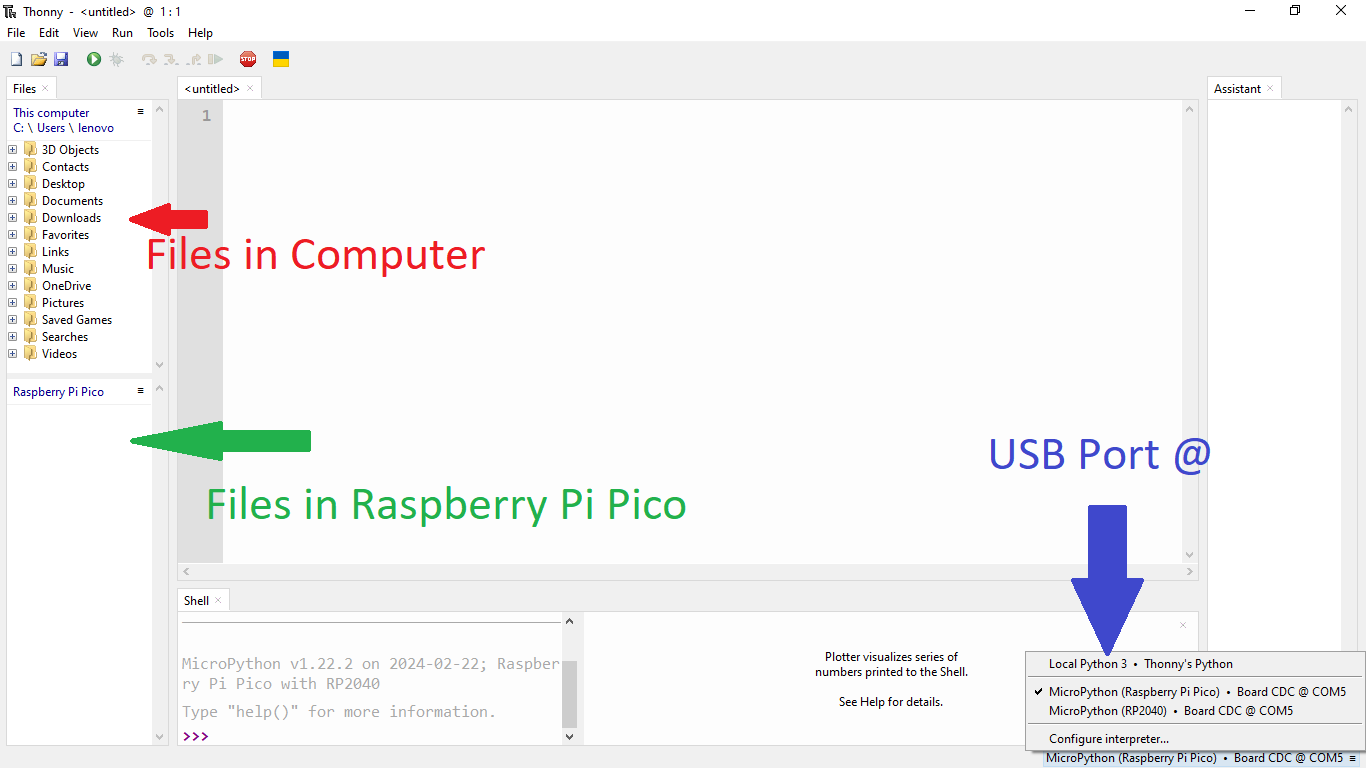
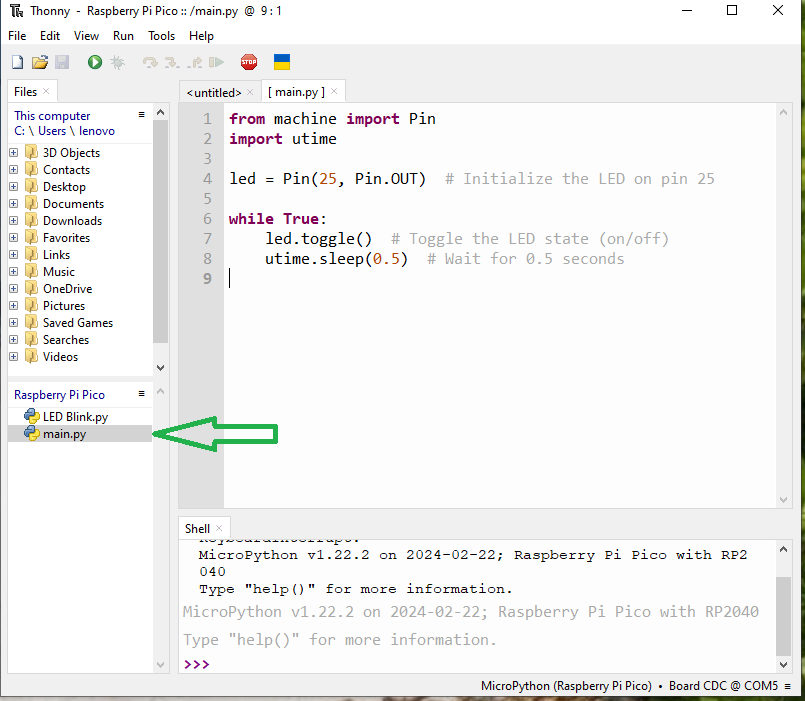
After finishing step 3, Thonny IDE would look like this screenshot. Click View and then Files to show system and Pico files on screen. In bottom right side corner Pico board and its connected port number will appear.
Step 5
Now enter the code to make on board LED of Pico board to blink.
Then click Run, Now the On board LED connected in pin 25 will ON and OFF (starts to blink).
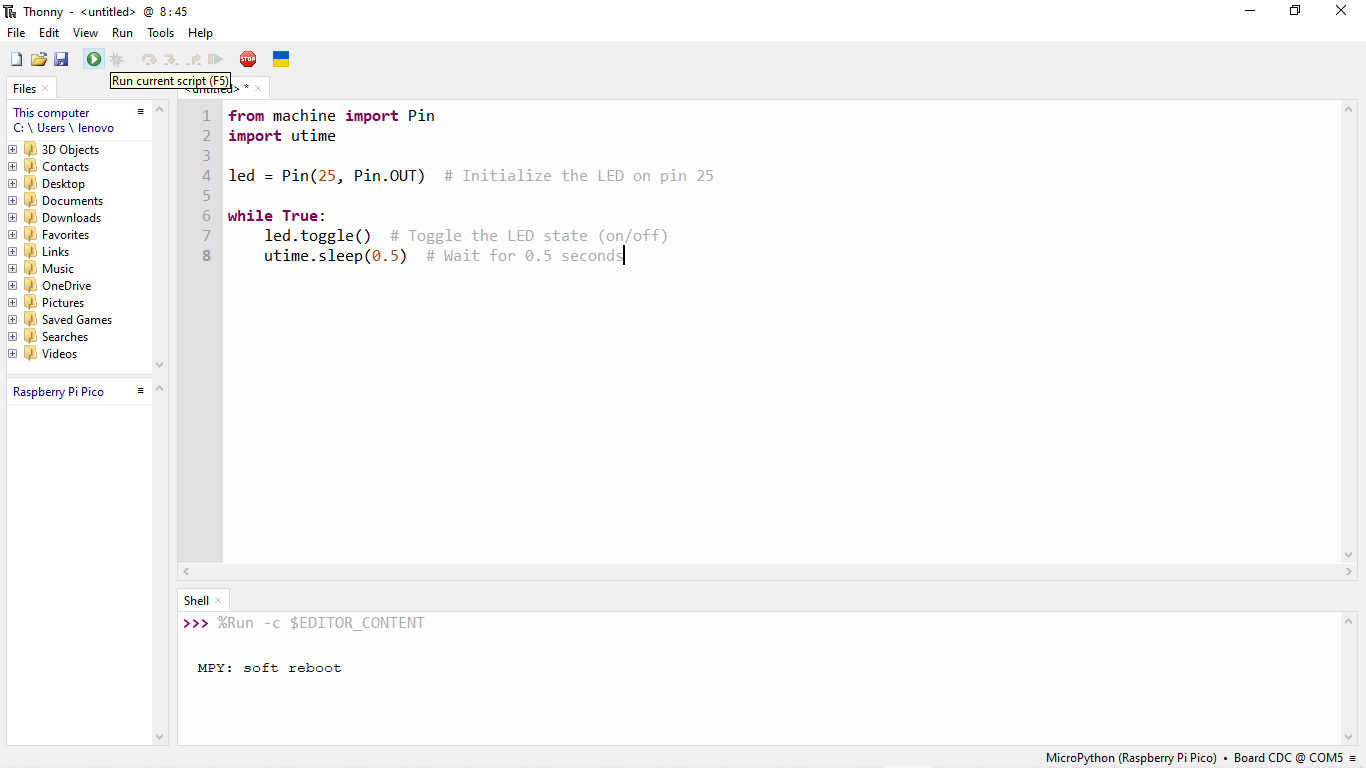
Working!
Step 6
If you want to load the program into Pico memory, click save and choose Raspberry pi Pico.
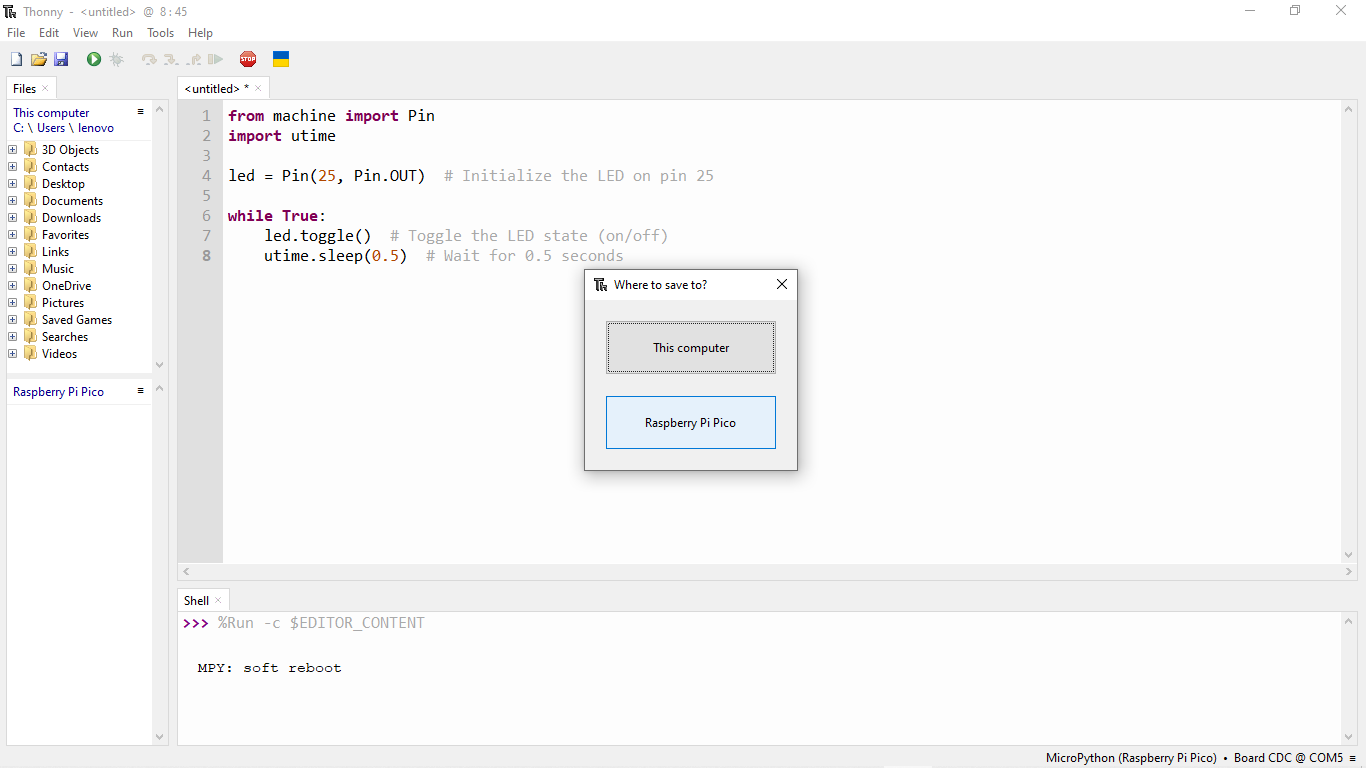
If you want to run that script when you give power supply (Auto run code when power on Raspberry pi Pico) Name that file name as “main.py”.
Setup for the Raspberry Pi Pico W (wireless) also same as above steps, you have to choose the right board name.