Last Updated on December 26, 2024
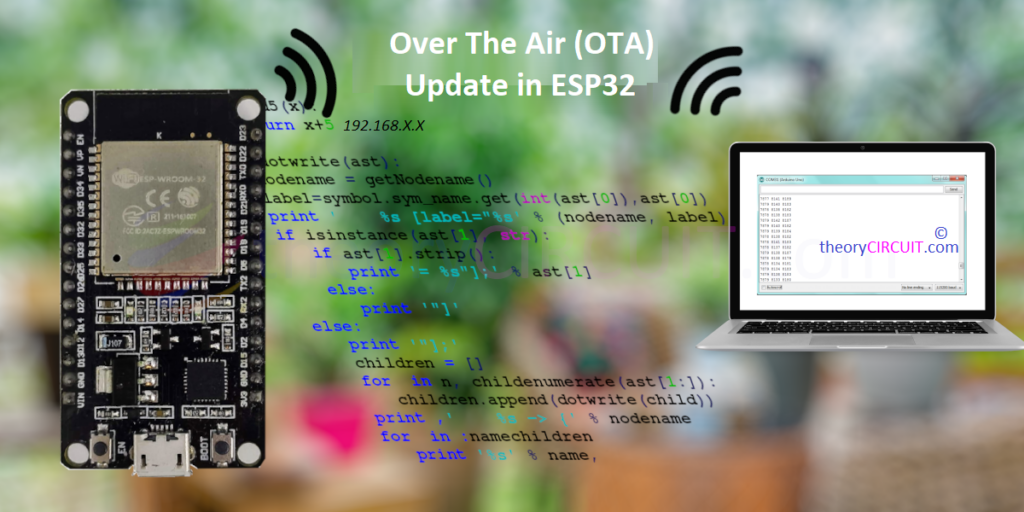
Devices connected with Internet or able to connect with Internet have the advantage of update itself. This technique is called Over The Air (OTA) update. This will help to keep the devices up to date with minimal user intervention. Additionally OTA poses lot of features like Security enhancements, Performance Improvements, feature upgrades, and Regulatory upgrades. This is the cost effective method for manufacturers to make their on field or on service devices to update in on go.
Updating firmware on embedded devices is a critical task once upon a time. Now, most embedded devices and IoT devices are able to connect with internet, So the firmware can be updated remotely. Here we are going to make experiment with ESP32 to make OTA (Over The Air) update and also understand, how the OTA works?
OTA Updates
OTA Updates enable developers or manufacturers to remotely upgrade or update the firmware of their devices over a network connection such as Wi-Fi, Internet.
ESP32 and OTA Support
ESP32 microcontroller with dual core processor and Wi-Fi, is well suitable for OTA updates. Arduino framework for ESP32 makes it simple to implement OTA functionality through library and tools.
OTA can be implemented on the ESP32 in two different way.
- Simple Basic OTA – Using the Arduino IDE to update.
- Web OTA – Using the on board Web Interface (HTML page) of ESP32 to update.
- Advanced OTA – Hosting the Firmware (updates) on a server like AWS IoT, Azure IoT, Clouds.., (Stay tuned for this tutorial)
Here we are going to explore Simple Basic OTA and Web OTA – these two will work in the same Wi-Fi network connected devices.
When the OTA is Implemented then the ESP32 listens for a firmware (Code) update, once it detects then downloads over a specified protocol like HTTP, HTTPs or MQTT. After that code will be verified and flashed to dedicated partition in the ESP32 microcontroller memory. After completion ESP32 reboots and runs the updated firmware. To know more about OTA Data Partition read official documents.
Implementing OTA in ESP32
Let’s implement simple Basic OTA in the ESP32 through Arduino IDE.
Step 1: ArduinoOTA Library
- Install the ArduinoOTA library. It is typically include in the ESP32 core.
Step 2: Upload OTA Code
- Write and upload below example OTA code to ESP32 board through USB port.
#include <WiFi.h>
#include <ESPmDNS.h>
#include <WiFiUdp.h>
#include <ArduinoOTA.h>

const char* ssid = "Your Wi-Fi Name";
const char* password = "Your Wi-Fi Password";

void setup() {
  Serial.begin(115200);
  Serial.println("Booting");
  WiFi.mode(WIFI_STA);
  WiFi.begin(ssid, password);
  while (WiFi.waitForConnectResult() != WL_CONNECTED) {
    Serial.println("Connection Failed! Rebooting...");
    delay(5000);
    ESP.restart();
  }

  // Port defaults to 3232
  // ArduinoOTA.setPort(3232);

  // Hostname defaults to esp3232-[MAC]
  // ArduinoOTA.setHostname("myesp32");

  // No authentication by default
  // ArduinoOTA.setPassword("admin");

  // Password can be set with it's md5 value as well
  // MD5(admin) = 21232f297a57a5a743894a0e4a801fc3
  // ArduinoOTA.setPasswordHash("21232f297a57a5a743894a0e4a801fc3");

  ArduinoOTA
    .onStart([]() {
      String type;
      if (ArduinoOTA.getCommand() == U_FLASH)
        type = "sketch";
      else // U_SPIFFS
        type = "filesystem";

      // NOTE: if updating SPIFFS this would be the place to unmount SPIFFS using SPIFFS.end()
      Serial.println("Start updating " + type);
    })
    .onEnd([]() {
      Serial.println("\nEnd");
    })
    .onProgress([](unsigned int progress, unsigned int total) {
      Serial.printf("Progress: %u%%\r", (progress / (total / 100)));
    })
    .onError([](ota_error_t error) {
      Serial.printf("Error[%u]: ", error);
      if (error == OTA_AUTH_ERROR) Serial.println("Auth Failed");
      else if (error == OTA_BEGIN_ERROR) Serial.println("Begin Failed");
      else if (error == OTA_CONNECT_ERROR) Serial.println("Connect Failed");
      else if (error == OTA_RECEIVE_ERROR) Serial.println("Receive Failed");
      else if (error == OTA_END_ERROR) Serial.println("End Failed");
    });

  ArduinoOTA.begin();

  Serial.println("Ready");
  Serial.print("IP address: ");
  Serial.println(WiFi.localIP());
}

void loop() {
  ArduinoOTA.handle();
}
Step 3: Perform OTA Updates
- After successful uploading and identifying IP address of ESP32 board in Arduino Serial Port. (“If it don’t show, just press ‘EN’ button on the ESP32 board and observe“)
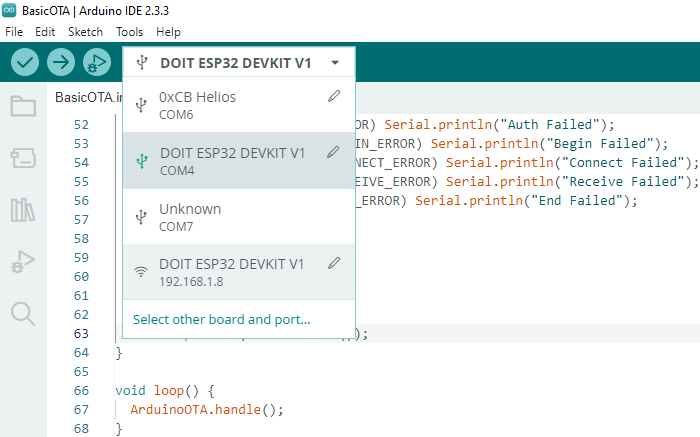
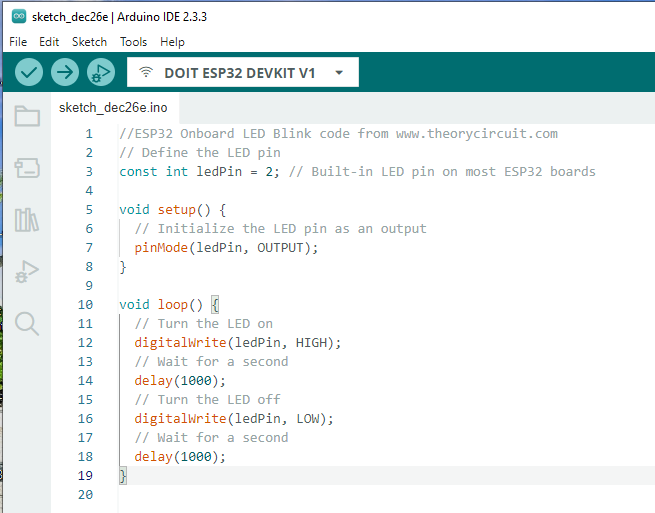
In the Arduino IDE Go to Tools > Port and choose the Network Port of ESP32. Then open “New Sketch” and write code (here we used Onboard ESP32 LED code) to upload it Over the Air (Network).
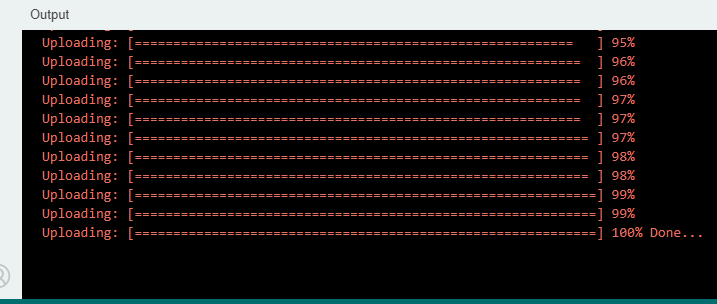
When you click upload in the Arduino IDE, it will ask Password just enter your wi-fi password and press upload.
You can use same Wi-Fi Network connected computer or mobile to upload the code over the air.
Implementing Web OTA in ESP32
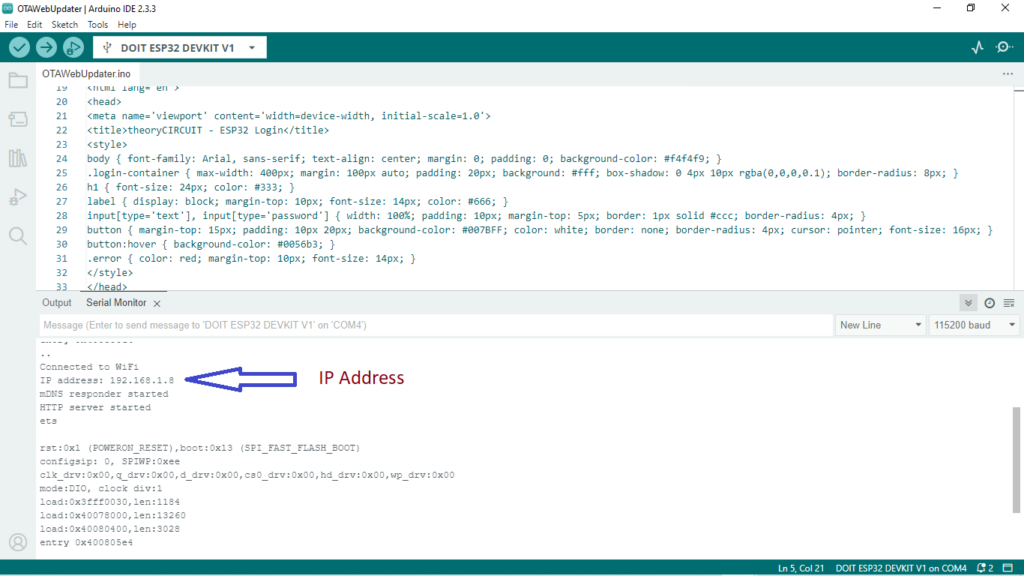
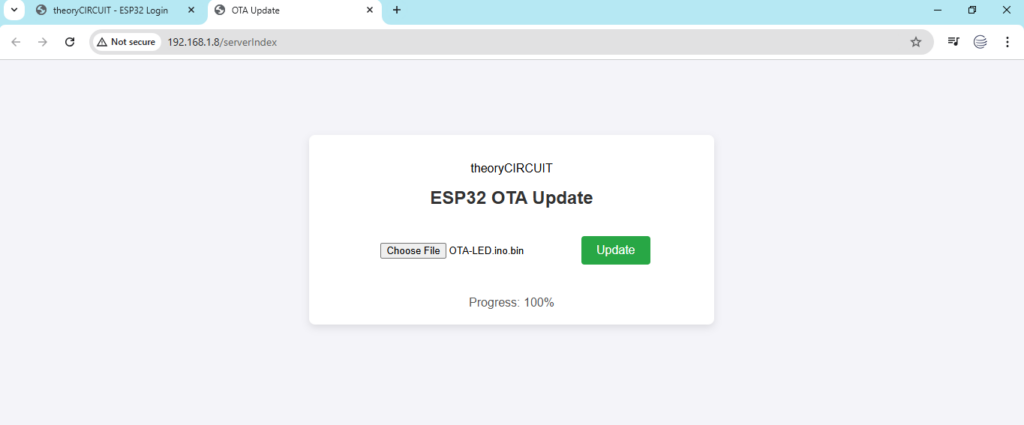
Web OTA helps you to upload the Arduino Code in Compiled Binary format (***.bin). Just upload the following Arduino code and observe the IP address then use the IP address to view the HTML user interface page. Use “admin” as user name and password.
/* Code from theoryCIRCUIT */
#include <WiFi.h>
#include <WiFiClient.h>
#include <WebServer.h>
#include <ESPmDNS.h>
#include <Update.h>

const char* host = "esp32";
const char* ssid = "Your Wi-Fi Name";
const char* password = "Your Wi-Fi Password";

WebServer server(80);

/*
 * Login Page
 */
const char* loginIndex = R"rawliteral(
<!DOCTYPE html>
<html lang='en'>
<head>
<meta name='viewport' content='width=device-width, initial-scale=1.0'>
<title>theoryCIRCUIT - ESP32 Login</title>
<style>
body { font-family: Arial, sans-serif; text-align: center; margin: 0; padding: 0; background-color: #f4f4f9; }
.login-container { max-width: 400px; margin: 100px auto; padding: 20px; background: #fff; box-shadow: 0 4px 10px rgba(0,0,0,0.1); border-radius: 8px; }
h1 { font-size: 24px; color: #333; }
label { display: block; margin-top: 10px; font-size: 14px; color: #666; }
input[type='text'], input[type='password'] { width: 100%; padding: 10px; margin-top: 5px; border: 1px solid #ccc; border-radius: 4px; }
button { margin-top: 15px; padding: 10px 20px; background-color: #007BFF; color: white; border: none; border-radius: 4px; cursor: pointer; font-size: 16px; }
button:hover { background-color: #0056b3; }
.error { color: red; margin-top: 10px; font-size: 14px; }
</style>
</head>
<body>
<div class='login-container'>
<h1>theoryCIRCUIT - ESP32 Login</h1>
<form name='loginForm'>
<label for='userid'>Username</label>
<input type='text' id='userid' name='userid' placeholder='Enter your username'>
<label for='pwd'>Password</label>
<input type='password' id='pwd' name='pwd' placeholder='Enter your password'>
<button type='button' onclick='check(this.form)'>Login</button>
<p class='error' id='error'></p>
</form>
</div>
<script>
function check(form) {
  const errorElement = document.getElementById('error');
  if (form.userid.value === 'admin' && form.pwd.value === 'admin') {
    window.open('/serverIndex');
  } else {
    errorElement.textContent = 'Error: Incorrect Username or Password';
  }
}
</script>
</body>
</html>
)rawliteral";

/*
 * Server Index Page
 */
const char* serverIndex = R"rawliteral(
<!DOCTYPE html>
<html lang='en'>
<head>
<meta name='viewport' content='width=device-width, initial-scale=1.0'>
<title>OTA Update</title>
<style>
body { font-family: Arial, sans-serif; text-align: center; margin: 0; padding: 0; background-color: #f4f4f9; }
.upload-container { max-width: 500px; margin: 100px auto; padding: 20px; background: #fff; box-shadow: 0 4px 10px rgba(0,0,0,0.1); border-radius: 8px; }
h1 { font-size: 24px; color: #333; }
input[type='file'] { margin: 20px 0; padding: 10px; }
button { padding: 10px 20px; background-color: #28a745; color: white; border: none; border-radius: 4px; cursor: pointer; font-size: 16px; }
button:hover { background-color: #218838; }
#prg { margin-top: 20px; font-size: 16px; color: #555; }
</style>
<script src='https://ajax.googleapis.com/ajax/libs/jquery/3.2.1/jquery.min.js'></script>
</head>
<body>
<div class='upload-container'>
<p> theoryCIRCUIT</P>
<h1>ESP32 OTA Update</h1>
<form method='POST' action='#' enctype='multipart/form-data' id='upload_form'>
<input type='file' name='update'>
<button type='submit'>Update</button>
</form>
<div id='prg'>Progress: 0%</div>
</div>
<script>
$('form').submit(function(e) {
  e.preventDefault();
  var form = $('#upload_form')[0];
  var data = new FormData(form);
  $.ajax({
    url: '/update',
    type: 'POST',
    data: data,
    contentType: false,
    processData: false,
    xhr: function() {
      var xhr = new window.XMLHttpRequest();
      xhr.upload.addEventListener('progress', function(evt) {
        if (evt.lengthComputable) {
          var percent = Math.round((evt.loaded / evt.total) * 100);
          $('#prg').text('Progress: ' + percent + '%');
        }
      }, false);
      return xhr;
    },
    success: function() {
      $('#prg').text('Update Successful!');
    },
    error: function() {
      $('#prg').text('Update Failed!');
    }
  });
});
</script>
</body>
</html>
)rawliteral";

/*
 * Setup Function
 */
void setup() {
  Serial.begin(115200);

  // Connect to Wi-Fi network
  WiFi.begin(ssid, password);
  while (WiFi.status() != WL_CONNECTED) {
    delay(500);
    Serial.print(".");
  }
  Serial.println("\nConnected to WiFi");
  Serial.print("IP address: ");
  Serial.println(WiFi.localIP());

  // Setup mDNS responder
  if (!MDNS.begin(host)) {
    Serial.println("Error setting up MDNS responder!");
    while (1) {
      delay(1000);
    }
  }
  Serial.println("mDNS responder started");

  // Define server routes
  server.on("/", HTTP_GET, []() { server.send(200, "text/html", loginIndex); });
  server.on("/serverIndex", HTTP_GET, []() { server.send(200, "text/html", serverIndex); });
  server.on("/update", HTTP_POST, []() {
    server.send(200, "text/plain", (Update.hasError()) ? "FAIL" : "OK");
    ESP.restart();
  }, []() {
    HTTPUpload& upload = server.upload();
    if (upload.status == UPLOAD_FILE_START) {
      if (!Update.begin(UPDATE_SIZE_UNKNOWN)) { Update.printError(Serial); }
    } else if (upload.status == UPLOAD_FILE_WRITE) {
      if (Update.write(upload.buf, upload.currentSize) != upload.currentSize) { Update.printError(Serial); }
    } else if (upload.status == UPLOAD_FILE_END) {
      if (Update.end(true)) { ESP.restart(); }
    }
  });

  server.begin();
  Serial.println("HTTP server started");
}

void loop() {
  server.handleClient();
}
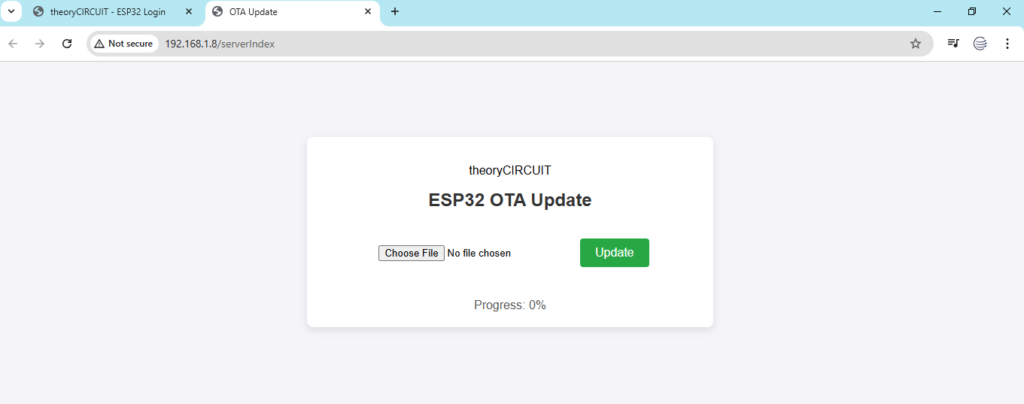
Use this ip address and browse it on any device browser (Same Wi-Fi network connected device).
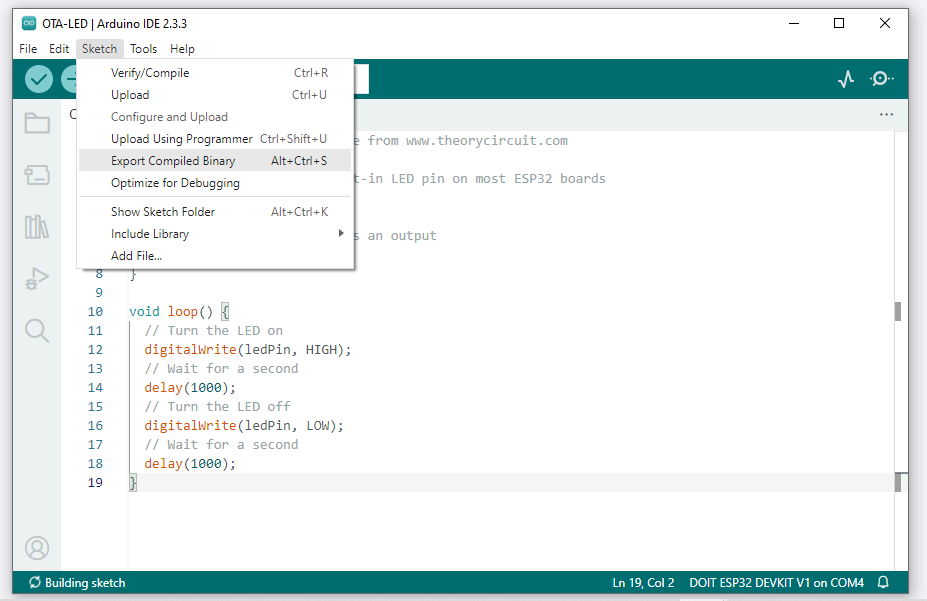
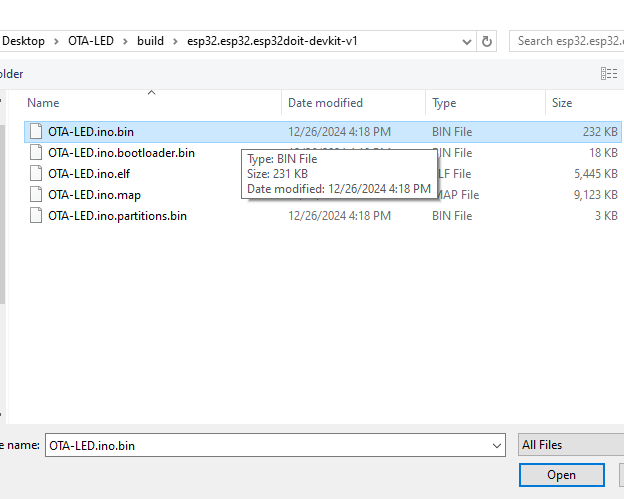
Here you can upload only “Compiled Binary” file, so you need to export your Arduino code as compiled binary file and then use it to upload.
Using Web OTA user interface page to upload .bin file.
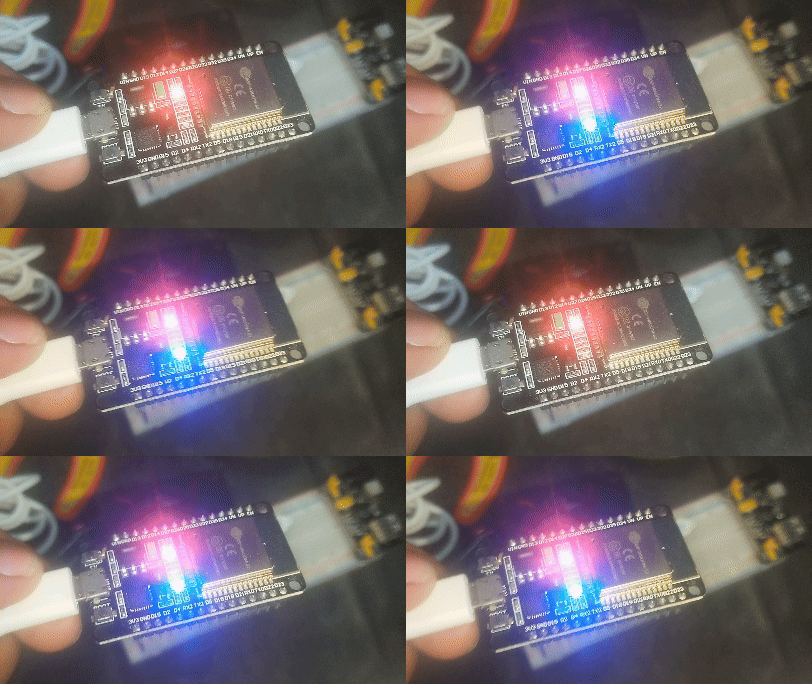
Result:

