
Last Updated on March 9, 2025
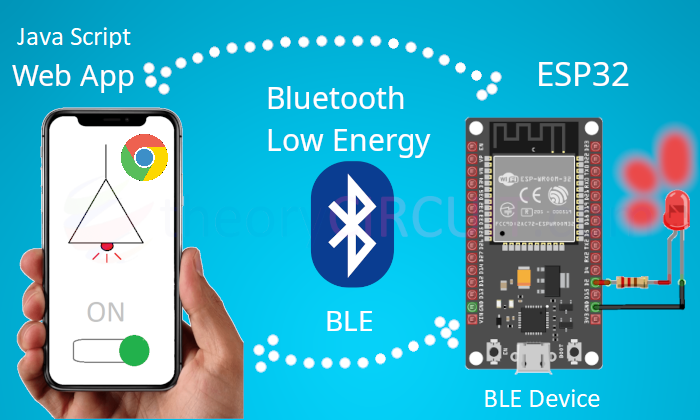
Previously we learned about Controlling an LED using Bluetooth through Serial Terminal App. Here we are going to experiment Web Bluetooth, that is to control ESP32 GPIO pins using Web Bluetooth. We know that ESP32 Microcontroller comes with built in Bluetooth Low Energy (BLE) support and it is suitable for wireless and IoT related projects. By pairing ESP32 with the Web Bluetooth API allows you to control and monitor GPIO pins & hardware directly from a Web page.
Here we going to build HTML web page that supports Web Bluetooth and devices like LED, LDR interface with ESP32 microcontroller GPIO pins. So that we can toggle (ON, OFF) LED and read light levels from the LDR through a browser (Chrome).
What is Web Bluetooth?
Let’s understand what is Web Bluetooth? It is a Web API (Application programming Interface), that allows websites to directly communicate with Bluetooth Low Energy (BLE) devices without needing native apps or extra software. Modern browsers are equipped with this API (Chrome).
Here the Web Page (Browser) acts as a Bluetooth Central device and scans for BLE Peripherals to connect.
Peripherals are BLE enabled devices like ESP32, IoT sensors, these devices should expose Service and Characteristics data points which is essential for the web page to read and write.
Services and Characteristics
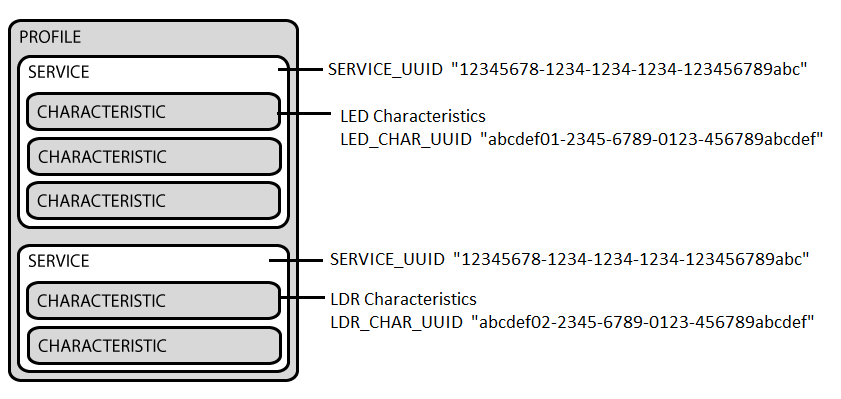
GATT (Generic Attribute Profile) transactions in BLE are based on high level and nested objects called Profiles, Services and Characteristics.
Connection Flow
When the user click connect to ESP32 button on the Web Page, the browser prompts the user to select BLE device (here, ESP32_GPIO_Control), Once connected then the Web Page can toggle (ON/OFF) LED and Read LDR light sensing value.
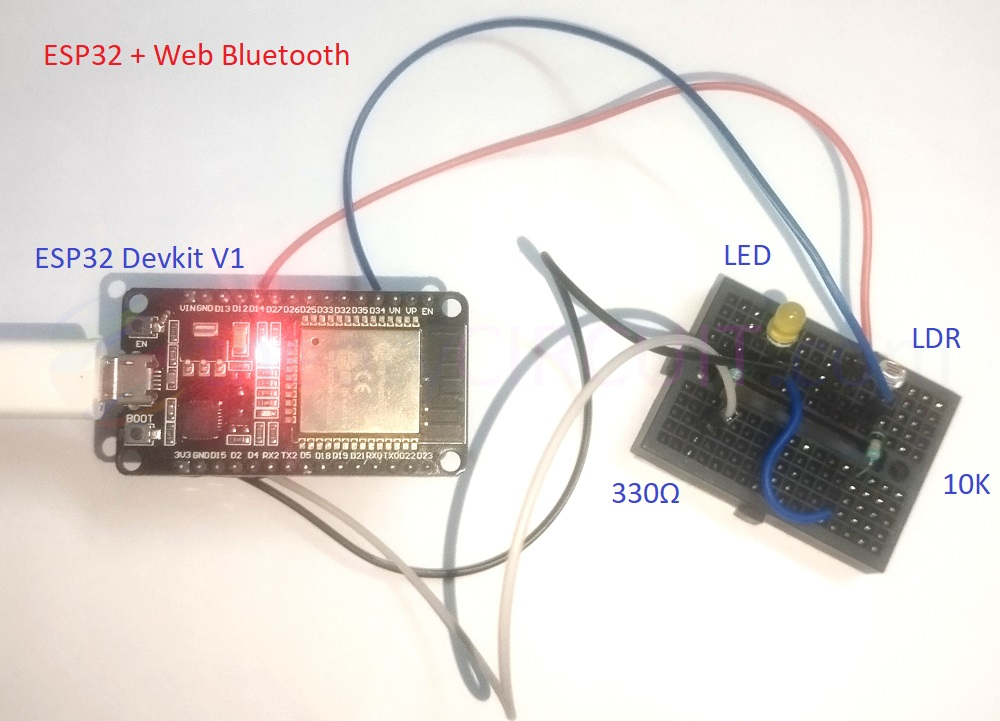
ESP32 Web Bluetooth for LED and LDR
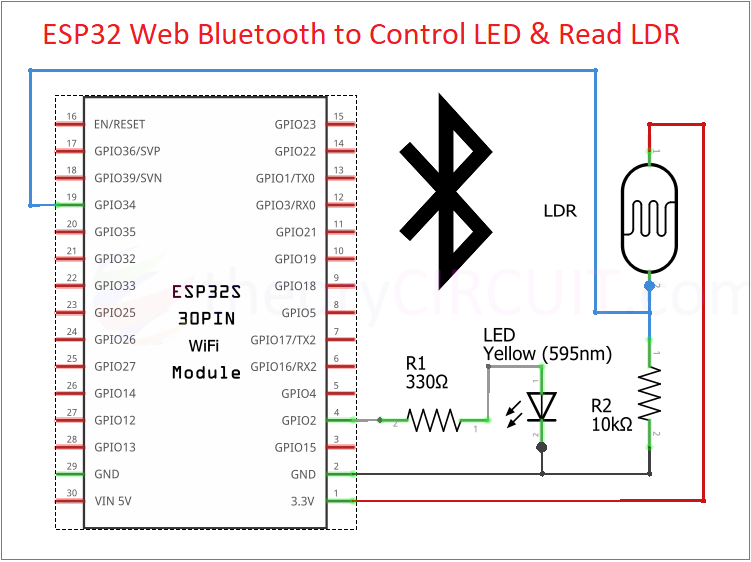
Schematic
Components Required
- ESP32 Development Board (Here ESP32 Devkit V1)
- LED
- LDR (Light Dependent Resistor as Sensor)
- Resistor 330Ω, 10KΩ each one
- Connecting Wires, Breadboard
- USB Cable (Micro USB Cable)
- Computer with Arduino IDE and Browser (Chrome)
Working Video
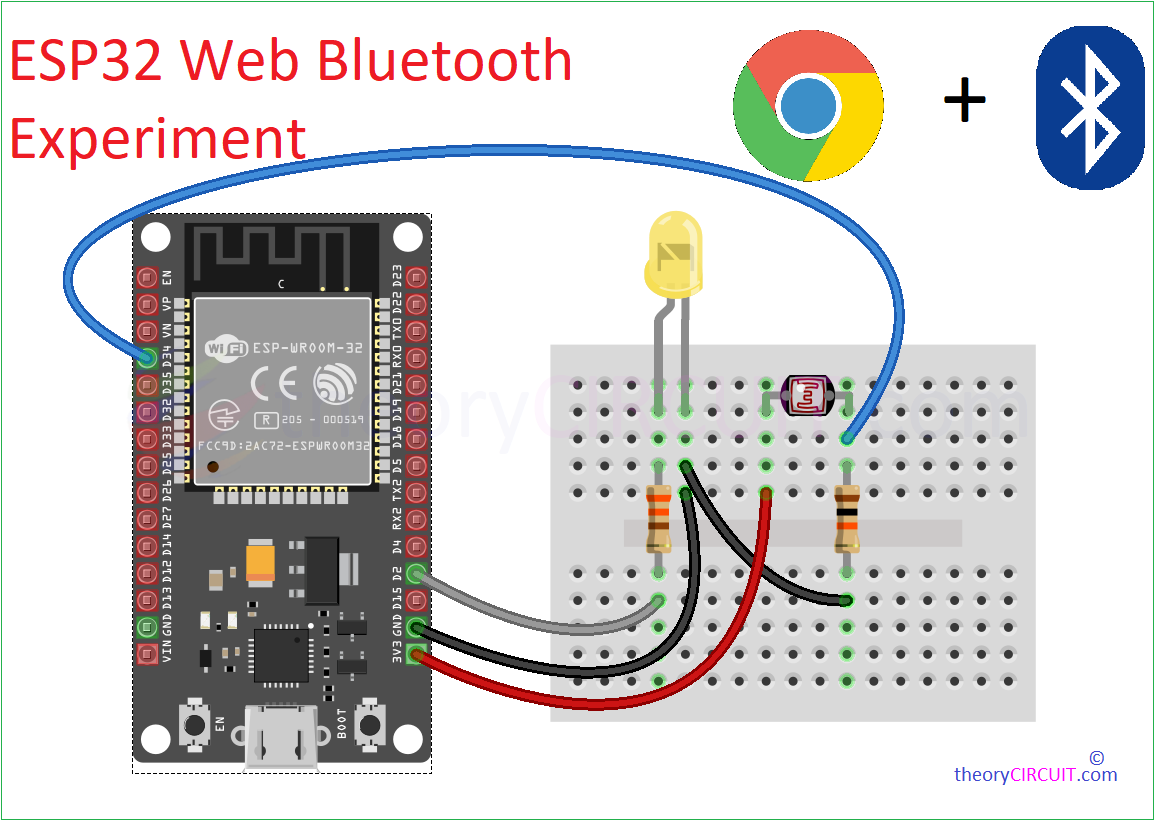
Construction & Working
To experiment Web Bluetooth, we are going to use LED & LDR, just connect LED Anode to GPIO2 of ESP32 development board through 330Ω Resistor and GND to LED cathode. Connect 3.3V to one terminal of LDR and connect other terminal to 10KΩ Resistor, GND to another terminal of resistor, this forms voltage divider and connect LDR, 10KΩ resistor junction point to GPIO34. Let’s make HTML page that have Web Bluetooth API request.
HTML Code
Remember to save this html code as index.html
You can use this code or just use https://theorycircuit.github.io/ESP32-Web-BT/ link to directly access Web Bluetooth application. After that upload the following code to ESP32 through Arduino IDE.
ESP32 Web Bluetooth for LED and LDR – Arduino Code
#include <BLEDevice.h>
#include <BLEServer.h>
#include <BLEUtils.h>
#include <BLE2902.h>

// BLE UUIDs
#define SERVICE_UUID        "12345678-1234-1234-1234-123456789abc"
#define LED_CHAR_UUID       "abcdef01-2345-6789-0123-456789abcdef"
#define LDR_CHAR_UUID       "abcdef02-2345-6789-0123-456789abcdef"

// GPIO Pins
#define LED_PIN 2
#define LDR_PIN 34

BLECharacteristic *pLedCharacteristic;
BLECharacteristic *pLdrCharacteristic;
bool deviceConnected = false;

class MyServerCallbacks: public BLEServerCallbacks {
  void onConnect(BLEServer* pServer) {
    deviceConnected = true;
    Serial.println("Device connected");
  }
  void onDisconnect(BLEServer* pServer) {
    deviceConnected = false;
    Serial.println("Device disconnected");
    pServer->getAdvertising()->start(); // Restart advertising
  }
};

class LedCallbacks: public BLECharacteristicCallbacks {
  void onWrite(BLECharacteristic *pCharacteristic) {
    std::string value = pCharacteristic->getValue();
    if (value.length() > 0) {
      Serial.print("LED command: ");
      Serial.println(value.c_str());
      if (value == "1") digitalWrite(LED_PIN, HIGH);
      else if (value == "0") digitalWrite(LED_PIN, LOW);
    }
  }
};

void setup() {
  Serial.begin(115200);

  // Initialize GPIO
  pinMode(LED_PIN, OUTPUT);
  digitalWrite(LED_PIN, LOW); // LED off by default

  // Initialize BLE
  BLEDevice::init("ESP32_GPIO_Control");
  BLEServer *pServer = BLEDevice::createServer();
  pServer->setCallbacks(new MyServerCallbacks());

  // Create BLE Service
  BLEService *pService = pServer->createService(SERVICE_UUID);

  // LED Characteristic (writeable)
  pLedCharacteristic = pService->createCharacteristic(
    LED_CHAR_UUID,
    BLECharacteristic::PROPERTY_WRITE
  );
  pLedCharacteristic->setCallbacks(new LedCallbacks());

  // LDR Characteristic (readable, notifying)
  pLdrCharacteristic = pService->createCharacteristic(
    LDR_CHAR_UUID,
    BLECharacteristic::PROPERTY_READ | BLECharacteristic::PROPERTY_NOTIFY
  );
  pLdrCharacteristic->addDescriptor(new BLE2902());

  // Start service and advertising
  pService->start();
  pServer->getAdvertising()->start();
  Serial.println("BLE server started. Waiting for connection...");
}

void loop() {
  if (deviceConnected) {
    // Read LDR value (0-4095) and map to percentage (0-100)
    int ldrValue = analogRead(LDR_PIN);
    int ldrPercent = map(ldrValue, 0, 4095, 0, 100);
    String ldrString = String(ldrPercent);

    // Update LDR characteristic and notify
    pLdrCharacteristic->setValue(ldrString.c_str());
    pLdrCharacteristic->notify();

    delay(500); // Update every 0.5 seconds
  }
}
Now you can read sensor data and control LED GPIO pin through Web page application.