
Last Updated on October 26, 2025
Nowadays when you look at electronic products it may have mini OLED display and user interface displays are everywhere, from small IoT gadgets to wearables. These OLED displays are consume less power and offer sharp text and graphics and these are easy to interface with Microcontrollers. So I wanted to try displaying some text and Images on a 0.96″ OLED module using one of my favorite small microcontroller the ATtiny85.
128×64 OLED Display
This 128×64 OLED Display module can be named as 0.96″ OLED or I2C OLED and this module will have four pins two for power supply and two for I2C communication. This will operate with 3.3V to 5V DC power supply.
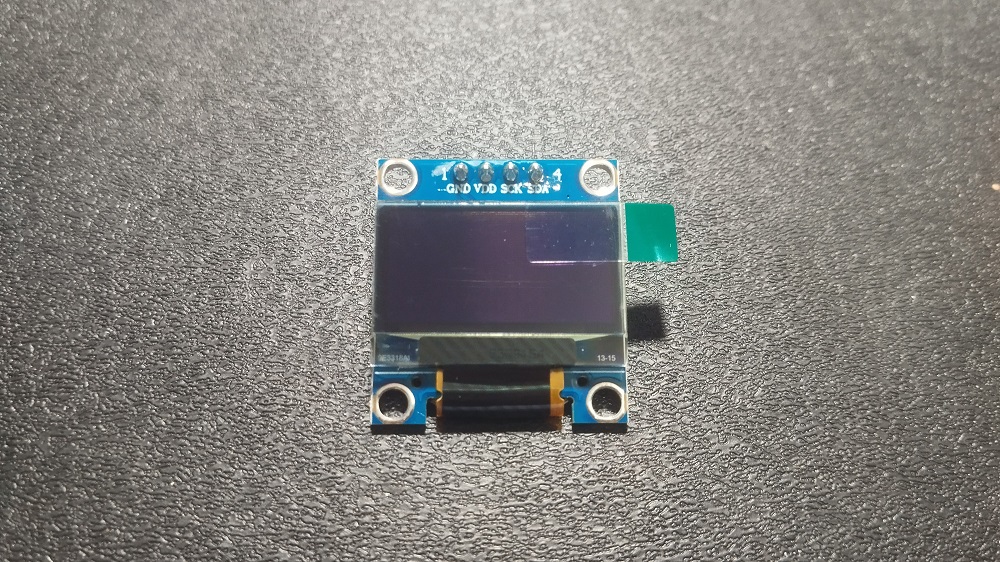
This OLED module will have total of 8192 pixels that is 128 pixels in X axis and 64 pixels in Y axis and driven by SSD1306 driver. By controlling each pixel ON and OFF we can display text or Image.
Interfacing ATtiny85 with OLED
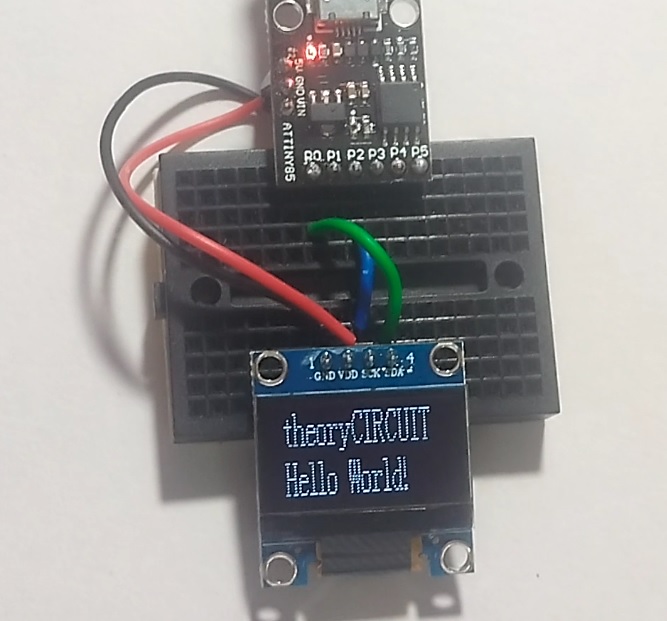
Let’s Interface ATtiny85 Microcontroller board from Digispark and OLED display. Here this ATtiny85 microcontroller have Micronucleus Bootloader, so we can code it through Arduino IDE. If you are new to use ATtiny85 with Arduino IDE then read here.
See the table and Connect wires between ATtiny85 digispark board and 0.96″ OLED module.
| ATtiny85 | OLED Display |
| +5V | VCC or VDD |
| GND | GND |
| P0 | SDA |
| P2 | SCK |
Let’s start with text message display, for that make the wiring as mentioned in the table and upload the following code before connecting the ATtiny85 board with computer. When the Arduino IDE output terminal says ‘plug in device now’ then connect the ATtiny85 board with computer. Code will be uploaded to microcontroller and display text in OLED. Make sure that you have installed required library before uploading code.
OLED Text Message using ATtiny85 Code
#include <TinyWireM.h>
#include <Tiny4kOLED.h>

void setup() {
  TinyWireM.begin();     // Start I2C communication
  oled.begin();          // Initialize OLED
  oled.clear();          // Clear display
  oled.on();             // Turn on display

  oled.setFont(FONT8X16P); // Use large font (if supported)

  oled.setCursor(10, 0);
  oled.print(F("theoryCIRCUIT"));

  oled.setCursor(10, 2);
  oled.print(F("Hello World!"));
}

void loop() {
  // Nothing to do
}
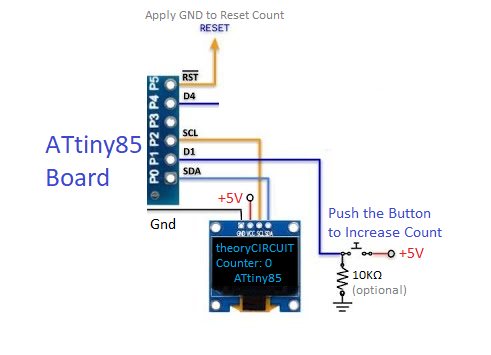
Displaying Push Button Count in OLED Display using ATtiny85
Now Let’s test Push Button count in OLED Display using ATtiny85 Microcontroller, here the event of push in the button gets counted and displayed in the OLED. Just make the wiring and Upload the code then connect ATtiny85 board to computer.
//theoryCIRCUIT.com
//ATtiny85 Module Interfaced with I2C OLED
//Connect Pushbutton switch between P1 of ATtiny85 and +5V
//----------------------------------------
#include <DigisparkOLED.h>
#include <Wire.h>
//---------------------------------------------------
#define SW  1
unsigned int i = 0;
//===================================================
void setup()
{
  pinMode(SW,INPUT);
  oled.begin();
  oled.clear();
  oled.setFont(FONT8X16);
  oled.setCursor(30, 6);
  oled.print("ATtiny85");
  oled.setFont(FONT8X16);
  oled.setCursor(7, 0);
  oled.print("theoryCIRCUIT");
}
//===================================================
void loop()
{
  if(digitalRead(SW) == HIGH) {delay(100); i++;}

  //-------------------------------------------------
  oled.setFont(FONT8X16);
  oled.setCursor(0, 3);
  oled.print("Counter: ");
  oled.setCursor(70, 3);
  oled.println(i);
  delay(200);
}
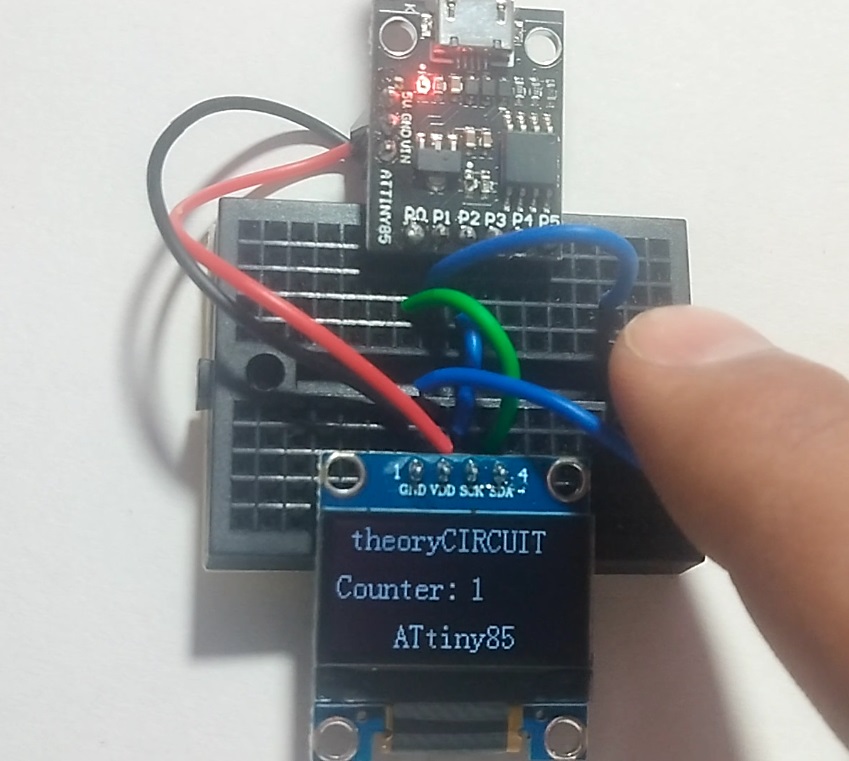
Now it counts the push and displays the count numbers.
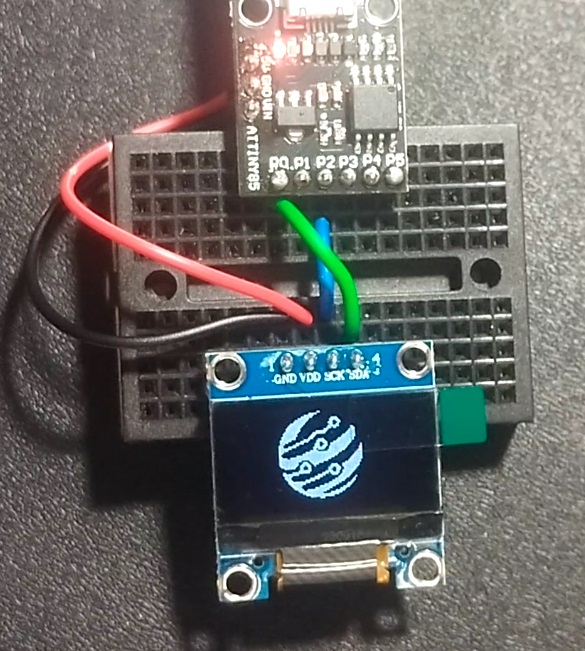
Displaying Image in OLED Display using ATtiny85
Let’s try displaying image in OLED, First thing you need is LCD Assistant to convert black and white monochrome image to hex code.
Then have an Image size of 128 x 64 pixels in monochrome BMP format then load it to LCD Assistant and make sure the size of output as 128 x 64 pixels and then save output and name it, this is your image hex code file.
Now open the hex code file through Note pad and Include the following header file, and then save it as .h (header file).
#include<avr/pgmspace.h>
const uint8_t image [] PROGMEM = {    here put your image hex code  };
It is time to upload the code,
// theoryCIRCUIT - ATtiny85 OLED 128x64 SSD1306 I2C Display Interface

#include <DigisparkOLED.h>
#include <Wire.h>

#include "image.h"

void setup() {
  // put your setup code here, to run once:
  oled.begin();

}

void loop() {

  // put your main code here, to run repeatedly:
  oled.fill(0xFF); //fill screen with color
  delay(1000);
  oled.clear(); //all black
  delay(1000);
  //usage: oled.setCursor(X IN PIXELS, Y IN ROWS OF 8 PIXELS STARTING WITH 0);
  oled.setCursor(0, 0); //top left
  oled.setFont(FONT8X16);
  oled.print(F("theoryCIRCUIT")); //wrap strings in F() to save RAM!
  oled.setFont(FONT6X8);
  oled.print(F(" OLED!"));
  oled.setCursor(0, 2); //two rows down because the 8x16 font takes two rows of 8
  oled.println(F("test")); //println will move the cursor 8 or 16 pixels down (based on the front) and back to X=0
  oled.print(F("test test test test test")); //lines auto wrap

  delay(3000);
  //usage oled.bitmap(START X IN PIXELS, START Y IN ROWS OF 8 PIXELS, END X IN PIXELS, END Y IN ROWS OF 8 PIXELS, IMAGE ARRAY);

  delay(3000);
  oled.bitmap(0, 0, 128, 8, image);
  delay(3000);
}
Video