Last Updated on March 16, 2024
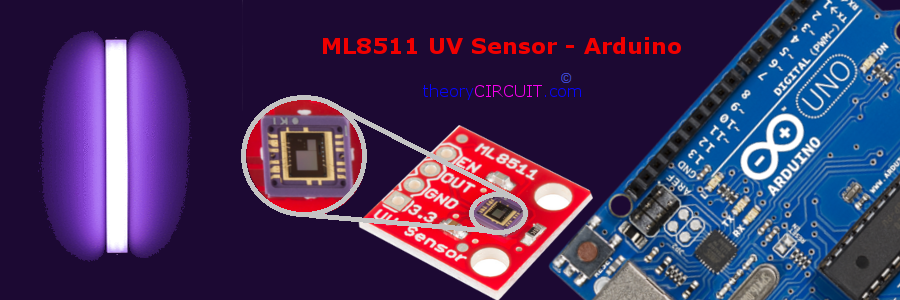
UV – Ultraviolet light radiation occurs from 10nm to 400nm wavelength in electromagnetic spectrum, to get effective output in accordance with UV light the ML8511 sensor from lapis semiconductor helps a lot. This sensor comes in surface mount type package hence better to use in breakout board.
The ML8511 UV sensor detects 280nm – 390nm light in a better way, this wavelength is categorized as part of the UVB-burning rays spectrum and most of the UVA-tanning rays spectrum.
Block Diagram
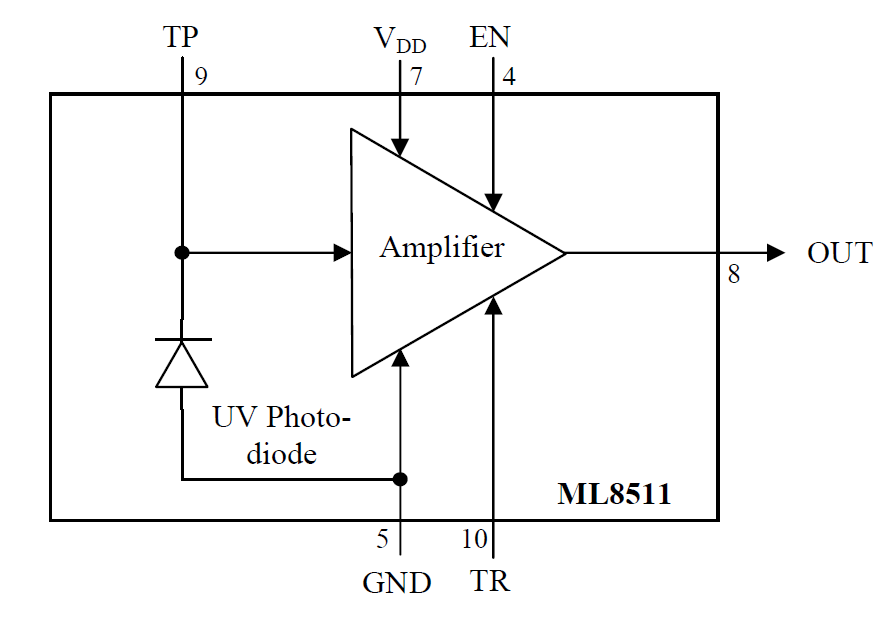
The sensor ML8511 has a UV photodiode and Internal Amplifier which will converts photo current to voltage output depending on the UV light intensity.
Through the voltage output it is easy to interface with external micro controllers and ADC.
ML8511 Breakout Board
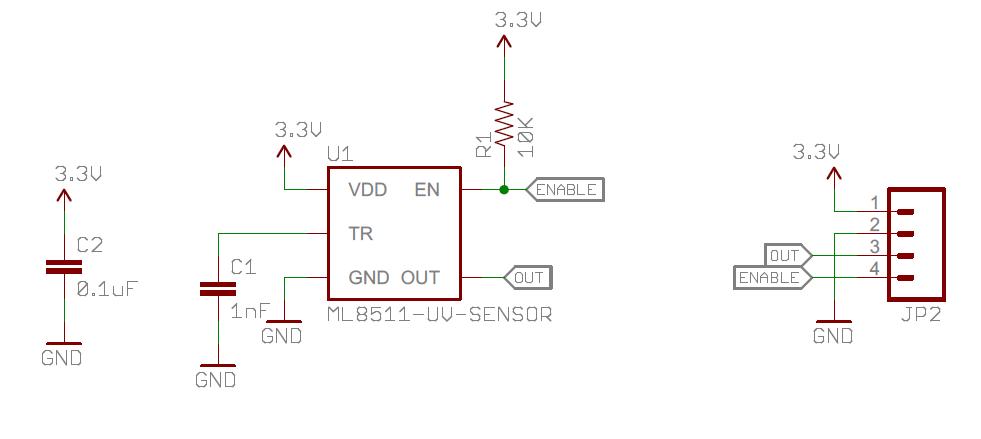
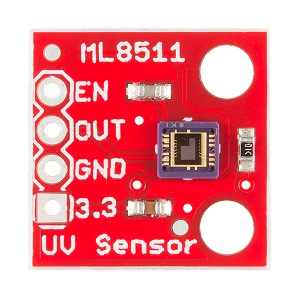
The sensor ML8511 is very handy to use in breakout board and it requires 3.3V with low supply current 300μA, and gives output in Analog signal variation. This breakout board can be easily interfaced with all kind of micro controllers(which having ADC) and Arduino boards.
UV characteristics
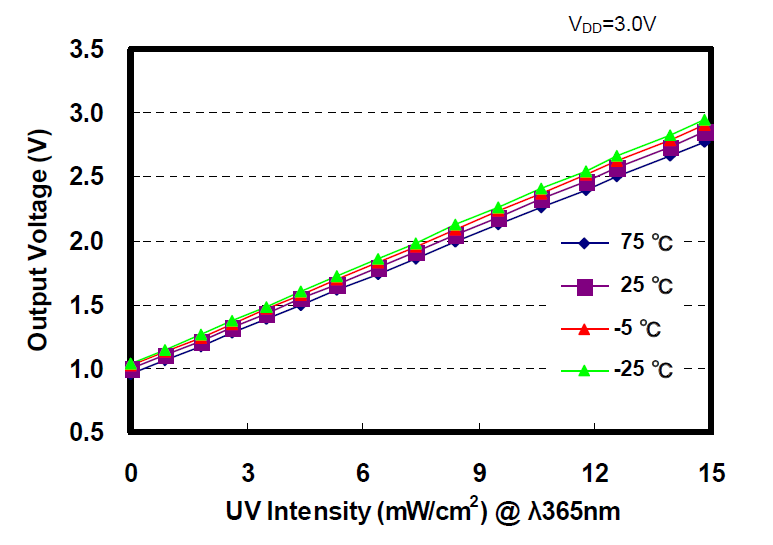
The characteristics drawn between output Voltage from the sensor with respect to UV intensity (mW/cm²) at constant VDD supply. The curves in different color represents sensor operation in different temperature range.
Arduino Hookup with ML8511
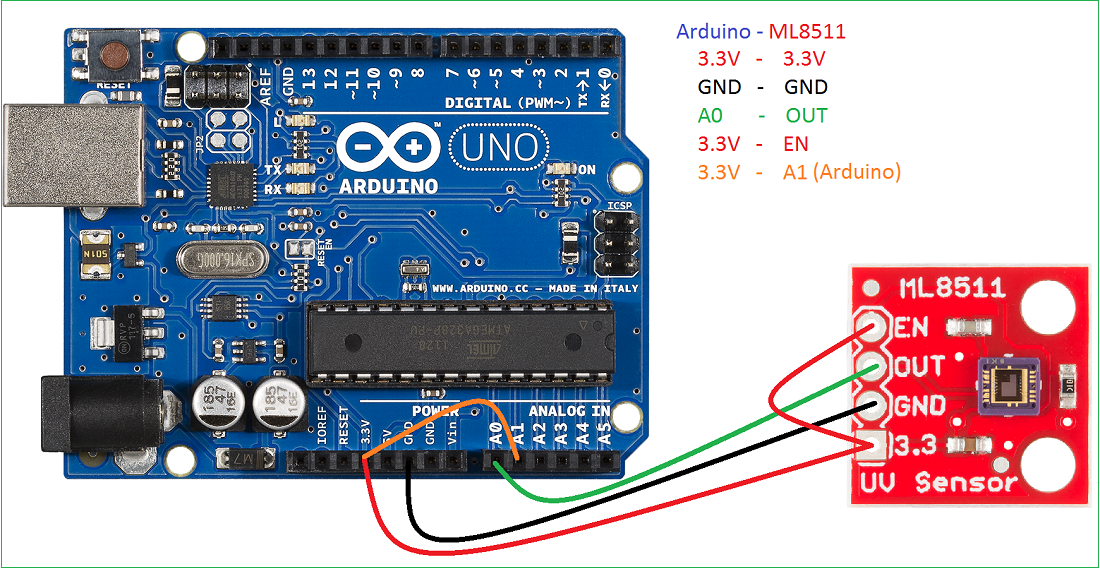
Connect the breakout board with Arduino board as illustrated, Made connection between 3.3V and A1 (analog input 1) of Arduino board for reference. This example hookup considered to have sensor out in A0. Don’t provide Vdd more than 3.3V, it may damage the device due to its low voltage and low current character.
Arduino UV sensor Code
int UVOUT = A0; //Output from the sensor
int REF_3V3 = A1; //3.3V power on the Arduino board

void setup()
{
  Serial.begin(9600);

  pinMode(UVOUT, INPUT);
  pinMode(REF_3V3, INPUT);

  Serial.println("MP8511 example");
}

void loop()
{
  int uvLevel = averageAnalogRead(UVOUT);
  int refLevel = averageAnalogRead(REF_3V3);

  //Use the 3.3V power pin as a reference to get a very accurate output value from sensor
  float outputVoltage = 3.3 / refLevel * uvLevel;

  float uvIntensity = mapfloat(outputVoltage, 0.99, 2.9, 0.0, 15.0);

  Serial.print("MP8511 output: ");
  Serial.print(uvLevel);

  Serial.print(" MP8511 voltage: ");
  Serial.print(outputVoltage);

  Serial.print(" UV Intensity (mW/cm^2): ");
  Serial.print(uvIntensity);

  Serial.println();

  delay(100);
}

//Takes an average of readings on a given pin
//Returns the average
int averageAnalogRead(int pinToRead)
{
  byte numberOfReadings = 8;
  unsigned int runningValue = 0;

  for(int x = 0 ; x < numberOfReadings ; x++)
    runningValue += analogRead(pinToRead);
  runningValue /= numberOfReadings;

  return(runningValue);
}

//The Arduino Map function but for floats
//From: http://forum.arduino.cc/index.php?topic=3922.0
float mapfloat(float x, float in_min, float in_max, float out_min, float out_max)
{
  return (x - in_min) * (out_max - out_min) / (in_max - in_min) + out_min;
}
Reference
According to the datasheet the numbers of the mapfloat should be:
mapfloat(outputVoltage, 1, 2.2, 0.0, 10.0);
So for 15mW/cm2 this should be:
mapfloat(outputVoltage, 1, 2.8, 0.0, 15.0);
I tweaked it to 20mW/cm2:
mapfloat(outputVoltage, 1, 3.4, 0.0, 20.0);
After covering the sensor you can calibrate the in_min, in my case 0.97 rather than 1.