
Last Updated on March 29, 2024
Simple Way to Interface Graphical LCD (KS0108) with Arduino, Here Graphical LCD termed as GLCD, The KS0108B is a LCD driver LSl with 64 channel output for dot matrix liquid crystal graphic display system. This device consists of the display RAM, 64 bit data latch 64 bit drivers and decoder logics. It has the internal display RAM for storing the display data transferred from a 8 bit micro controller and generates the dot matrix Liquid crystal driving signals corresponding to stored data. The KS0108B composed of the liquid crystal display system in combination with the KS0107B (64 common driver) Refer datasheet for more details. By following Steps you can interface any type of 128×64 LCD with Arduino boards.
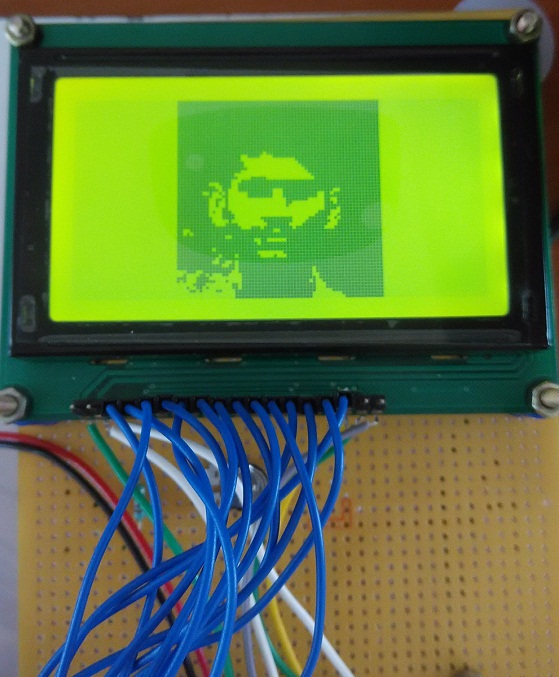
After Interface Graphical LCD (KS0108) with Arduino, Can you display any images or photos as you wish? Yes You can display your photo and selfie or pictures in glcd! (Graphic Liquid Crystal Display) to make this happen you have to follow some steps. First have arduino mega borad and glcd display and then some connecting wires.
Components List
| S.No | Name | Quantity |
| 1. | Arduino MEGA board | 1 |
| 2. | GLCD display (128×64) | 1 |
| 3. | 100 KΩ Variable Resistor | 1 |
| 4. | Connecting Wires | as required |
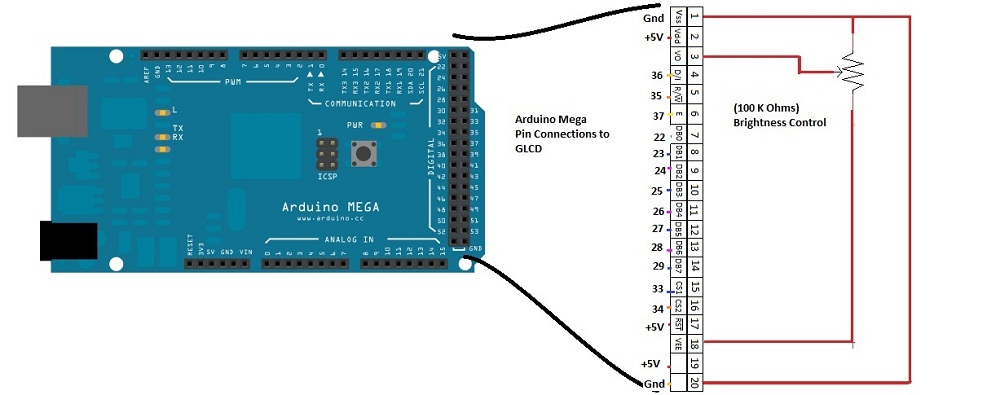
Then make connections as per the diagram shows, don’t make mistake in connection then you will see improper image in glcd. Here 100 KΩ variable resistor acts as a brightness control for glcd.
The numbers from 1 to 20 shown in right side of connection diagram is the pin number order in graphic lcd. Then corresponding arduino pin number also given straight to the glcd pin numbers.
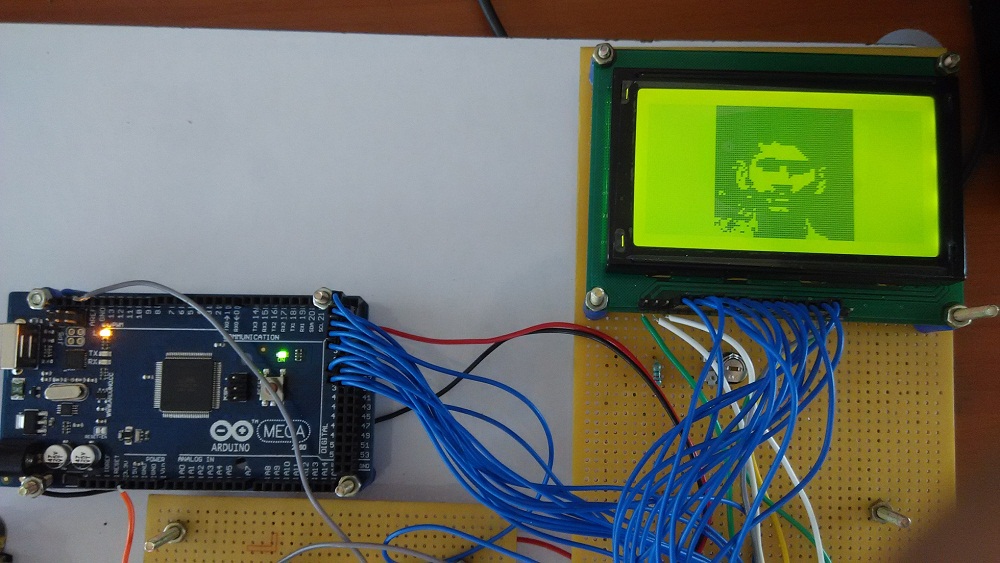
After connecting all wires with arduino mega board and glcd, we have to chose the photo which we want to display in glcd.
For GLCD use Library file from Openglcd, the arduino library of display couldn’t directly support gld displays. Once you insert the openglcd library into arduino software you can see the example programs of GLCD in the arduino software. (refer how to insert new library in arduino.cc )
Here we use 128×64 GLCD hence it can display any image that have 128×64 pixels. Make sure that your image should not exceed this pixel level. Resize and save your image as monochrome bitmap then your becomes black and white pixels.
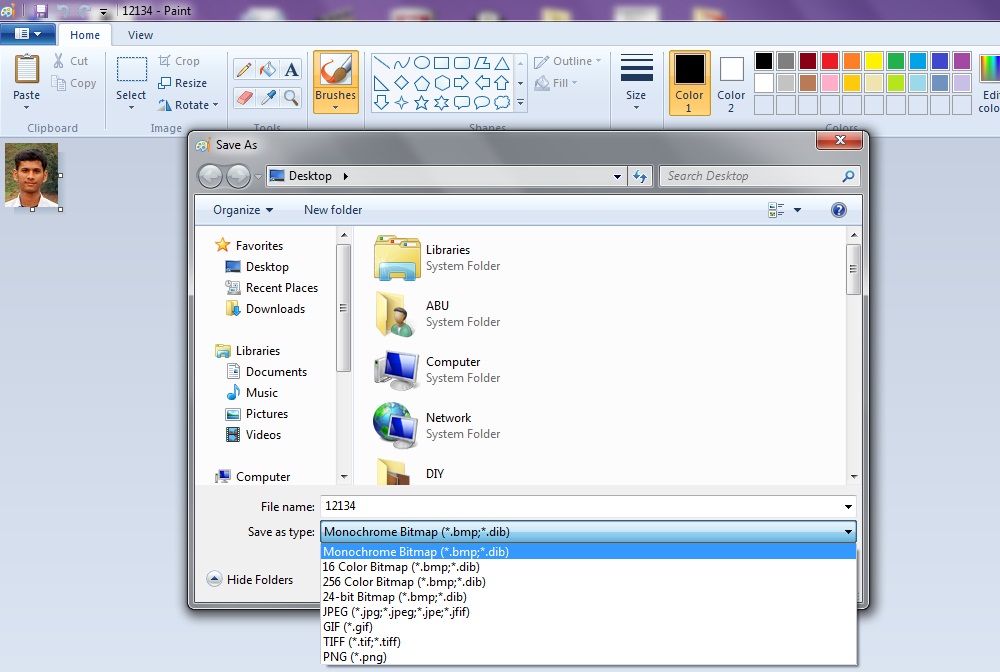
To display this bitmap in glcd we have to convert it into hex codes, for that download LCD Assistant software. (http://en.radzio.dxp.pl/bitmap_converter/)
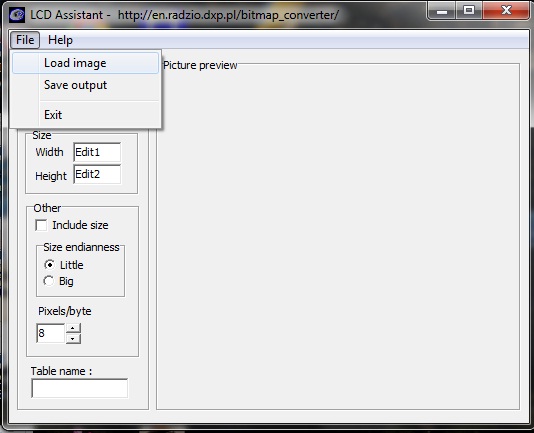
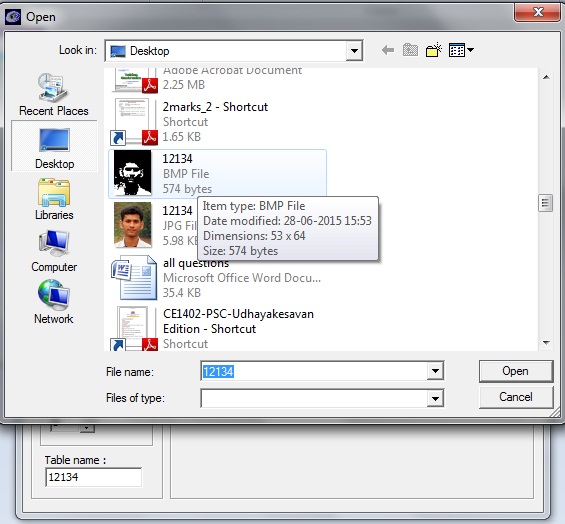
Load bitmap image in LCD assistant software, through file – Load image.
After that directly convert bitmap into hex file by choosing save output. Keep in mind that you have to store your output as .h that is hex (ex: 12134.h)
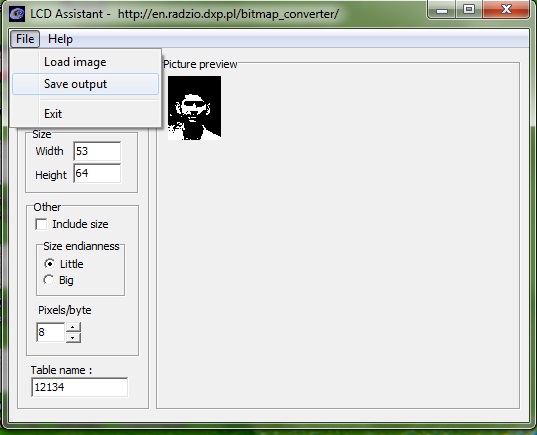
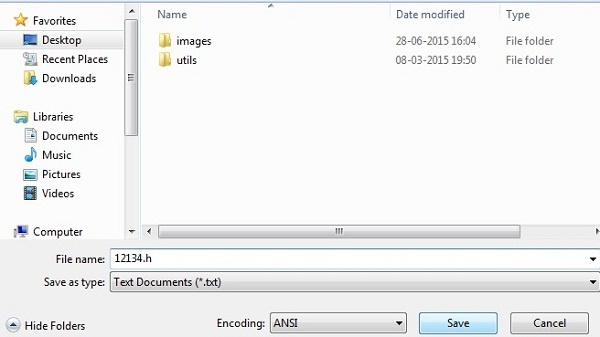
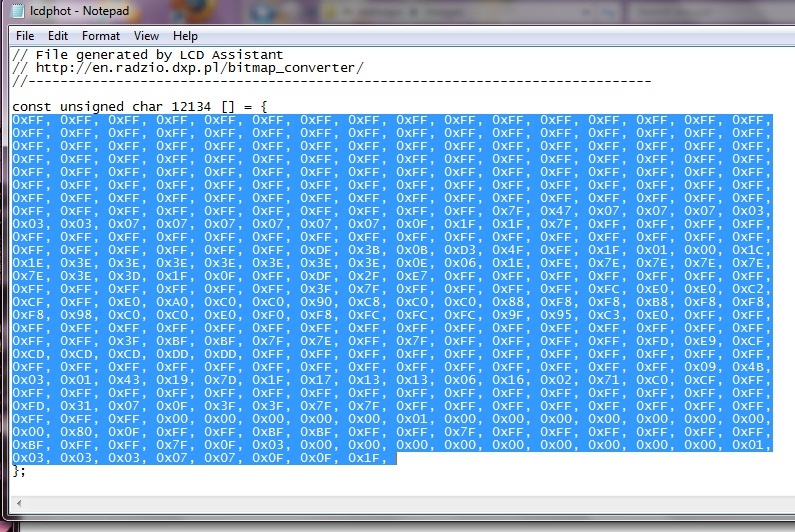
Open the saved hex file through notepad and select hex file numbers only without any other terms.
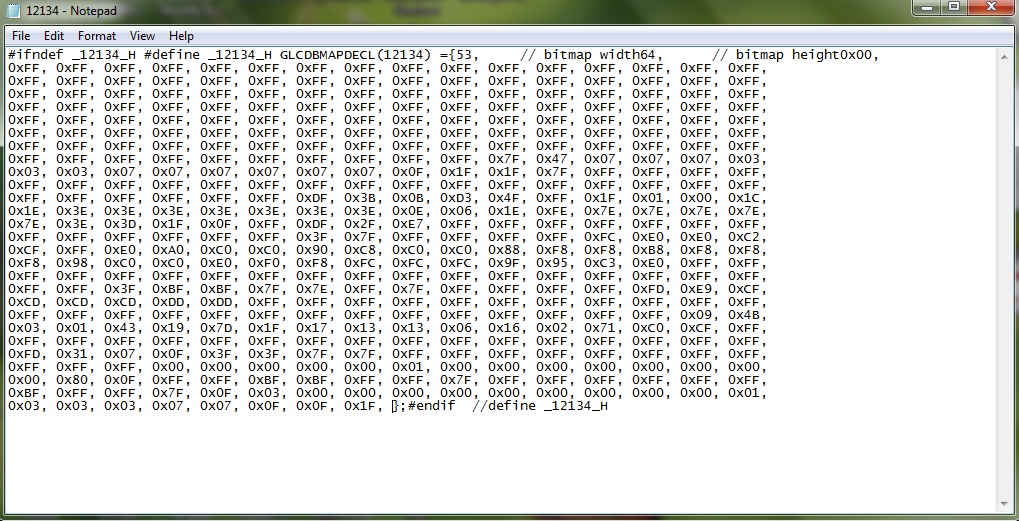
Make another file through new notepad and put define terms and bitmap size like below image shows. (you can refer or modify the billshead hex file from the openglcd bitmaps library)
After making the file save it as a hex file, and copy paste into openglcd bitmaps folder.
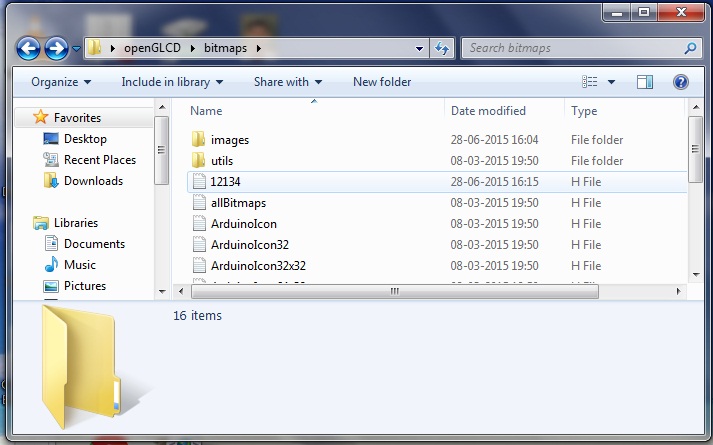
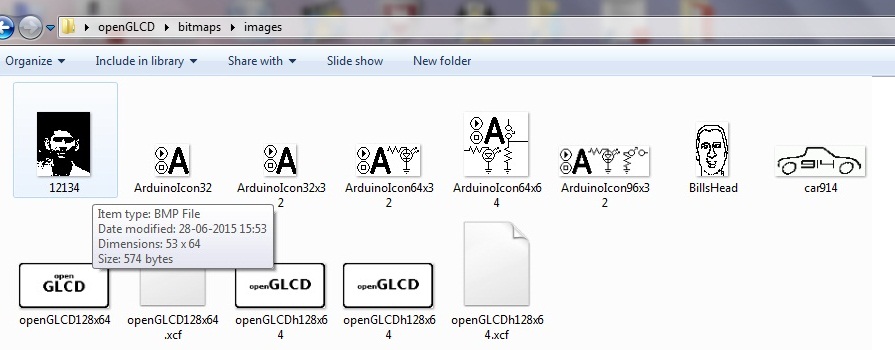
You need to save your bitmap image also into the (openglcd/bitmaps/images) folder. Then only GLCD can clearly reproduce your image clearly.
Finally we come to the end, here simple example arduino code given to display image that has been explained so far in this page.
Arduino code for Interface Graphical LCD (KS0108) with Arduino
/*
* Interface Graphical LCD (KS0108) with Arduino
* 128x64 Character (Green) Graphic LCD Display
* www.theorycircuit.com/interface-graphical-lcd-ks0108-with-arduino
*/

#include <openGLCD.h>
#include <bitmaps/12134.h>
#define DELAY 2000 // ms delay between examples
void setup()
{
GLCD.Init();
}
void loop()
{
GLCD.ClearScreen();
/*
* Display photo centered on Display
*/
GLCD.DrawBitmap(12134, GLCD.Width/2 - 32, 0);
delay(DELAY);
}
Can you please send a sketch of connecting wires of the lcd with arduino mega?
Is not an LCD, it is a GLCD: https://theorycircuit.com/wp-content/uploads/2015/12/MEGA_pinconnections.jpg
amateur question: do I have to define all pins connected to GLCD? if so how exactly?