
Last Updated on April 16, 2024
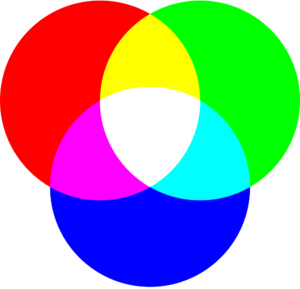
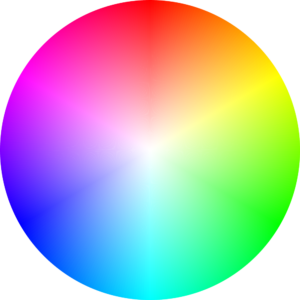
Addressable RGB LED and Arduino Project is very interesting and colorful one to try. Here we have taken WS2812B Addressable 8 bit Neopixels RGB LED strip for this project, because of one wire control and easy to interface method this Neopixels (WS2812) LEDs got every one attention. It is most suitable and beautiful for stage lighting, Interior decoration, wearables and art installation etc.., It can produce dynamic color effects with 16.7 million possible color combinations including brightness control.
Wonder how it produce over 16 million color, here is the answer, 8 bit color channel can be represent 256 different color intensity level from 0 to 255, and the WS2812B LED will have three primary color (Red, Green, Blue) die inside so 256^3 = 16777216, that is over 16 million colors.
There are different types of addressable RGB LEDs available in the market, depends on the usage we can choose one among them, here we took WS2812B LEDs for experiment and mentioning its name in the Arduino code can help you get proper output.
| LED Type | Controller | Voltage | Communication | PWM Frequency | Max Current | Common Uses |
|---|---|---|---|---|---|---|
| WS2812 / WS2812B (Neopixel) | Integrated | 5V | Single-wire | ~400 Hz | 60 mA | DIY projects, wearables, art installations |
| APA102 / APA102C (DotStar) | Integrated | 5V / 3.3V | Dual-wire | Up to 20 kHz | 60 mA | High-speed data transmission, POV displays |
| SK6812 | Integrated | 5V | Single-wire | ~400 Hz | 20 mA | Similar to WS2812 applications |
| WS2813 | Integrated | 5V | Single-wire | ~400 Hz | 60 mA | Projects requiring high reliability |
| SK9822 | Integrated | 5V / 3.3V | Dual-wire | Up to 20 kHz | 30 mA | Projects requiring high PWM frequency |
Lets Understand WS2812B
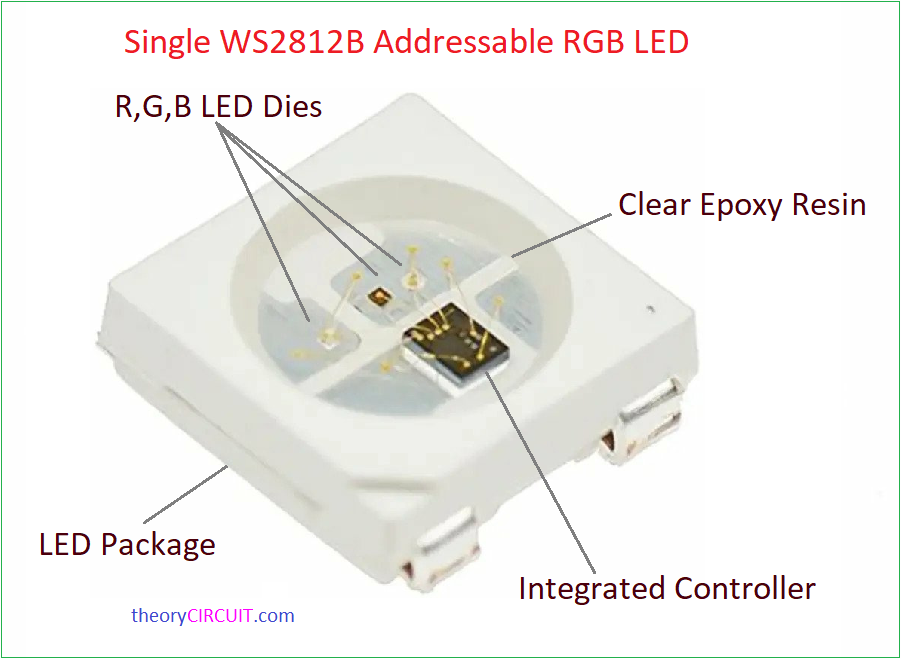
LEDs use compound semiconductors to produce different light waves, like that every RGB LEDs will have Red, Green, Blue LED die inside. But the difference comes in the Integrated controller chip inside the package. (You can refer the chip name in LED Type and their specifications in the previous table).
| LED Color | Semiconductor Material | Wavelength Range |
|---|---|---|
| Red | Gallium Arsenide (GaAs) | 620 – 750 nm |
| Green | Gallium Phosphide (GaP) | 495 – 570 nm |
| Blue | Indium Gallium Nitride (InGaN) | 450 – 495 nm |
Here WS2812B chip LEDs used in strip and each one is connected in parallel to the bias line and the each LED receives Data signal from previous LED.
You can use individual LEDs to form desirable length and shape, ready made strip also available in different length and shape, WS2812B 8-bit strip PCB will have Input and Output side terminals and it is very useful for extending another strip.
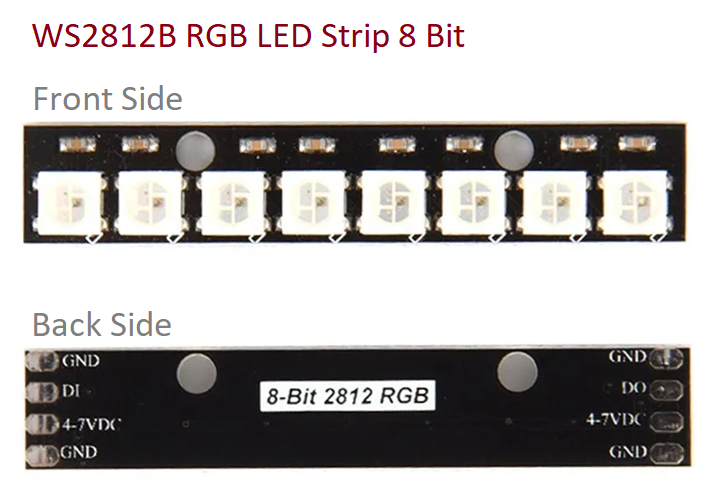
Check the PCB silkscreen to connect terminals with microcontroller or Arduino board, here GND represents power supply Ground, DI is Data input, 4-7VDC is positive power supply range between 4V to 7V and 5V is enough for driving 8 bit. DO is Data out for next strip. If you are connecting more than 8 LEDs to Arduino then you have to use external power supply as mentioned in the Circuit diagram.
Addressable RGB Neopixel LED and Arduino Wiring
Circuit Diagram
Components Required
1. Arduino UNO Board
2. Addressable RGB LED Strip = WS2812B 8 bit Neopixels Strip
3. Connecting Wires
4. USB Data Cable for Arduino
5. Computer
Working Video
Steps to Interface Addressable RGB LED and Arduino
It is very easy to make connection between WS2812B LED strip with Arduino board, follow the steps.
Step 1 : Make Soldering in LED strip with different color wire, if your strip board not having pin headers.
Step 2 : Connect 4-7VDC pin of strip to Arduino 5V pin.
Step 3 : Connect GND pin to Arduino GND pin.
Step 4 : Connect DI Pin to any one digital pin (here D4) of Arduino board.
Step 5 : Connect USB of Arduino to Computer.
Step 6 : Load FastLED library in Arduino IDE.
Step 7 : Upload the following Code or use any one example from fastled library and enjoy.
Addressable RGB Neopixel LED and Arduino Code
/// example ColorPalette.ino
#include <FastLED.h>
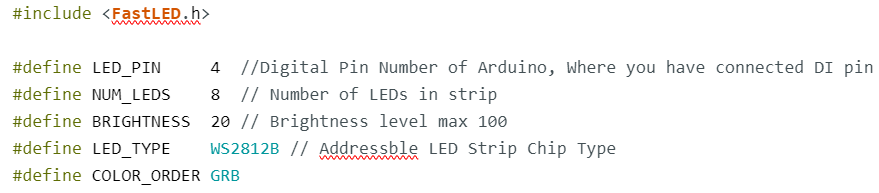
#define LED_PIN 4 //Digital Pin Number of Arduino, Where you have connected DI pin of Addressable Neopixel LED Strip
#define NUM_LEDS 8 // Number of LEDs in strip
#define BRIGHTNESS 20 // Brightness level max 100
#define LED_TYPE WS2812B // Addressble LED Strip Chip Type
#define COLOR_ORDER GRB
CRGB leds[NUM_LEDS];
#define UPDATES_PER_SECOND 100
CRGBPalette16 currentPalette;
TBlendType currentBlending;
extern CRGBPalette16 myRedWhiteBluePalette;
extern const TProgmemPalette16 myRedWhiteBluePalette_p PROGMEM;
void setup() {
delay( 3000 ); // power-up safety delay
FastLED.addLeds<LED_TYPE, LED_PIN, COLOR_ORDER>(leds, NUM_LEDS).setCorrection( TypicalLEDStrip );
FastLED.setBrightness( BRIGHTNESS );
currentPalette = RainbowColors_p;
currentBlending = LINEARBLEND;
}
void loop()
{
ChangePalettePeriodically();
static uint8_t startIndex = 0;
startIndex = startIndex + 1; /* motion speed */
FillLEDsFromPaletteColors( startIndex);
FastLED.show();
FastLED.delay(1000 / UPDATES_PER_SECOND);
}
void FillLEDsFromPaletteColors( uint8_t colorIndex)
{
uint8_t brightness = 255;
for( int i = 0; i < NUM_LEDS; ++i) {
leds[i] = ColorFromPalette( currentPalette, colorIndex, brightness, currentBlending);
colorIndex += 3;
}
}
// There are several different palettes of colors demonstrated here.
void ChangePalettePeriodically()
{
uint8_t secondHand = (millis() / 1000) % 60;
static uint8_t lastSecond = 99;
if( lastSecond != secondHand) {
lastSecond = secondHand;
if( secondHand == 0) { currentPalette = RainbowColors_p; currentBlending = LINEARBLEND; }
if( secondHand == 10) { currentPalette = RainbowStripeColors_p; currentBlending = NOBLEND; }
if( secondHand == 15) { currentPalette = RainbowStripeColors_p; currentBlending = LINEARBLEND; }
if( secondHand == 20) { SetupPurpleAndGreenPalette(); currentBlending = LINEARBLEND; }
if( secondHand == 25) { SetupTotallyRandomPalette(); currentBlending = LINEARBLEND; }
if( secondHand == 30) { SetupBlackAndWhiteStripedPalette(); currentBlending = NOBLEND; }
if( secondHand == 35) { SetupBlackAndWhiteStripedPalette(); currentBlending = LINEARBLEND; }
if( secondHand == 40) { currentPalette = CloudColors_p; currentBlending = LINEARBLEND; }
if( secondHand == 45) { currentPalette = PartyColors_p; currentBlending = LINEARBLEND; }
if( secondHand == 50) { currentPalette = myRedWhiteBluePalette_p; currentBlending = NOBLEND; }
if( secondHand == 55) { currentPalette = myRedWhiteBluePalette_p; currentBlending = LINEARBLEND; }
}
}
// This function fills the palette with totally random colors.
void SetupTotallyRandomPalette()
{
for( int i = 0; i < 16; ++i) {
currentPalette[i] = CHSV( random8(), 255, random8());
}
}
void SetupBlackAndWhiteStripedPalette()
{
// 'black out' all 16 palette entries...
fill_solid( currentPalette, 16, CRGB::Black);
// and set every fourth one to white.
currentPalette[0] = CRGB::White;
currentPalette[4] = CRGB::White;
currentPalette[8] = CRGB::White;
currentPalette[12] = CRGB::White;
}
// This function sets up a palette of purple and green stripes.
void SetupPurpleAndGreenPalette()
{
CRGB purple = CHSV( HUE_PURPLE, 255, 255);
CRGB green = CHSV( HUE_GREEN, 255, 255);
CRGB black = CRGB::Black;
currentPalette = CRGBPalette16(
green, green, black, black,
purple, purple, black, black,
green, green, black, black,
purple, purple, black, black );
}
// This example shows how to set up a static color palette
const TProgmemPalette16 myRedWhiteBluePalette_p PROGMEM =
{
CRGB::Red,
CRGB::Gray, // 'white' is too bright compared to red and blue
CRGB::Blue,
CRGB::Black,
CRGB::Red,
CRGB::Gray,
CRGB::Blue,
CRGB::Black,
CRGB::Red,
CRGB::Red,
CRGB::Gray,
CRGB::Gray,
CRGB::Blue,
CRGB::Blue,
CRGB::Black,
CRGB::Black
};
Troubleshooting
If you are not getting proper output the check the following Troubleshooting methods.
Check all the wiring connection between Arduino board and WS2812B 8 bit LED Strip, Check the Library in Arduino IDE, if not installed then install it. Check the code and correct LED_PIN (here we used 4 for Digital Pin 4). Then check the NUM_LEDS, here we used 8-bit LED strip so we put 8. (It is the number of LED Chip count). Then check the BRIGHTNESS level in code that should be minimum 1 to maximum 100. Check the LED_TYPE and mention exact type name of yours LED strip.
Even after these troubleshooting methods, still having problem then mention it in comment section and get possible solutions.