
Last Updated on March 25, 2024
Want to know and data log the moisture level of soil, here is the sensor to do so, the moisture sensor has two large exposed pads function as probes for the sensor and together acting as a variable resistor. Put the sensor into the soil where you want to measure moisture level depends on the water presence in the soil the sensor’s conductivity between the pads will vary that is more water more conductivity.
So the sensor pads reacts as High resistance for dry soil and Low resistance for wet soil, so we get the signal depends on the soil moisture.
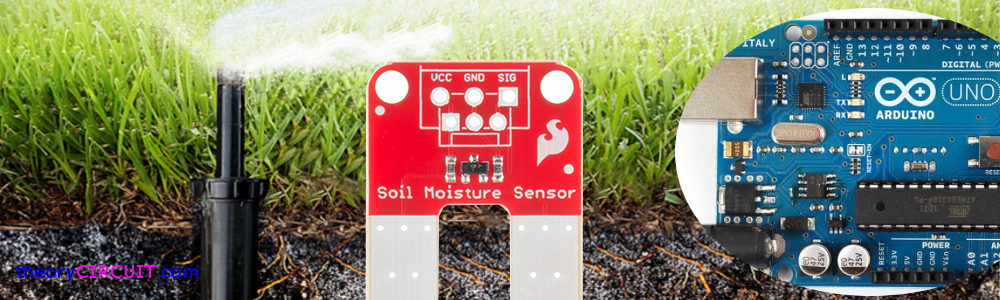
Sensor Breakout

Sparkfun Soil moisture sensor used in this article, it can be easily interfaced with Arduino and other Microcontrollers Analog read pin.
Soil Moisture Sensor Arduino Interfacing
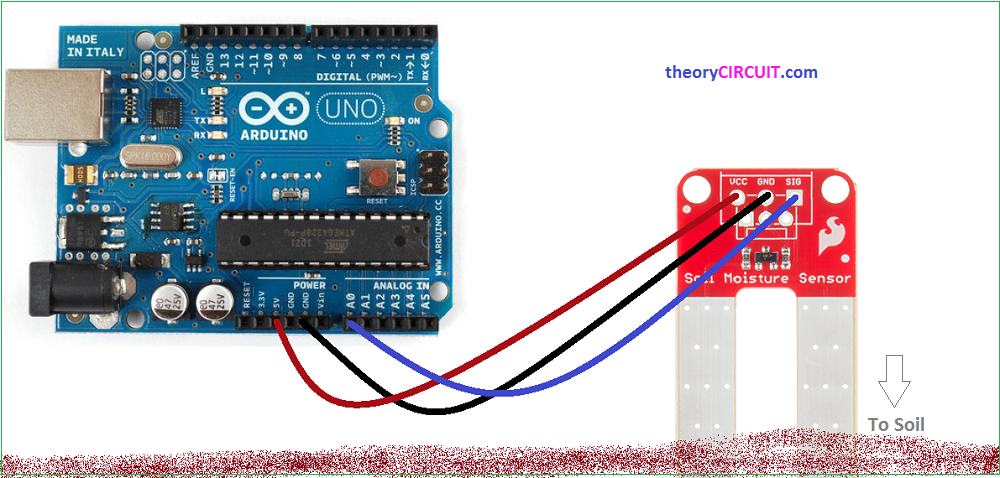
Just put Sensors Vcc into Arduino’s +5V pin and Gnd to Gnd, then connect signal pin of sensor to A0 pin of Arduino. Here you don’t need to connect bias or pull up resistor to the signal pin to just read the analog value.
Arduino Code
To Just Read Sensor output
int sensorPin = 0;    // select the input pin for the Soil moisture sensor
int sensorValue = 0;  // variable to store the value coming from the sensor

void setup() {
  // declare the ledPin as an OUTPUT:
   Serial.begin(9600);
}

void loop() {
  // read the value from the sensor:
  sensorValue = analogRead(sensorPin);
  delay(1000);
  Serial.print("sensor = " );
  Serial.println(sensorValue);
}
Read Sensor Value for a While
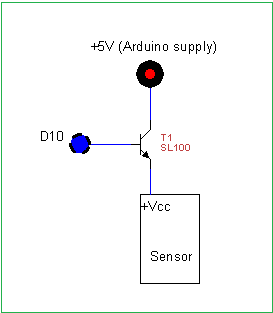
The sensor pads gets corrosion when the current continuously passed through the sensor. Here is the code to take reading at particular time for data logging.
Before that make the given circuit between Arduino board and Soil moisture sensor. Here the SL100 (NPN) transistor acts as a switch to control the supply to Sensor. When the D10 pin of Arduino goes high the sensor will get power supply if the D10 goes low the sensor disconnected from the power supply.
Soil Moisture Sensor and Arduino Code
int sensorPin = 0;    // select the input pin for the Soil moisture sensor
int sensorValue = 0;  // variable to store the value coming from the sensor

int sensorVCC = 10;

void setup() {
  // declare the ledPin as an OUTPUT:
   Serial.begin(9600);
   pinMode(sensorVCC, OUTPUT);
   digitalWrite(sensorVCC, LOW);
}

void loop() {
  // power the sensor
  digitalWrite(sensorVCC, HIGH);
  delay(100); //make sure the sensor is powered
  // read the value from the sensor:
  sensorValue = analogRead(sensorPin);
  //stop power
  digitalWrite(sensorVCC, LOW);
  //wait
  delay(60*1000);//delay time change according to your need
  Serial.print("sensor = " );
  Serial.println(sensorValue);
}
Value Range
0 ~ 300 : Dry Soil
300 ~ 700 : Humid Soil
2-3 meters 🙂
Hello.
Thank you for your sharing.
What is the the equivalent of sl 100n transistor for this project ,cause is hard to find it at the market ?
Regards
Any low power switching transistor,
you can try BC547.
Hello. Why cannot I directly connect sensor VCC pin to Arduino digital OUT pin without transistor? Thank you.