
Last Updated on October 19, 2025
If you have ever wanted a tiny Arduino like board that directly plugs into USB and costs few cents, and runs your Arduino code, then say hello to the Digispark ATtiny85, It is a ATtiny85 SMD based tiny development board with USB A or Micro USB connector. This little board is powered by the ATtiny85 microcontroller and is a fantastic choice for small automation tasks, wearable electronics, and USB powered mini projects. It have external power option also. Lets see how to program the Digispark ATtiny85 using Arduino IDE without need for other Arduino boards as In System Programmer (ISP).
ATtiny85
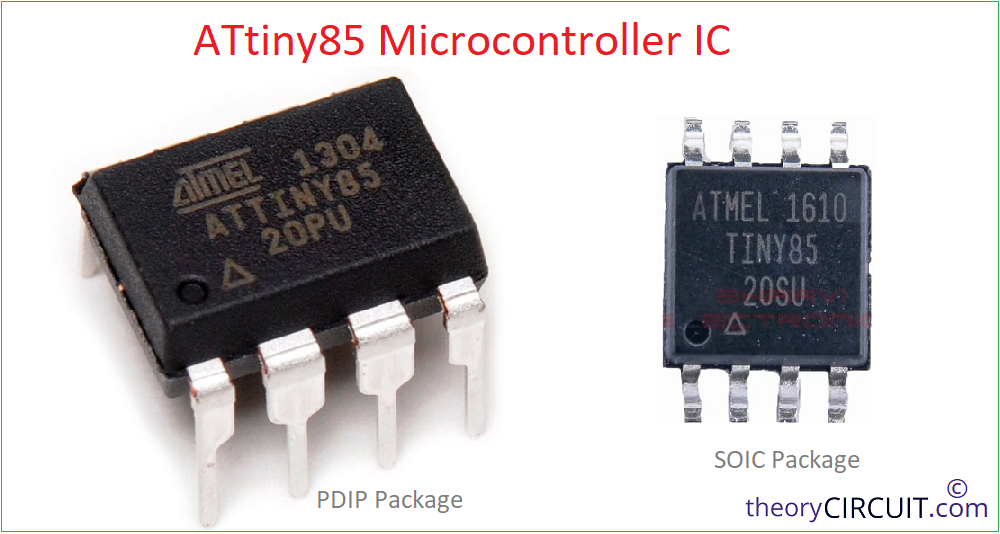
ATtiny85 is a small yet powerful 8 bit microcontroller from Atmel’s AVR family, I think its now with Microchip Technology. It is like a mini version of the Arduino Uno’s ATmega328P with some similarities in the Architecture, but packed into just 8 pins either in PDIP, SOIC or TSSOP package. It can be used to do embedded tasks such as blinking LEDs, reading sensors, generating PWM, or communicating via I2C and SPI.
Some notable features of ATtiny85 Microcontroller,
- 8 KB Flash memory
- 512 bytes SRAM
- 512 bytes EEPROM
- I2C pins
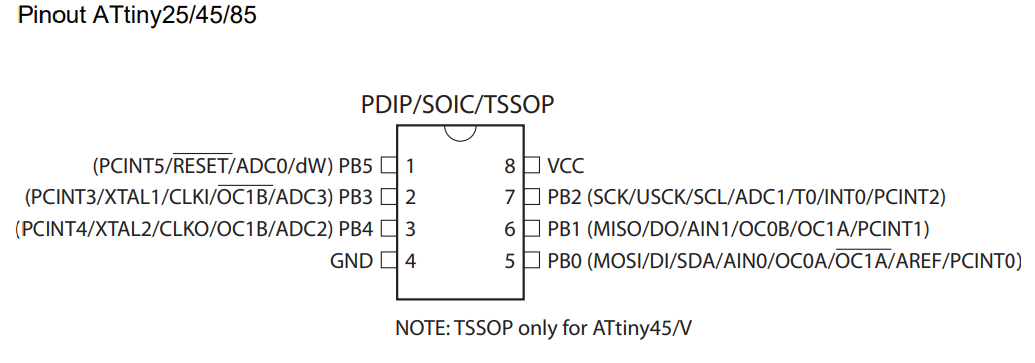
This microcontroller can operate from 1.8V to 5.5V DC supply, and you can choose different clock speeds from 1 MHz, 8 MHz (internal), or even 20 MHz by using external crystal. With up to 6 I/O pins that can serve multiple functions (digital, analog, PWM, communication), ATtiny85 can easily adapt in IoT sensor nodes, wearables, and mini automation circuits, etc.,
You can easily program it using Arduino IDE, either through an Arduino Uno as ISP or Standalone with Micronucleus bootloader, Digispark ATtiny85 USB board comes with preloaded Micronucleus bootloader. ATtiny85 is a perfect choice when you want Arduino like functionality in a tiny, low-power, and cost-effective package.
Digispark ATtiny85 Development Board
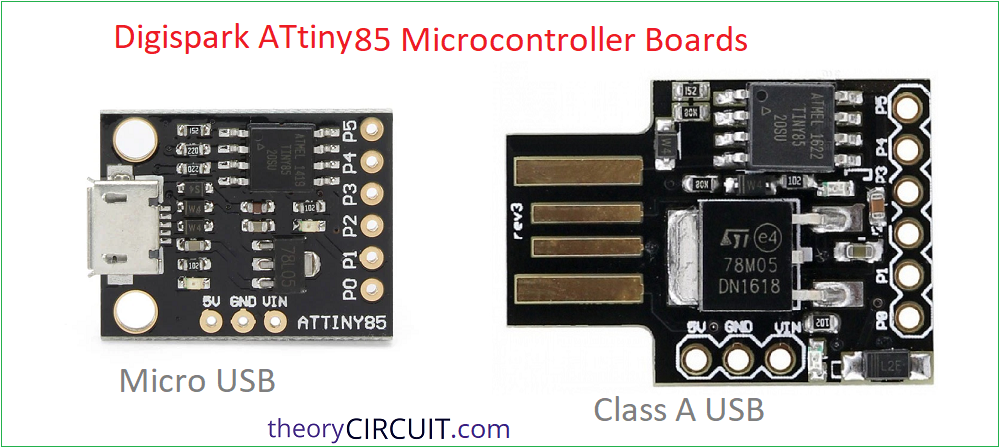
The Digispark is a small and USB capable (either Class A or Micro USB) development board based on the ATtiny85 microcontroller. Some similar clone versions are also available in market. Unlike bare ATtiny Microcontroller chips, this one already includes a USB bootloader that is Micronucleus bootloader file. So you don’t need any external programmer like an Arduino Uno or USBasp. Upload code from the Arduino IDE then Just plug it into your USB port and it runs!
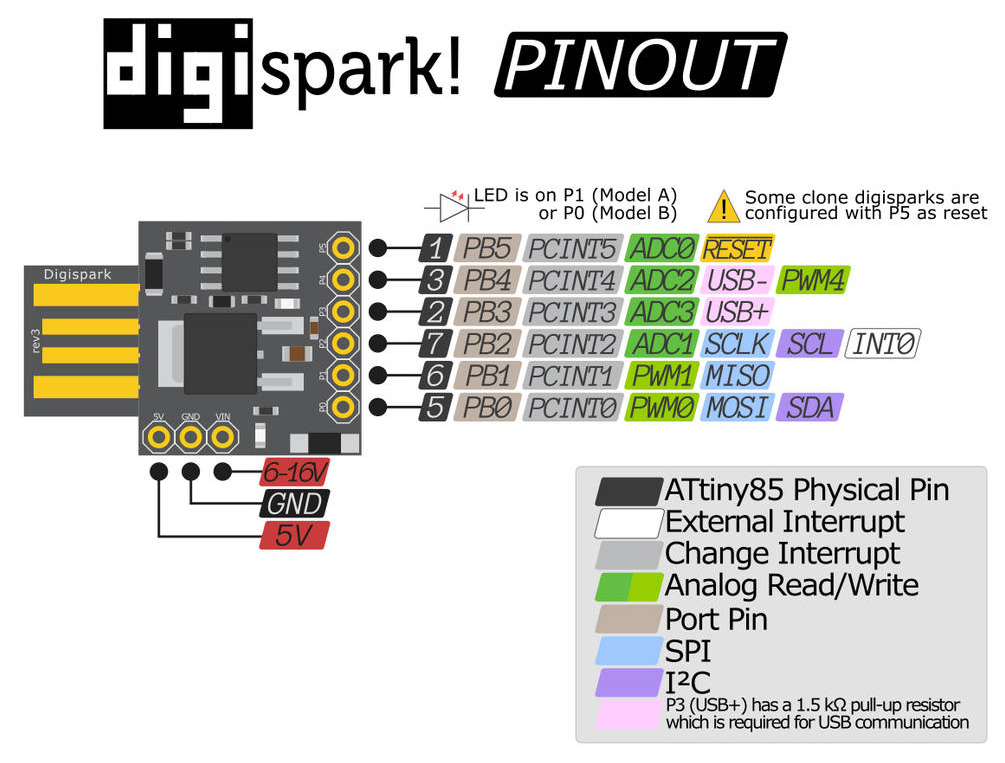
Digispark ATtiny85 Board Pinout
Lets Code ATtiny85 Development Board using Arduino IDE
To use Arduino IDE with ATtiny85, It must have Micronucleus bootloader. As previously said Digispark development boards comes with pre installed Micronucleus bootloader. So follow the steps,
Step 1: Open Arduino IDE (Do not Connect ATtiny85 board with computer) then Go to File > Preferences and then in Additional Boards Manager URL paste the given JSON link and click ok.
https://raw.githubusercontent.com/digistump/arduino-boards-index/master/package_digistump_index.json
Now the IDE will download package.
Step 2: After that click Boards Manager and Search for digistump and Install Digistump AVR Boards it will ask permission to Install Drivers in your computer allow it to install.
Step 3: Then Go to Tools > Board > Digistump AVR Boards > Digispark (Default – 16.5mhz) select this one.
Step 4: No need to Select Port, because it is going to be a virtual one, Make sure the Programmer as Micronucleus under tools.
Step 5: Upload the Arduino Code (without Connecting ATtiny85 Board with computer) and see the output terminal to show “Plug in device now… (will timeout in 60 seconds)” now connect ATtiny85 board with computer. Then your code will be uploaded to It.
ATtiny85 Onboard LED Blink Code
// ATtiny85 Blink Example
void setup() {
  pinMode(0, OUTPUT); // Pin 0 on ATtiny85 (physical pin 5)
}
void loop() {
  digitalWrite(0, HIGH);
  delay(500);
  digitalWrite(0, LOW);
  delay(500);
}
Reference
Digistump Driver link for manual Installation: https://github.com/digistump/DigistumpArduino/releases
Micronucleus Bootloader link: https://github.com/micronucleus/micronucleus
How to Install Bootloader to ATtiny85 IC: https://learn.sparkfun.com/tutorials/how-to-install-an-attiny-bootloader-with-virtual-usb/all