
Last Updated on June 23, 2025
Arduino IDE and framework gives you hassle free coding experience but when you are trying to develop IoT or Embedded system products using microcontrollers like ESP32 in Arduino IDE then it becomes messy to handle. That is why recently i tried Visual Studio (VS Code) to program ESP32 and i can surely say its worth to try. Some special features that attracted me, better code navigation, smart auto suggestions and error checking and also it gives space to handle multiple files related to projects.
Here is the simple method I used to setup ESP32 development board in VS Code with PlatformIO and run a basic LED Blink code.
PlatformIO
Before we start to program ESP32 in VS Code we are going to install and use extension called PlatformIO IDE, you may ask what is PlatformIO? In simple words, it is a development environment that works inside VS Code and supports many boards like ESP32, Arduino, STM32, etc. It handles library management, board selection, upload, serial monitor and may be everything you need to code development boards. By using VS code and PlatformIO IDE extension you don’t need to open Arduino IDE again and again for multiple projects.
Tools and software Required
- ESP32 Development Board (I’m using ESP32 DOIT Devkit v1)
- USB Cable for esp32 board
- Internet connection (to install packages in VS Code)
- Visual Studio Code (if you don’t have just get and install)
Here is the Steps to code ESP32 using VS Code
Step 1: Install and open Visual Studio Code
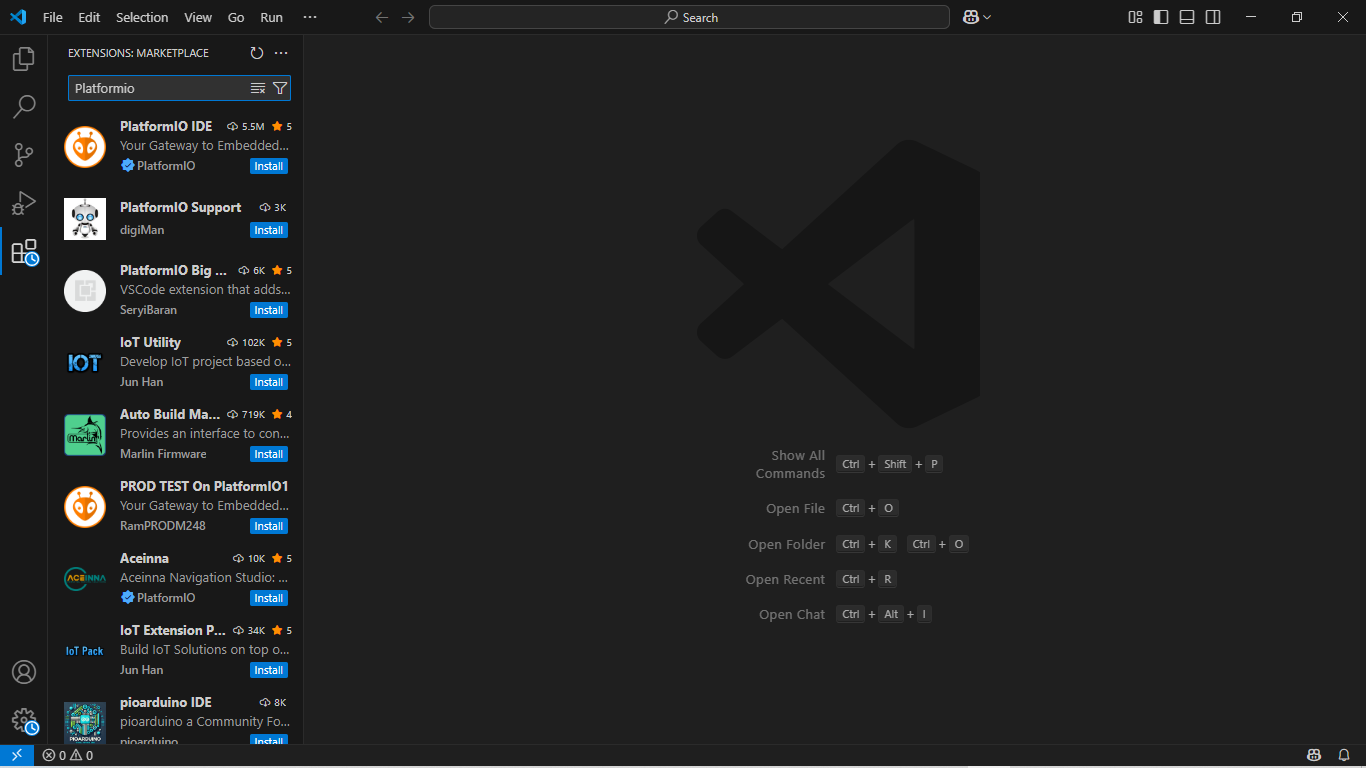
Step 2: Install PlatformIO IDE Extension, Go to the Extensions tab in VS Code and search for PlatformIO IDE and then click install, it may take some time to install core tools in the background.
Step 3: Open PlatformIO IDE by clicking PlatformIO Home icon (alien symbol in the left bar) then click New Project.

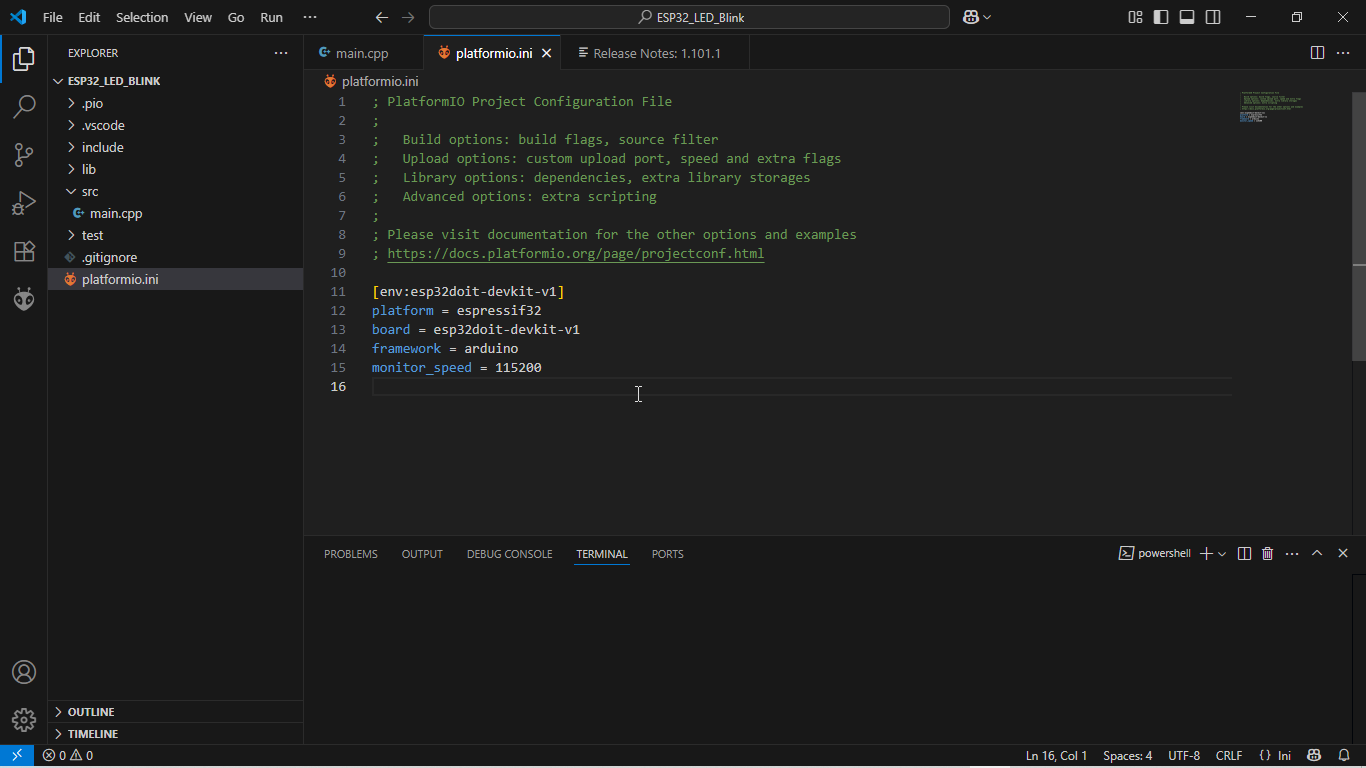
Step 4: Name your project as you wish (here i have tested it with simple on board LED blink example code), Select your board name (here ESP32 DOIT Devkit V1), and then Framework as Arduino. After click finish, the platformIO will make a folder structure for your project, and now you can write / edit code in src folder, main.cpp file.
Simple on board LED Blink Code
#include <Arduino.h>

#define LED_PIN 2  // Onboard LED

void setup() {
  pinMode(LED_PIN, OUTPUT);
}

void loop() {
  digitalWrite(LED_PIN, HIGH);
  delay(500);
  digitalWrite(LED_PIN, LOW);
  delay(500);
}
After save, then its time to upload code to ESP32 board.
Connect ESP32 board with Computer and note the port number, mostly VS Code-PlatformIO IDE auto detect port number depends on the selected board. Then click the (✓) symbol in the bottom bar for compiling and (→) symbol for uploading code (This will take some time during the initialization upload), After successful upload you can see the on board LED blink every 500 millisecond.
If you want to use serial monitor then you have to edit, platformio.ini and add – monitor_speed = 115200 this line. After that edit code to view the serial output.
LED Blink Code with Serial Monitor output
#include <Arduino.h>

#define LED_PIN 2

void setup() {
  Serial.begin(115200);          // Start Serial at 115200 baud
  pinMode(LED_PIN, OUTPUT);
  Serial.println("ESP32 is ready!");  // Print once after boot
}

void loop() {
  digitalWrite(LED_PIN, HIGH);
  Serial.println("LED ON");
  delay(500);

  digitalWrite(LED_PIN, LOW);
  Serial.println("LED OFF");
  delay(500);
}
After uploading, click plug icon (terminal) to see the serial monitor output. Now you are ready to program ESP32 with VS Code.