
Last Updated on February 21, 2026
If you have ever walked into a room or steps and watched the lights turn ON automatically then you have experienced the magic of PIR sensor at work. When I first started working with motion detection circuits, I started with PIR sensor, that is Passive Infrared sensor. It is called passive because it does not transmit any thing but detects changes in infrared radiation from surrounds by either human or animals.
HC-SR501 PIR Sensor
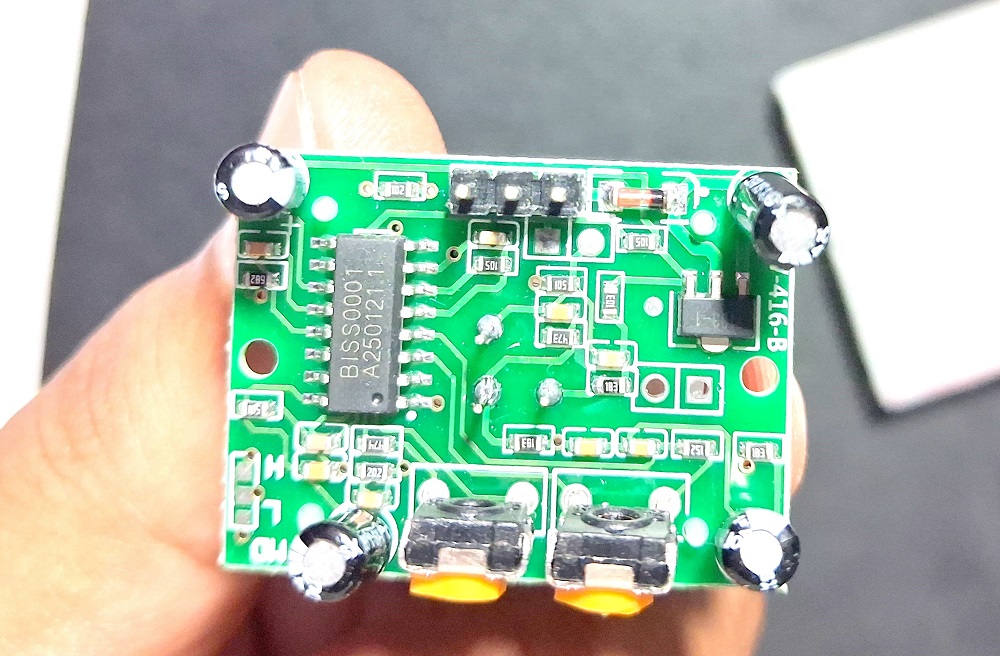
This is most commonly used module to detect motion without emitting signals. It only receives IR radiation, so the power consumption is very low. This module have PIR sensor element about 5mm in diameter containing Pyroelectric sensing element then detector and amplifier circuit using BISS0001 IC. Here the sensor core generates tiny electrical signals when it detects changes in heat patterns through Infrared radiation.
The Fresnel lens dome is a critical optical component, it may look like plastic protective cover but it is not. It have multiple segments or facets each with slightly different angle and these facets focus infrared radiation from different direction onto the small sensor element below., like eyes that can see in multiple directions.
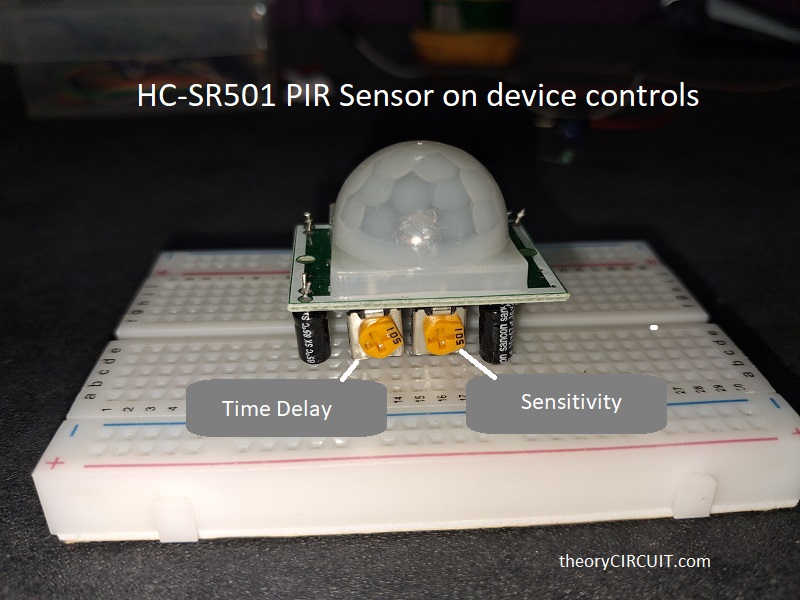
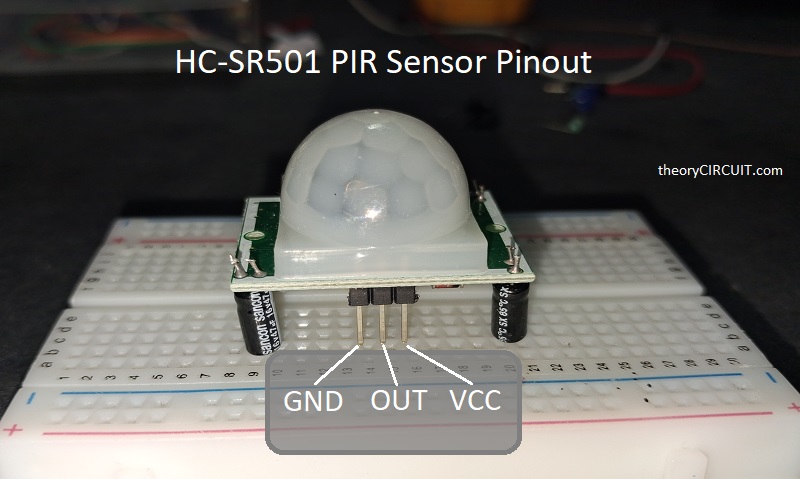
On board two potentiometers named Sx and Tx provides control over Sensitivity and Time delay. We can adjust the sensitivity depends on the application. PIR sensor operates with 5V to 20V DC power supply and gives logic output as HIGH (3.3V) and LOW (0 or GND).
Sensitivity adjustment provides controls over detection distance and time delay adjustment provides output delay control from 5 seconds to 300 seconds. You can set the trigger modes by changing the MD jumper. Here H mode is repeatable trigger and L mode is non repeatable trigger.
Simple Application Circuit of PIR Sensor
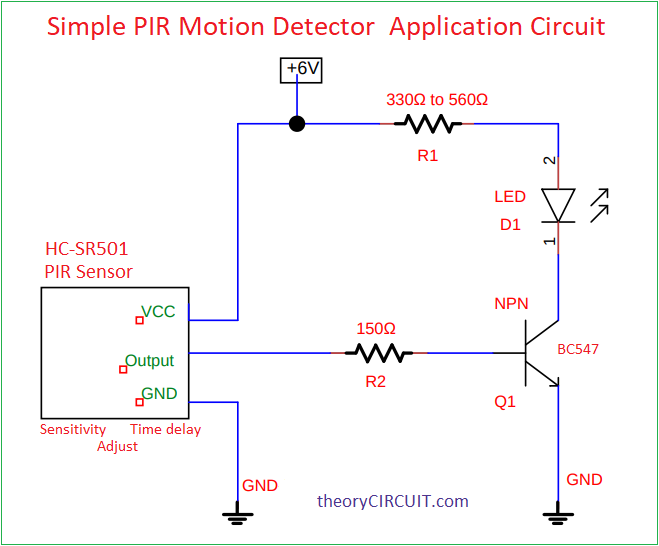
Components Used
- HC-SR501 PIR motion detector sensor
- BC547 (NPN) Transistor
- 5mm LED
- Resistors 330Ω, 150Ω
- 6V DC supply source
- Connecting wires
PIR Sensor Standalone circuit on Breadboard
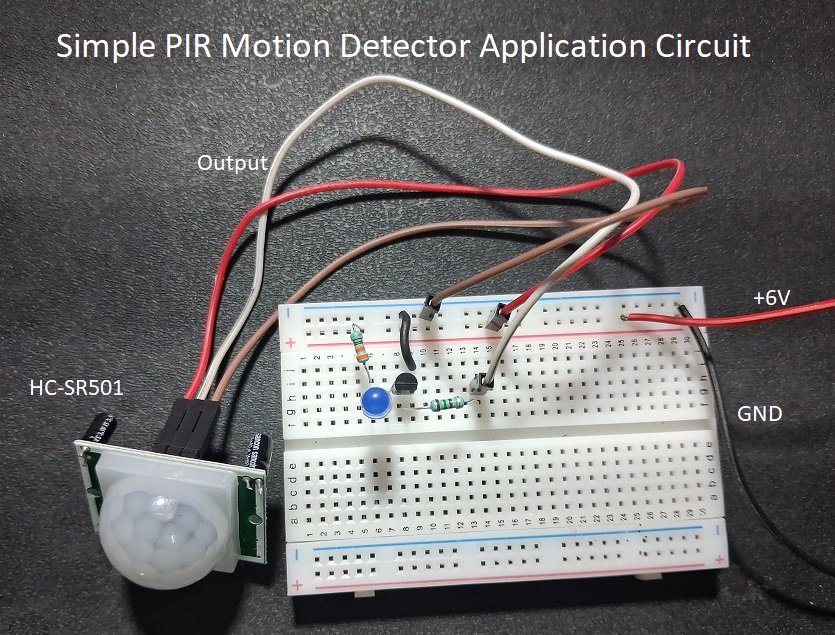
Construction & Working
Connect all components together using wires as shown in circuit diagram and apply power supply, now this circuit detects the changes temperature in the surrounding through Infrared and produce logic output signal. Here I have used one simple LED and whenever the PIR sensor detects motion through IR changes, it gives output HIGH for few seconds and the LED starts to glow, then PIR sensor output goes low and LED off, PIR sensor waits for another IR changes. If you use any relay then you can control high power lights through this circuit, so this circuit acts stand alone controller.
If you want more control then you can use any microcontrollers and interface this PIR sensor and control your lights, alarm or appliances.
PIR Sensor HC-SR501 in Action
