
Last Updated on November 2, 2024
By using Arduino and IR Receiver TSOP 1738 (in our project, you can use any IR receiver available, Check the datasheet for its specifications and pinout) we can decode any infrared remote code into hex or some other format. Before constructing the circuit check datasheet of IR receiver having in your hand, hence you can connect proper bias pins and output pin. (IR = Infra Red light). This Arduino universal IR remote Receiver can be programmed to receive any IR remote signal and can be programmed to control any appliances.
An IR Remote control is a Common device in every house, IR Remote Control uses Infra Red rays to send Command signal to the Receiver device, this a kind of wireless communication that works in specific direction (IR rays should be directed towards IR Receiver).
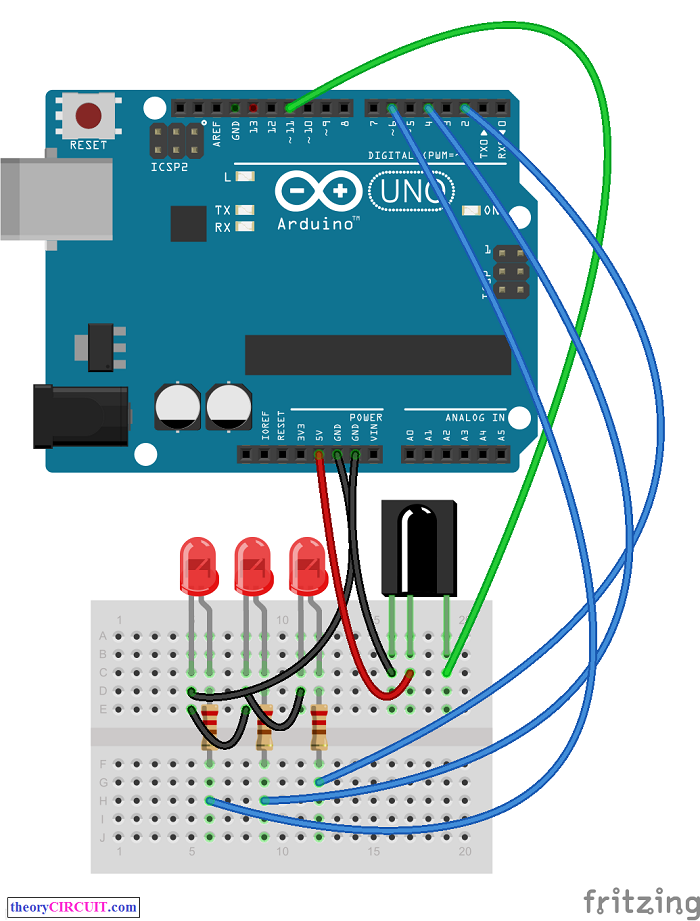
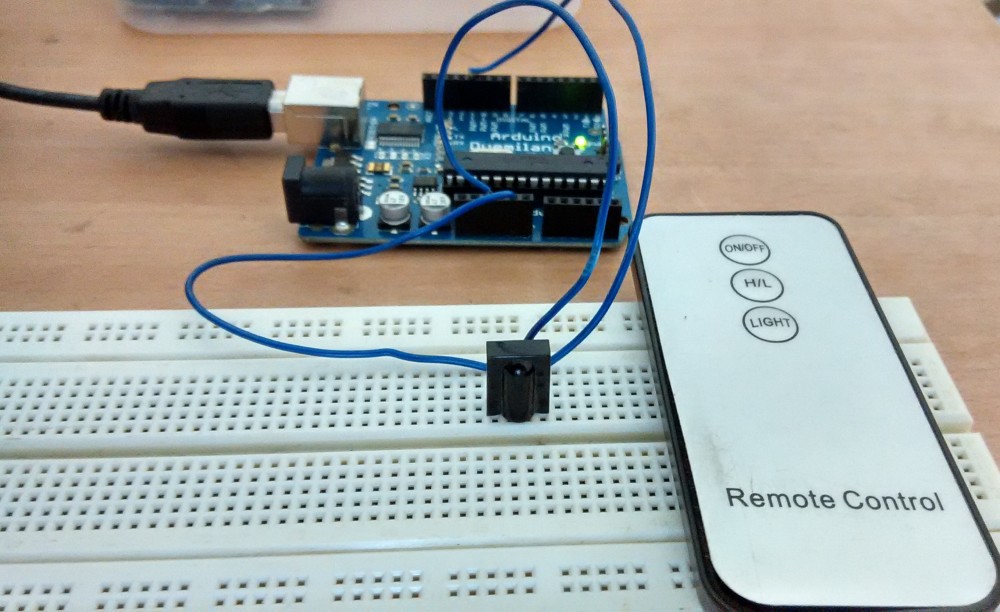
Arduino Universal Remote Control Receiver Hookup
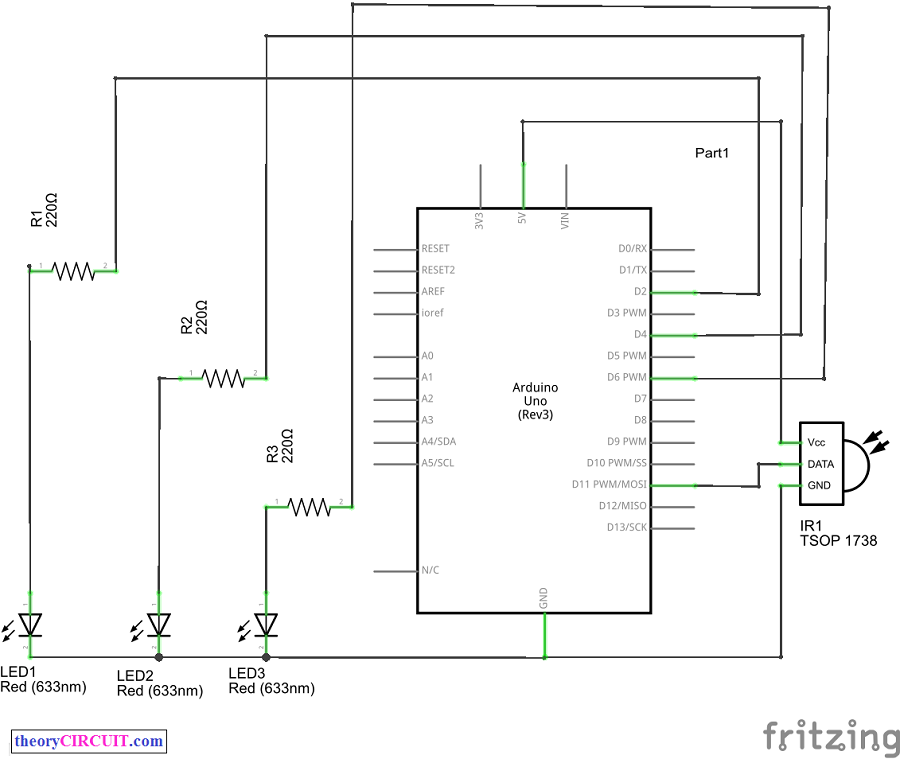
Circuit Diagram
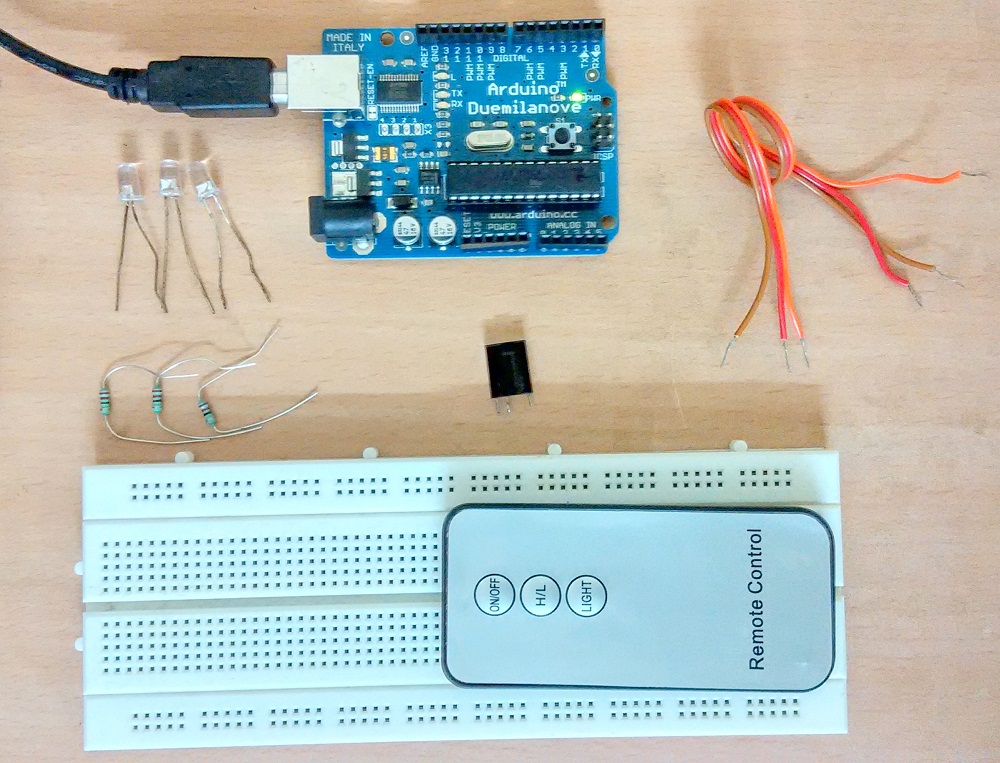
Components List
- Arduino Uno
- IR Receiver TSOP1738
- Resistor 220Ω = 3
- LED = 3
- Connecting Wires
Working Video!
Construction & Working
Most Common IR remote controls are using HEX code format to send the command to IR receiver by using Pulse frequency range of 30 kHz to 60 kHz. In order to build Universal Arduino IR Receiver device, we need a IR Photo Module Receiver that is capable of detecting 30 kHz to 60 kHz IR pulse. In this Project we used TSOP1738 component, which is good for 38 kHz IR remote controls.
TSOP17XX series are miniaturized receivers for infrared remote control systems. PIN diode and preamplifier are assembled on lead frame, the epoxy package is designed as IR filter. The demodulated output signal can directly be decoded by a microprocessor. TSOP17.. is the standard IR remote control receiver series, supporting all major transmission codes. For more information refer datasheet.
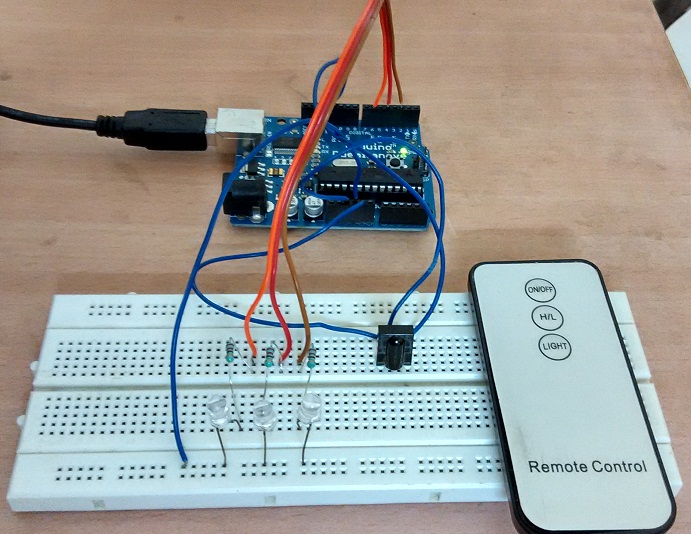
In this project we are going to decode IR Remote control buttons (any three) through serial monitor and going to program the Arduino to control Three LEDs by using that HEX code. Connect all the components as show in the connection diagram.
To read the IR rays from remote control by Arduino board we need an external library that is IRremote library, you can get IRremote library here. (how to insert new library in arduino IDE)
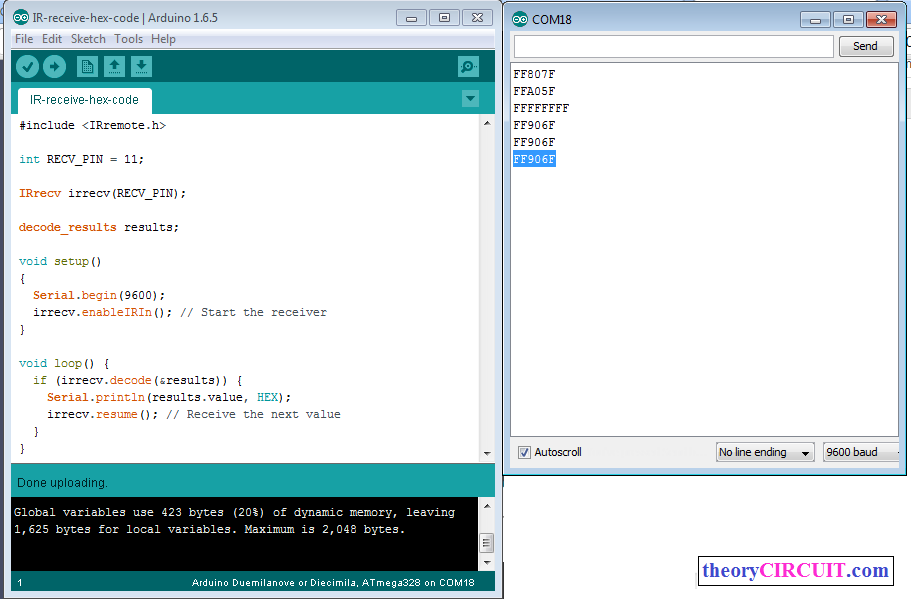
In this project first we have executed the IRrecvDemo example program from the arduino IR library example and decoded IR rays from remote.
(Note: If you have any error while running this library, remove “IRremoteTools.cpp” from libraries\RobotIRremote\IRremoteTools.cpp)
Arduino Code for Receiving IR as Hex code
#include <IRremote.h>

int RECV_PIN = 11;
IRrecv irrecv(RECV_PIN);
decode_results results;

void setup()
{
  Serial.begin(9600);
  irrecv.enableIRIn(); // Start the receiver
}

void loop() {
  if (irrecv.decode(&results)) {
    Serial.println(results.value, HEX);
    irrecv.resume(); // Receive the next value
  }
}
Screenshot
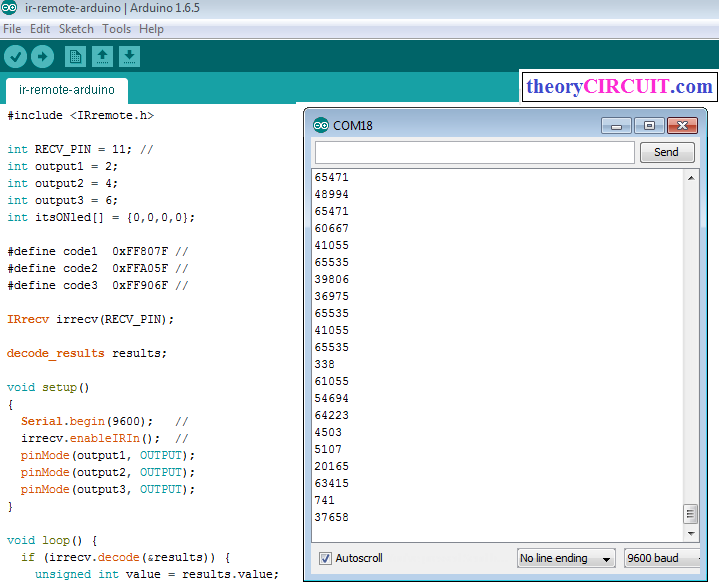
Then we used decoded data as switching condition in Arduino sketch to turn on and off the three LEDs.
Arduino Code For IR remote Control
#include <IRremote.h>

int RECV_PIN = 11; //
int output1 = 2;
int output2 = 4;
int output3 = 6;
int itsONled[] = {0,0,0,0};

#define code1  0xFF807F //
#define code2  0xFFA05F //
#define code3  0xFF906F //

IRrecv irrecv(RECV_PIN);

decode_results results;

void setup()
{
  Serial.begin(9600);   //
  irrecv.enableIRIn();  //
  pinMode(output1, OUTPUT);
  pinMode(output2, OUTPUT);
  pinMode(output3, OUTPUT);
}

void loop() {
  if (irrecv.decode(&results)) {
    unsigned int value = results.value;
    switch(value) {
       case code1:
         if(itsONled[1] == 1) {        //
            digitalWrite(output1, LOW);   //
            itsONled[1] = 0;           //
         } else {                      //
             digitalWrite(output1, HIGH); //
             itsONled[1] = 1;          //
         }
          break;
       case code2:
         if(itsONled[2] == 1) {
            digitalWrite(output2, LOW);
            itsONled[2] = 0;
         } else {
             digitalWrite(output2, HIGH);
             itsONled[2] = 1;
         }
          break;
       case code3:
         if(itsONled[3] == 1) {
            digitalWrite(output3, LOW);
            itsONled[3] = 0;
         } else {
             digitalWrite(output3, HIGH);
             itsONled[3] = 1;
         }
          break;
    }
    Serial.println(value); // you can comment this line
    irrecv.resume(); // Receive the next value
  }
}
In this arduino sketch we used
code1 as 0xFF807F
code2 as 0xFFA05F
code3 as 0xFF906F
you can change these code according to your remote key code received at Arduino serial Monitor from first Arduino sketch. (Arduino Code for Receiving IR as Hex code).
Screenshot
Prototype
Millones de gracias. Es la única página que me dio la respuesta para leer un IR… horas buscando y probando.
Te saludo desde Argentina
Millions of thanks. It is the only page that gave me the answer … to read an IR hours looking and testing.
I hail from Argentina
Thanks for your interest 🙂
the ir remote im using is giving different code everytime i press the same button , what can be done about this .
Remotes are designed to produce unique code for each buttons and you can’t get different code in single button.
Just Read the Hex code Once and Repeat then check with Serial monitor of Arduino.
Can i use smartphone ir?
Hi Gena
Sure, you can use smartphone IR. For that you need any IR remote app installed in your smartphone.
gracias funciona al 100%