
Last Updated on March 16, 2024
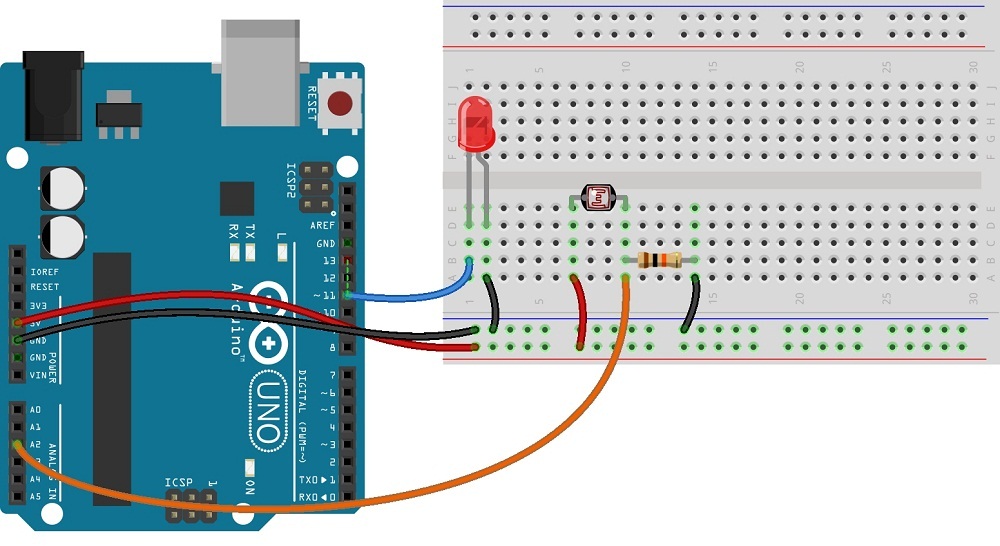
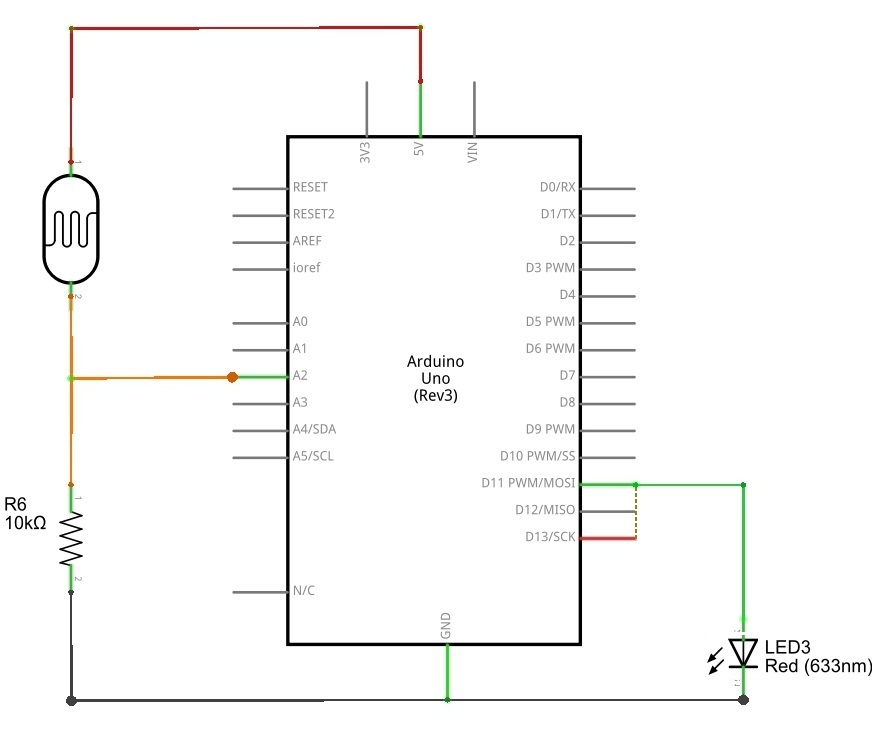
LDR (light depended resistor) or photocell sensor, when the light falls on this sensor resistance across the device gets low otherwise when the light intensity decreases the resistance of photocell increases.
By using this sensor we can measure light intensity or control light operated alarm circuit. To understand the simple operation of this photocell, it is connected with arduino board hence we can receive the sensor value in serial port and the output LED intensity according to sensor value.
Circuit diagram
Arduino Photocell (LDR) Sensor sketch code
[code]
/*www.theorycircuit.com*/
int ledPin = 3;
int photocell = 0;
void setup() {
pinMode(ledPin, OUTPUT);
Serial.begin(9600);
}
void loop() {
photocell = (analogRead(0)/4); // Divides input 0-1023 to resemble to 0-255
analogWrite(ledPin, photocell);
Serial.print(photocell);
// The delay can be change to get the desired dimming effect
delay(20);
}
[/code]
Components List
| S.No | Name | Quantity |
| 1. | Arduino uno | 1 |
| 2. | Photocell (LDR) sensor | 1 |
| 3. | LED | 1 |
| 4. | Resistor 10K Ω | 1 |
| 5. | Connecting wires | as required |
Respect to author, some great selective information.
Thanks for your interest
Someone in my Facebook group shared this website with us so I came to take a look. I’m definitely loving the information.
Thank you for your interest 🙂
Keep in touch!
Thanks for your interest 🙂