
Last Updated on April 19, 2025
We know that python is a high level interpreted programming language, having wide applications, large ecosystem and cross platform ability. But MicroPython is a light weight version of python with built in GPIO Control, which is most suitable for Microcontrollers and Embedded Systems.
ESP32 Microcontroller can be programmed with micropython and it is very useful in making quick prototype or test ideas. There are many micropython IDEs like Pycharm, IDLE etc., available but Thonny is open source and suitable for beginners. Now lets get start to code ESP32 with micropython using Thonny IDE.
You Need to Have
- ESP32 Development Board (here we have DOIT Devkit V1)
- USB Cable (suitable for your board)
- Computer with Internet connection
Step 1 : Install Python and Thonny IDE
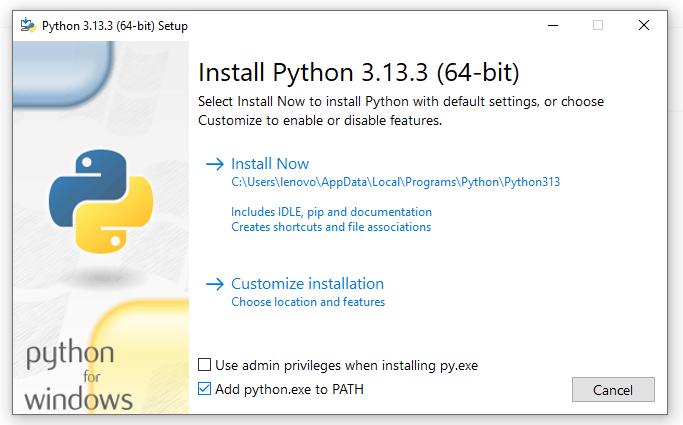
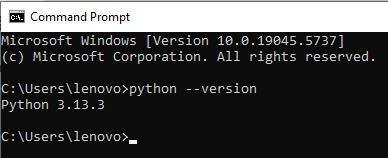
Make sure that you have Installed latest python on your computer. You can get it from python.org, Check the box that says “Add python.exe to PATH” and then click install now. After that check it through command prompt by typing “python –version” or “python – V“.
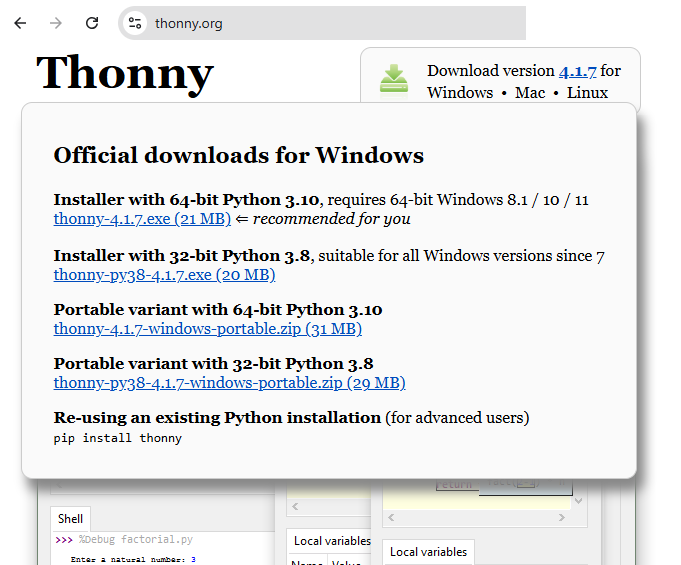
Go to thonny.org website and download latest version IDE and Install it on your computer. After that launch Thonny. Remember you don’t need to Install python separately, If you are installing thonny through installer and if you are installing it through pip then you need to install python separately.
After opening Thonny IDE, just check the ESPtool plugin, “Tool > Manage plug-ins..” search “esptool” if it is not installed by default then you should install it.
Step 2 : Download the Latest MicroPython firmware for ESP32
Go to “micropython.org/download/esp32” page and download the micropython firmware for ESP32 to a known location. (you can get specific firmware for your development boards)
Connect ESP32 board with computer and note down the port number which computer allocates for ESP32 board. Open Thonny IDE and go to “Tools > Options.. > Interpreter” then choose micropython (ESP32) as a Interpreter then choose exact port of ESP32 which computer allocates for your board.
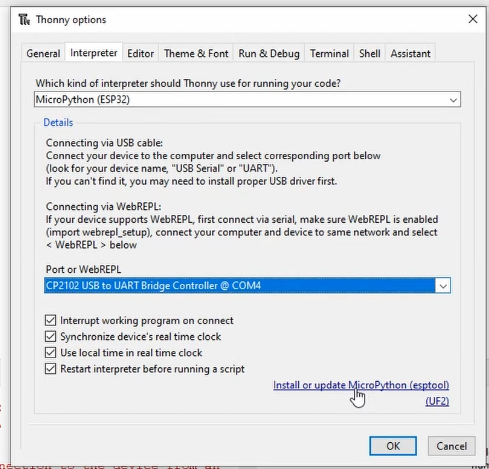
Then click “Install or update MicroPython” link, here new window appear, Select Target port as “Your board port in computer” like COM4, COM5 … then check the box of erase all flash before Installing.
Next choose micropython family as “ESP32“. Then click small button befor Install and choose “Select local micropython Image...” and load .BIN file which we downloaded before.

Now click Install, it will take a minutes to install. After done! your are ready to code ESP32 with micropython code.
Just press ‘EN’ button on ESP32 board that will display information about the board through shell.
Note – Some device may require to Press and Hold Boot button while installing firmware. If your board keep showing error then try this method.
If you want your board to run a specific code on boot or power on then you need to save it on python device and name it as either “boot.py” or “main.py“.
Video
LED Blink MicroPython Code
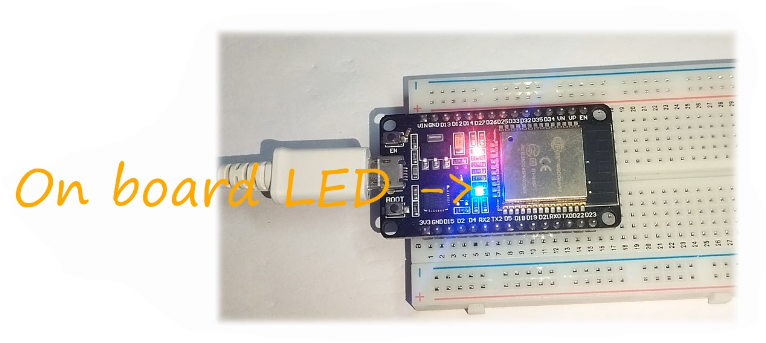
Lets make on board LED of ESP32 to blink every second.
from machine import Pin

from time import sleep

led = Pin(2, Pin.OUT)  # On-board LED is usually on GPIO 2

while True:
    led.value(1)
    sleep(1)
    led.value(0)
    sleep(1)
Press Run button on Thonny IDE,
Analog Read MicroPython Code
MicroPython code for reading LDR values (Analog value), that is sensor connected to GPIO2 pin.
from machine import ADC, Pin

from time import sleep

# Use GPIO34 (change this to your actual analog pin)

ldr = ADC(Pin(2))

# Configure ADC

ldr.atten(ADC.ATTN_11DB)       # Full range: 0 - 3.3V

ldr.width(ADC.WIDTH_12BIT)    # 12-bit resolution: 0 - 4095


while True:

    light_value = ldr.read()  # Read sensor value

    print("LDR Reading:", light_value)

    sleep(0.5)
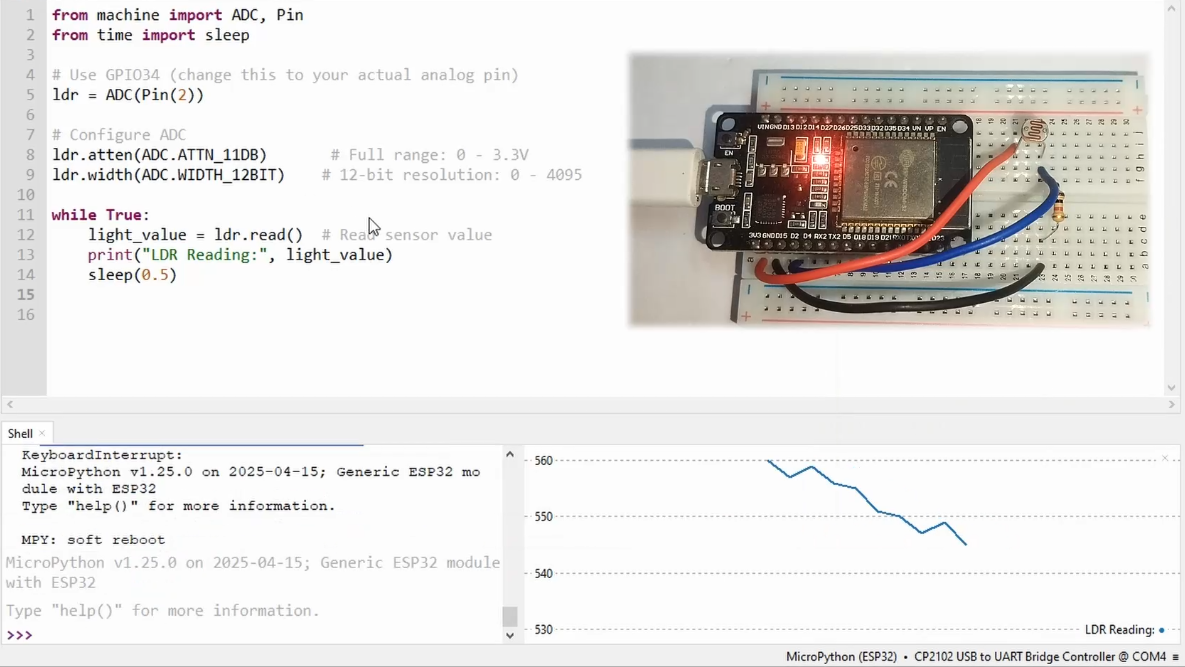
MicroPython Code works fine and fast on ESP32 board.