
Last Updated on March 16, 2024
An electromagnetic field Shortly EMF is a physical field produced by electrically charged objects and flow of current. It consists of both an electric field and a magnetic field, as we know which oscillate perpendicular to each other and propagate through space. These fields are main components of electromagnetic radiation, which includes a Wavelength ranging from radio waves to gamma rays. When electric field and magnetic field vary with time then they produce electromagnetic waves that is Electromagnetic field, It can be produced by various sources like power lines, electrical appliances, wireless communication devices, and electronics equipment. You may aware about some public concern and ongoing research regarding the potential health effects of prolonged exposure to certain levels of electromagnetic fields, particularly from sources like power lines or mobile phones. Here is the Simple Electromagnetic Field Detector using Arduino to detect and measure the level of EMF range from 0 to 100.
We are going to detect the Electromagnetic Field by using Faraday’s law of induction, Faraday’s first law of electromagnetic induction states that Whenever a conductor is placed in a varying magnetic field, an electromotive force is induced. This small level induced Voltage can be mapped from 0 to 1023 by using Arduino Code and through serial monitor we can measure the EMF value. You can use seven segment display or I2C LCD for standalone setup to measure EMF. Try Processing to plot the Graph of detected Electromagnetic Field.
Arduino Connection Diagram

Schematic
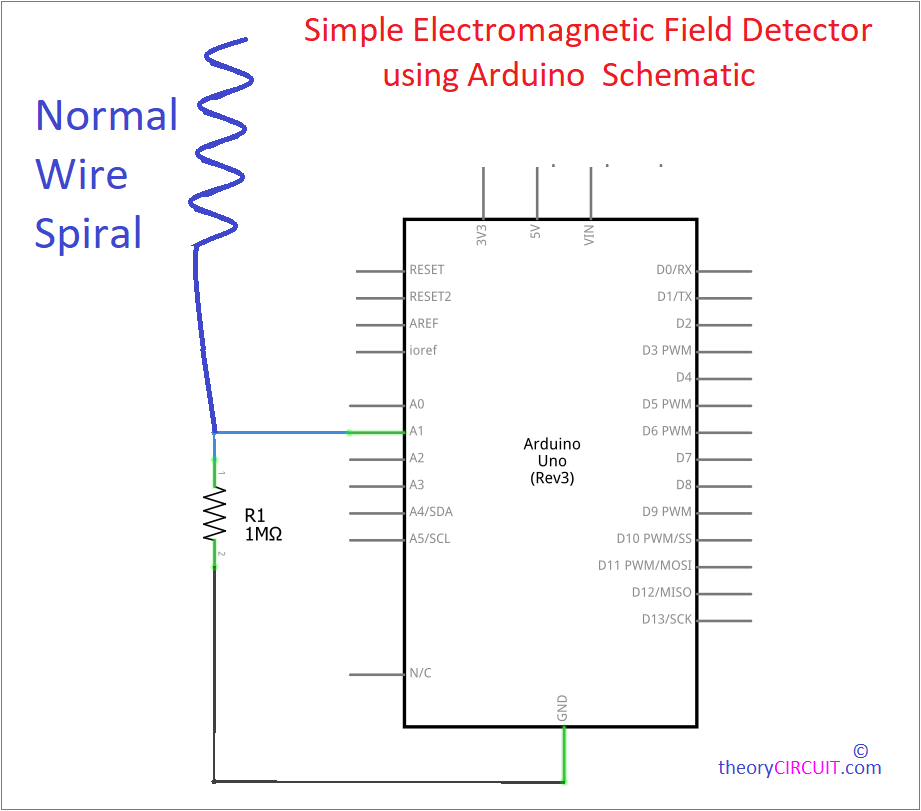
Components List
- Arduino Uno (Any Arduino board)
- 1MΩ Resistor
- Connecting Wires
- Spiraled single standard wire
- a to b usb cable for programing and Serial Monitoring
Construction & Working
Setup is very simple, take a single standard wire and make few spiral this going to be a Antenna wire to detect Electromagnetic field. Connect 1MΩ Resistor to the Gnd pin of Arduino then connect Another end of Resistor with Wire antenna and to A1 (Analog Input 1) pin.
Now Upload the following Arduino Code to the Arduino board through IDE and Open the Serial monitor For Electromagnetic Field reading, place the spiral wire near any electronic equipment and test it.
Arduino Code to Detect Electromagnetic Field
const int analogPin = A0;

void setup() {
  Serial.begin(9600);
}

void loop() {
  int sensorValue = analogRead(analogPin);

  // Map the analog reading from 0-1023 to 0-100
  int mappedValue = map(sensorValue, 0, 1023, 0, 100);

  Serial.print("EMF Value: ");
  Serial.print(sensorValue);
  Serial.print(" EMF Mapped Value: ");
  Serial.println(mappedValue);

  delay(1000); // Adjust delay as needed
}