
Last Updated on March 16, 2024
You may heard about FSR that is Force Sensitive Resistors some times called as force sensor or pressure sensor those are a type of sensor designed to detect and measure physical force or pressure applied to a surface. As name says, Electrical Resistance between terminals of FSR changes in response to the force applied. These sensors are particularly useful in applications where it’s necessary to quantify or monitor the intensity of force exerted on an object or surface. Interfacing Force Sensing Resistor FSR with Arduino gives lot of possibilities to measure the force on the go.
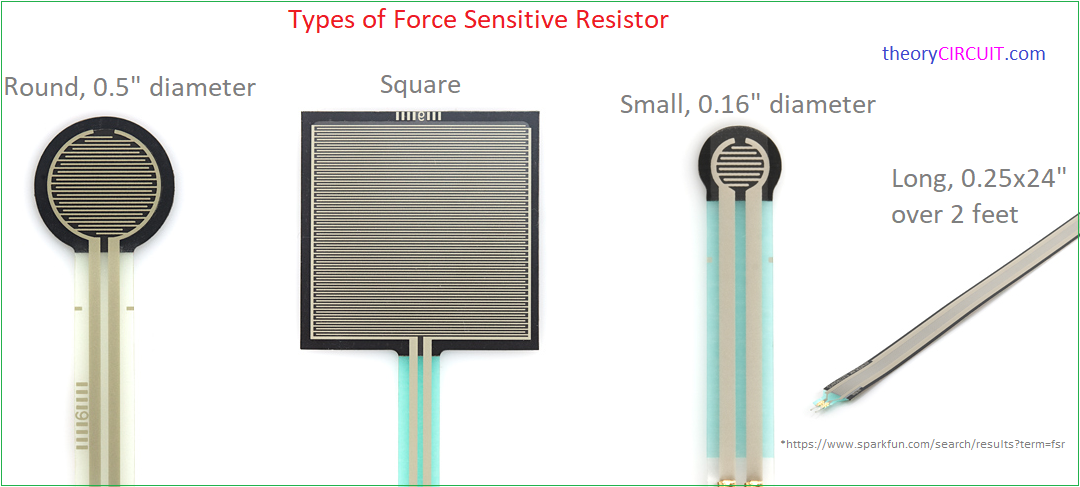
About FSR
Force Sensitive Resistor from interlinkelectronics comes in different Shape and size, allowing them to be adapted to specific applications. Whether integrated into electronic devices, interactive surfaces, or embedded within soft robotics, FSRs play a crucial role in translating physical interactions into measurable electrical signals.
How FSR Works?
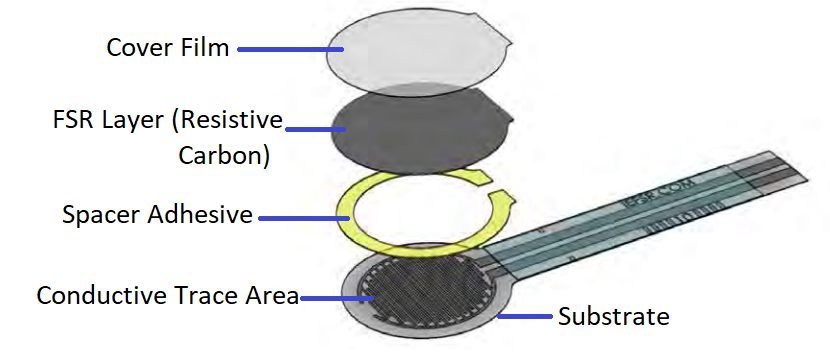
FSRs consist of a thin, flexible material with embedded conductive Trace Area and Resistive Carbon layer. These two layers are separated by Spacer Adhesive leaving some tiny space between them. When force is applied to the surface of the FSR through cover film, the Conductive Trace Area come closer to the Resistive Carbon, resulting in a decrease in electrical Resistance Value. The change in Resistance is proportional to the force applied on the FSR, FSRs are reliable tools for measuring force levels in various electronic and interactive systems.
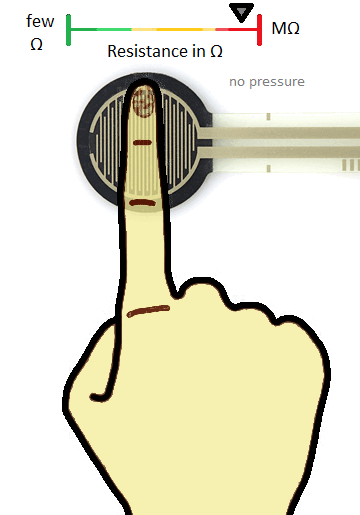
By default Most FSRs are have High Resistance when there is no pressure above it, that is greater than 1MΩ, Gives KΩ Range Resistance, When mild pressure applied to it. FSRs will give nearly few Ω Resistance when maximum force applied to it. Force required and Resistance value will be depend on the Shape and Size of FSR, refer related datasheet for more information.
Force Vs Resistance

Here is the relationship between Force (in Gram) and Resistance in (Ω), for Force Sensitive Resistor with a round shape and 0.5″ diameter sensing area. This Graph may change in according to the different sensor but you can get the point of operation from this graph.
Interfacing FSR
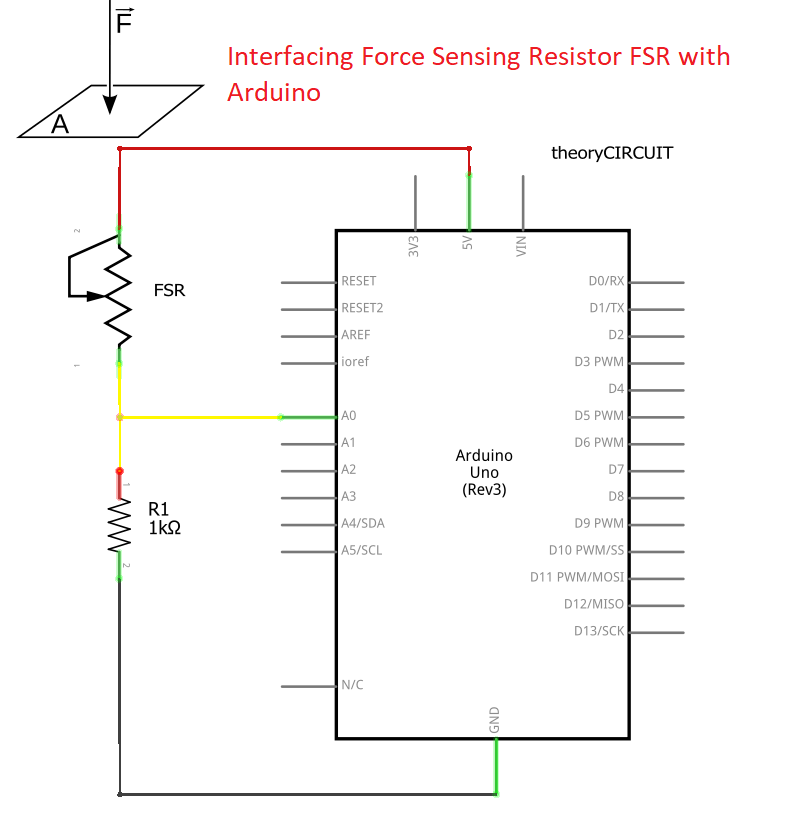
To Interface the FSR with Microcontrollers or in a Schematic we have to follow the Voltage Divider method to get proper output. Because it is very easy and common to sense the variable voltage by circuit or microcontroller.
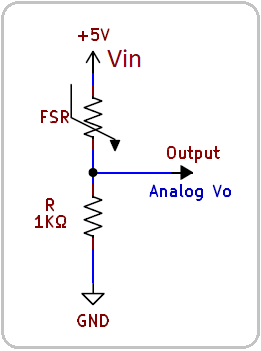
This varying voltage occurs by the Voltage drop of Pull down Resistor R, by changing the Value of R you can change the sensitivity level. Analog output Voltage (Vo) changes depends on the Resistance of FSR and the voltage drop in the pull down Resistor, it can be calculated as,

Voltage input (here 5V), pull down Resistor value and force applied to the FSR decides the Output Voltage Vo.
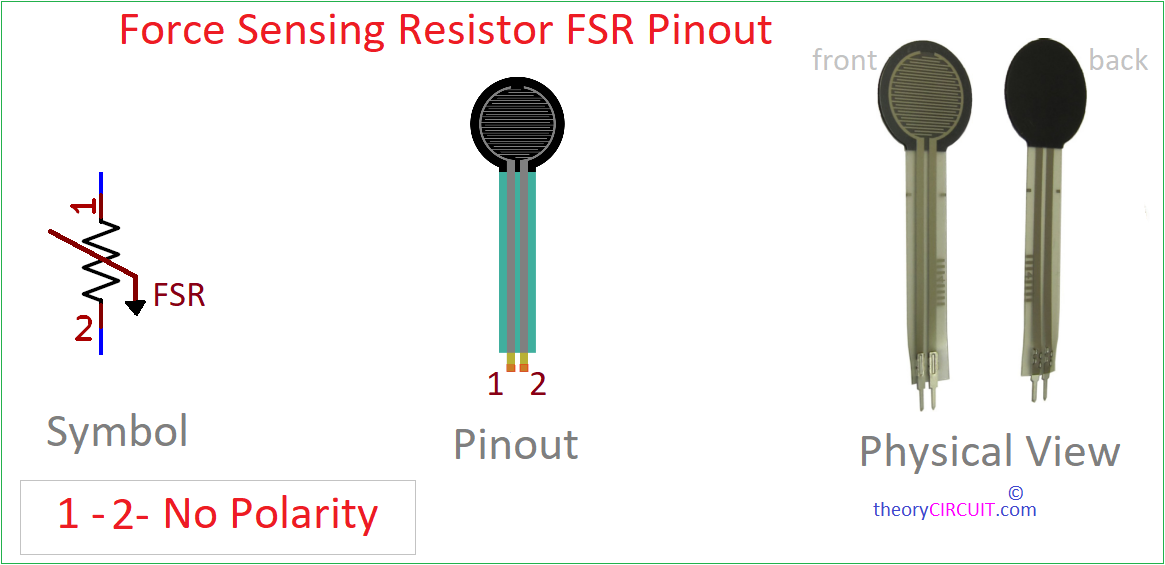
FSR Pinout
Connecting FSR with Arduino Uno
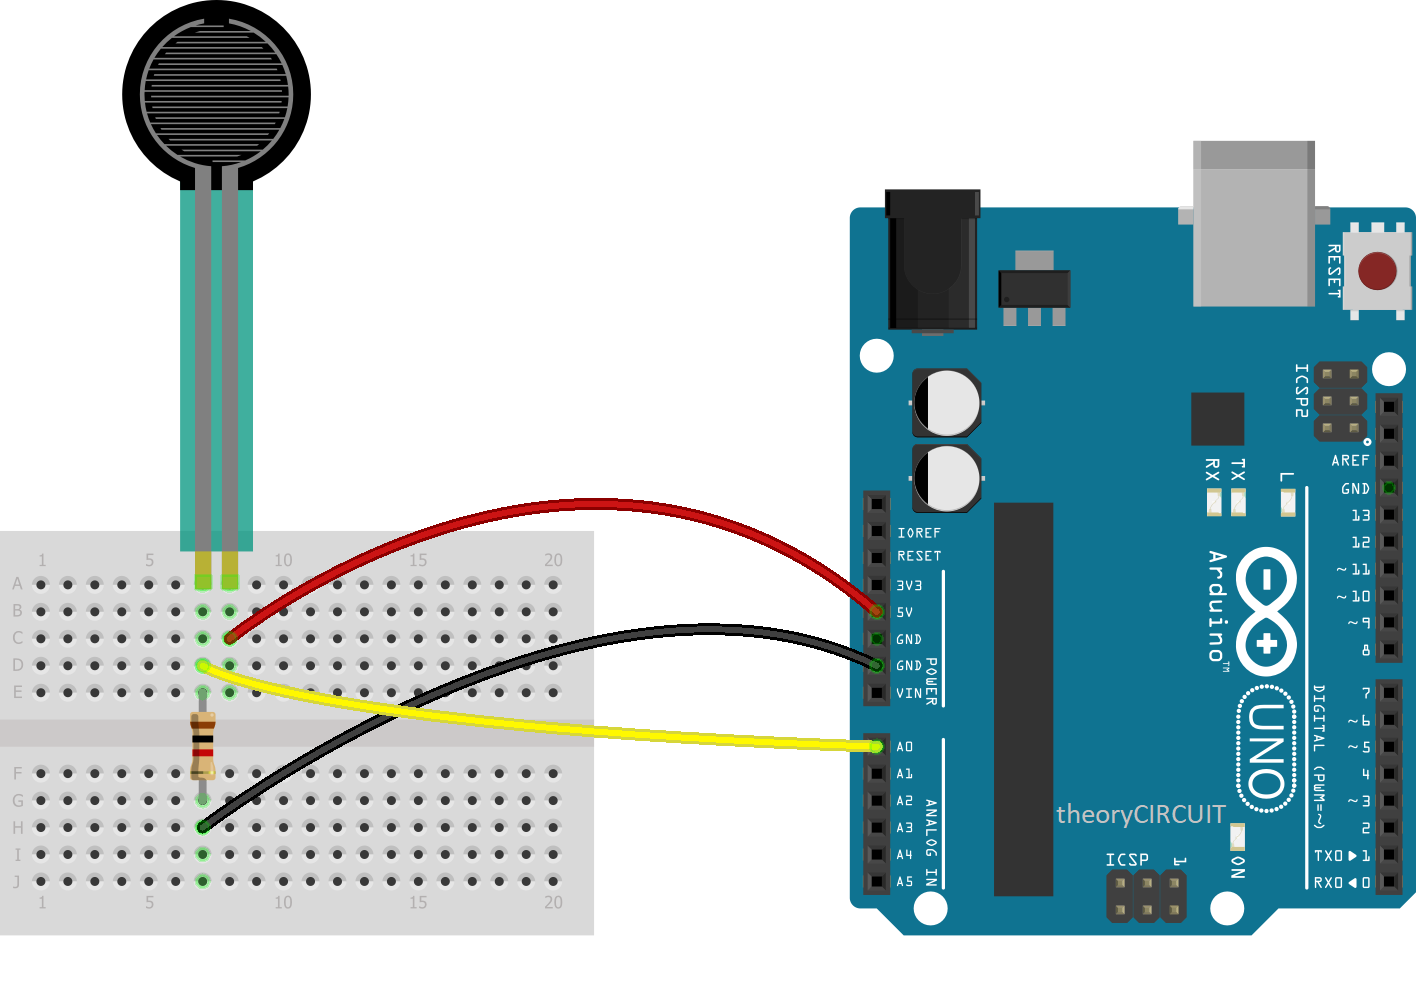
Here we have used Force Sensor Resistor with a round 0.5″ diameter sensing area and single Arduino uno, our intention is to measure the force applied to the FSR in Five stages through serial monitor. As previously said a Voltage divider circuit is formed by connecting 1KΩ Pull Down Resistor in Series with the FSR. Output from the Voltage divider is connected to the Analog Input A0 of Arduino board.
FSR with Arduino Circuit
After connecting wires upload the following Arduino code through ide to get the result of force applied to the FSR through Serial monitor.
FSR With Arduino Code
/* theoryCIRCUIT.com // don't remove this line
 *  Example Arduino Code to Test Force Sensitive Resistor (FSR) through Serial Monitor
 */
const int fsrPin = A0; // Connect FSR to Analog Pin A0

void setup() {
  Serial.begin(9600); // Initialize serial communication
}

void loop() {
  int fsrValue = analogRead(fsrPin); // Read analog value from FSR

  // Map the analog reading to force levels
  int forceLevel = map(fsrValue, 0, 1023, 0, 4);

  // Categorize force levels
  String forceCategory;
  switch (forceLevel) {
    case 0:
      forceCategory = "Very Light";
      break;
    case 1:
      forceCategory = "Light";
      break;
    case 2:
      forceCategory = "Moderate";
      break;
    case 3:
      forceCategory = "Strong";
      break;
    case 4:
      forceCategory = "Very Strong";
      break;
  }

  Serial.print("FSR Value: ");
  Serial.print(fsrValue);
  Serial.print("  |  Force Level: ");
  Serial.print(forceLevel);
  Serial.print("  |  Category: ");
  Serial.println(forceCategory); // Print force category to the serial monitor

  delay(500); // Delay for better readability, adjust as needed
}