
Last Updated on September 5, 2026
If you have been programming your ESP32 board with Arduino IDE and C++ and moving to MicroPython feels like a fresh start. By moving to micropython you can feel the speed difference in uploading a full sketch. For me its like switching between Hard Disk Drive to Solid State Drive. Yes there is no compiling, no waiting in micropython, You type a command and hit enter then the LED on the target board that is ESP32 turns ON immediately.
As we know Arduino released a small editor called Arduino lab for micropython, to make use of MicroPython language. It is a light weight tool with code window. Also it have a file manager for the board and an interactive REPL shell. For a beginners it is little difficult to start because it needs some initial setup. Once its done then it becomes so easy and fast.
Assuming you are a beginner and you download the Arduino Lab for MicroPython and plug in the ESP32 board and click connect and nothing happens. No Port appears, or the connection fails. Why it happens? the answer is, Arduino lab for micropython is only an editor not a compiler . So it expects the target board to already be running micropython firmware and a new ESP32 Devkit does not have that firmware from the factory. Also your computer must have python installed. Here is the simple way to make it.
Arduino Lab for MicroPython
It is an experimental and lightweight editor developed by Arduino for writing and running micropython programs on microcontroller boards. Arduino publishes early stage tools like this one in Arduino Labs web page. This editor connects to your board over a normal serial connection and once connected it gives you three things that are,
- Place to Write code
- File Browser
- Live REPL shell
Remember that this tool does not compile code, install firmware on target microcontroller and does not include board packages the way Arduino IDE does. It is thin and friendly front end on top of the MicroPython serial protocol.
Required Components
- ESP32 board (Here we used ESP32 DOIT Devkit V1)
- Computer with python installed
- USB Cable
Step 1: Install Python on Your Computer
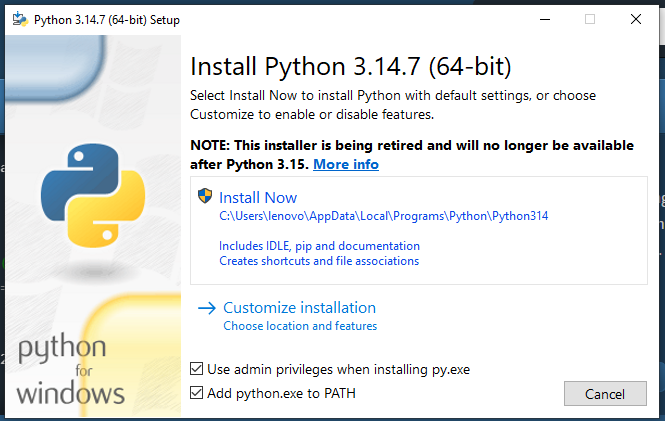
Open command prompt in your computer and check the python by typing and enter.
python --versionIf it brings values like Python 3.xx.x then you have it. Else visit python.org and download latest python suitable for your OS.
Step 2: Connect ESP32 with Computer
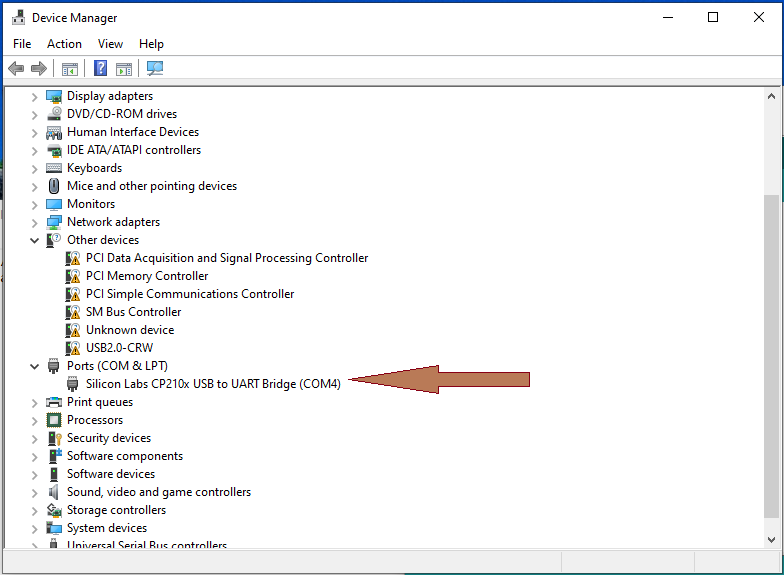
Just connect ESP32 board with computer and check whether it is showing in ports or not if connects then note down the port number (here we have port 4) or not connected then install required USB driver for your board and check.
Step 3: Install esptool
esptool is the official Espressif utility for writing firmware to ESP microcontroller. So install it with pip.
pip install esptool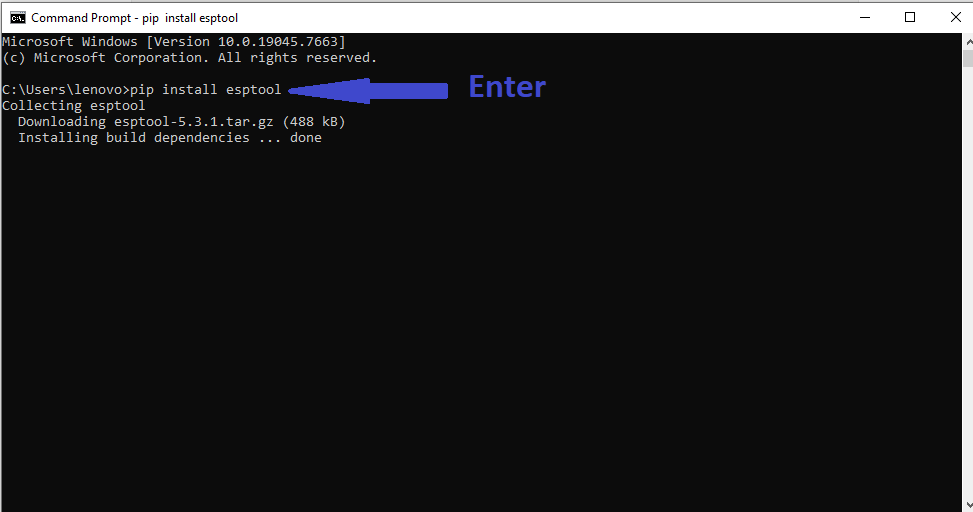
After Installing, Verify it through command,
esptool versionfor to know the full details, like target chip type and options use the follwing,
python -m esptoolStep 4: Download the micropython firmware
Just visit https://micropython.org/download/ and download the build that matches your exact board and microcontroller.
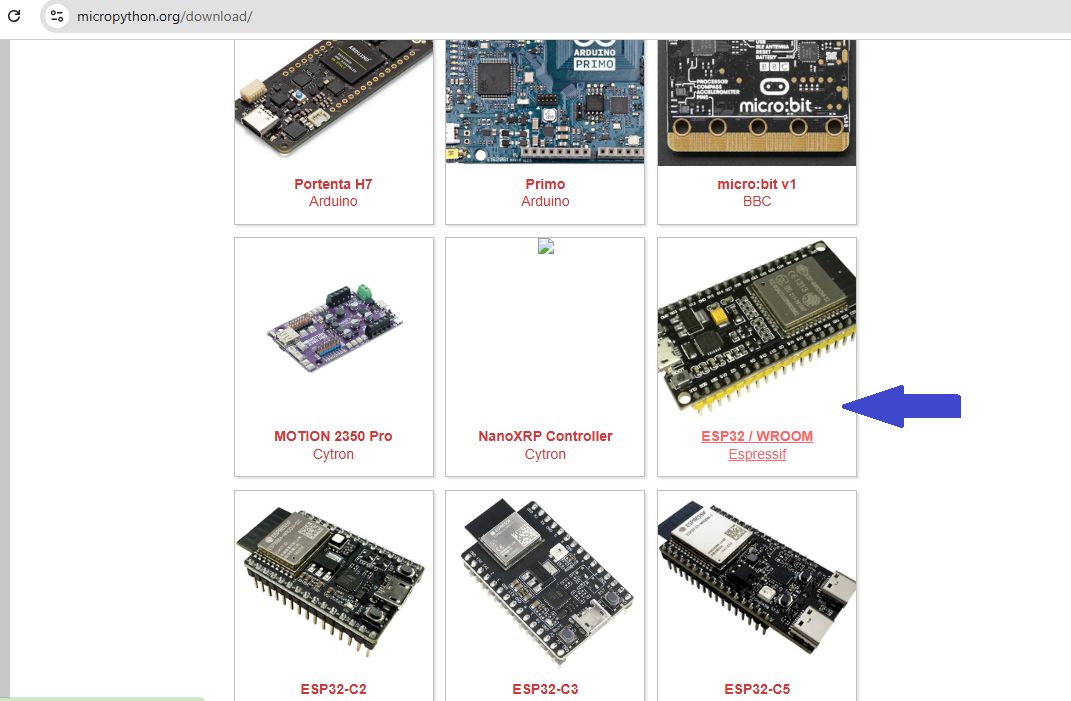
Here we use ESP32 DOIT Devkit V1 – ESP32_GENERIC. which is suitable for NodeMCU-32S, WROOM-32.
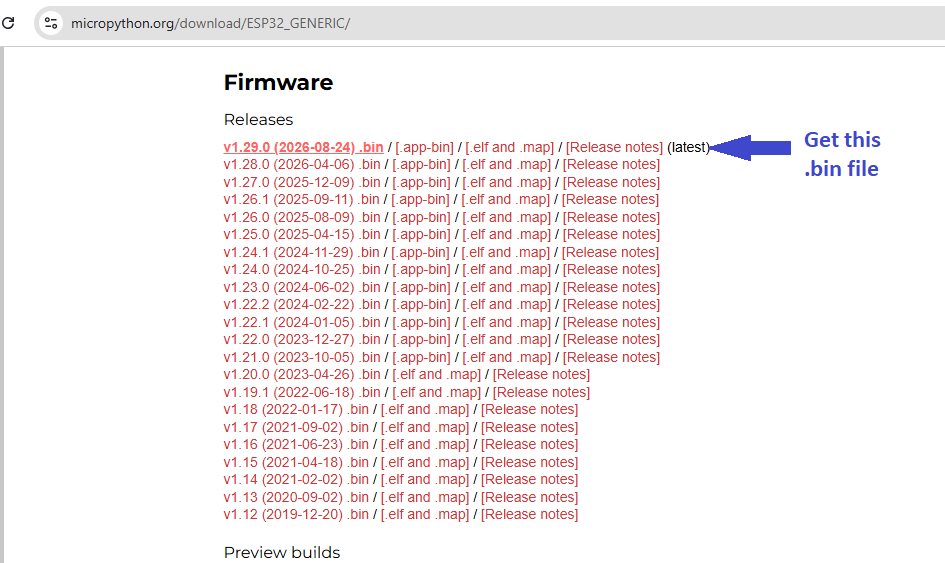
Just download the latest build marked as stable, and remember the download location of that .bin file.
Step 5: Erase the Existing flash
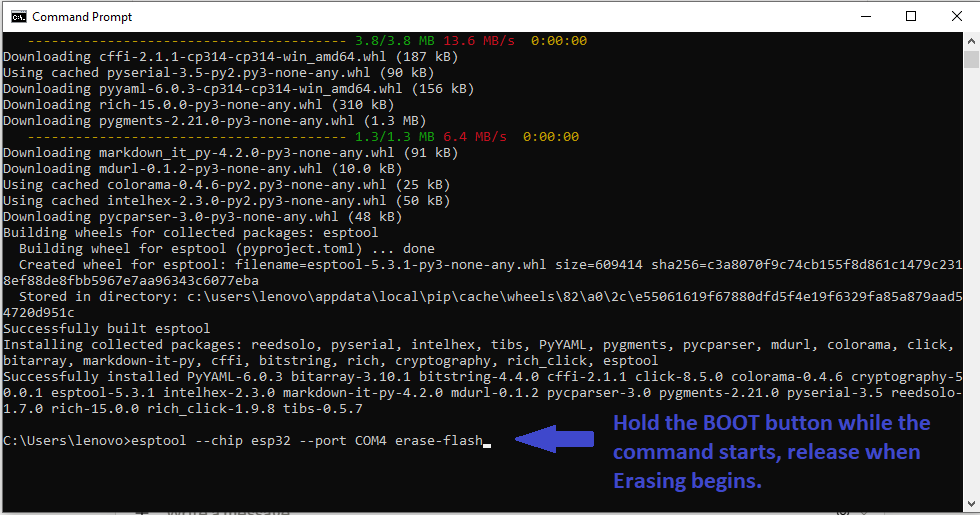
This step erase and clears out any old Arduino sketch and any stale partition table. This step is need for proper booting. Open the command prompt and type.
esptool --chip esp32 --port COM<your board port number> erase-flashexample
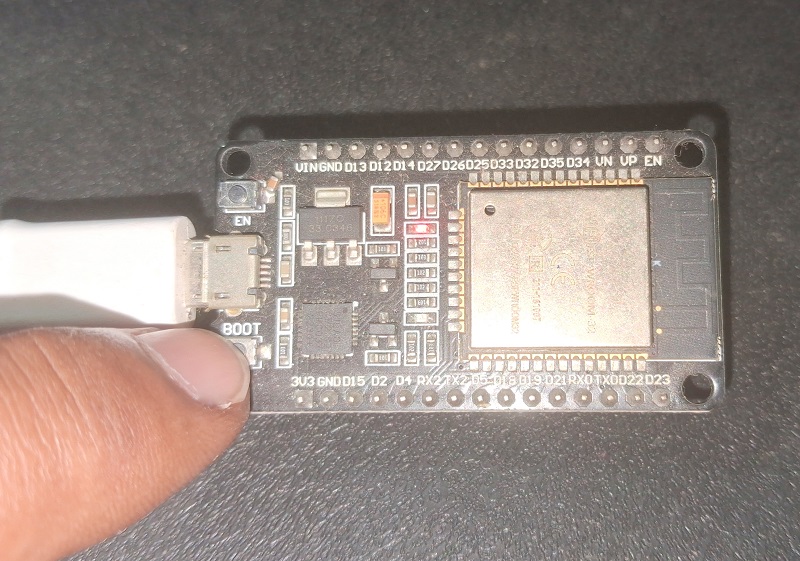
esptool --chip esp32 --port COM4 erase-flashBefore run this command after typing, hold down the BOOT button and run the command and then release BOOT button as soon as you see processing.
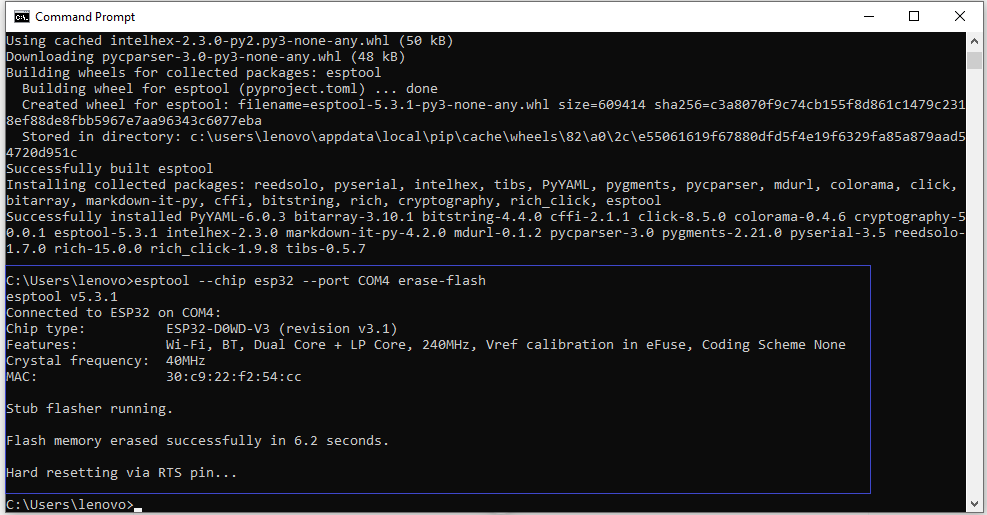
Step 6: Write the Micropython firmware
In the command prompt type and run to write the micropython firmware that is the file we downloaded as .bin from the micropython web page.
esptool --chip esp32 --port COM<Your board port number> --baud 460800 write-flash -z 0x1000 <downloaded firmware location, that .bin file>example
esptool --chip esp32 --port COM4 --baud 460800 write-flash -z 0x1000 C:\Users\lenovo\Downloads\ESP32_GENERIC-20260824-v1.29.0.bin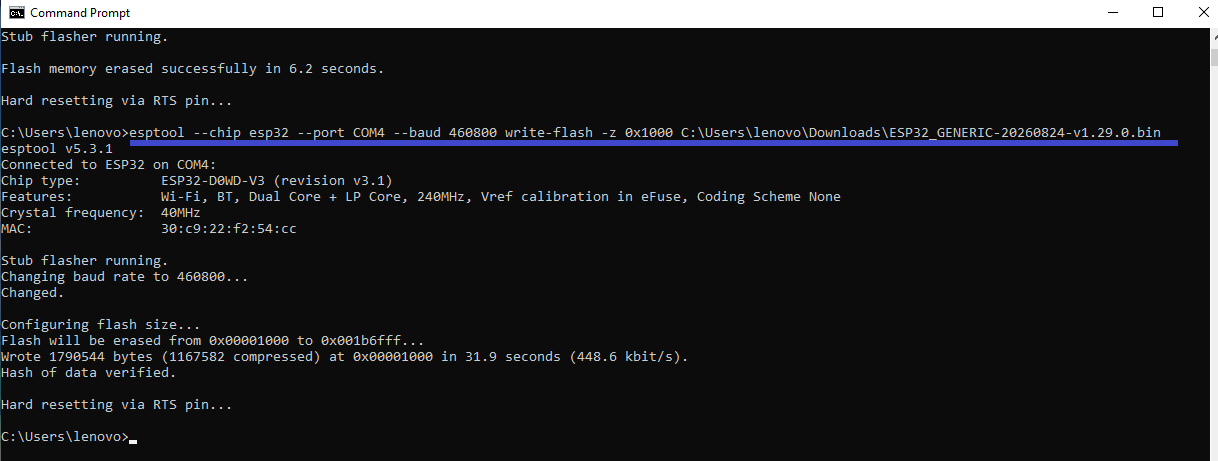
After write completes, just press the EN button on the board once to reboot the ESP32.
Step 7: Install Arduino Lab for micropython
You can easily download this Arduino lab for micropython from https://labs.arduino.cc/en/labs/micropython and there is no traditional installer. Just unzip the archieve into a folder and run the executable inside it.
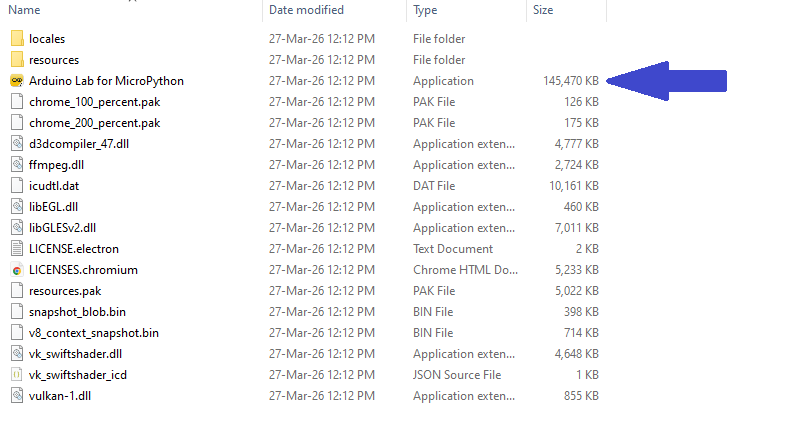
Step 8: Verify the connection with ESP32
Make sure that the ESP32 serial port is not held by any other program. Then click connect button in the tool bar and you must see the >>> prompt in the REPL panel, press EN button and try again if not showing.
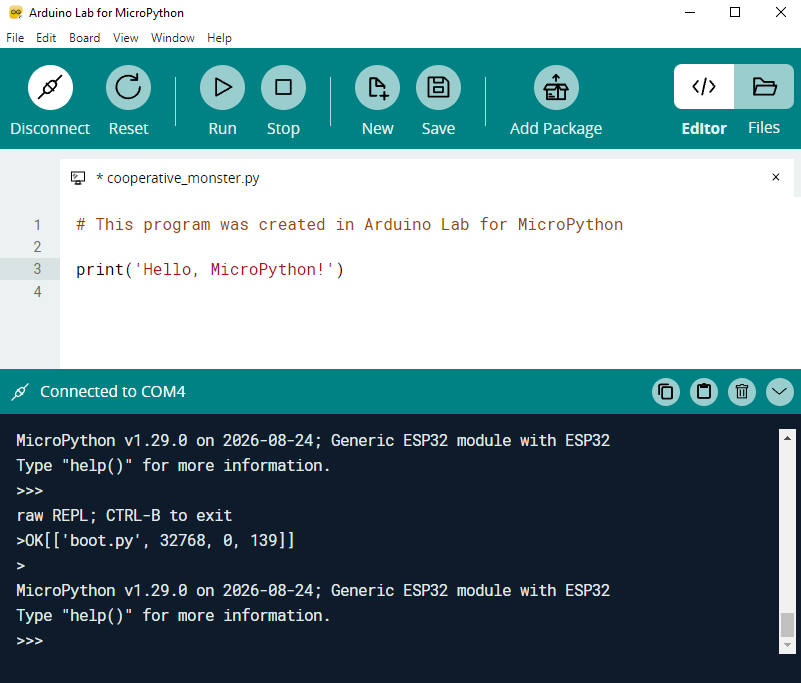
Then click into the REPL panel and type this, then press Enter.
import sys
print(sys.implementation)
you should see something like.
(name='micropython', version=(1, 25, 0), _machine='ESP32 module with ESP32', _mpy=4870)now all set, Let’s try LED Blink Code
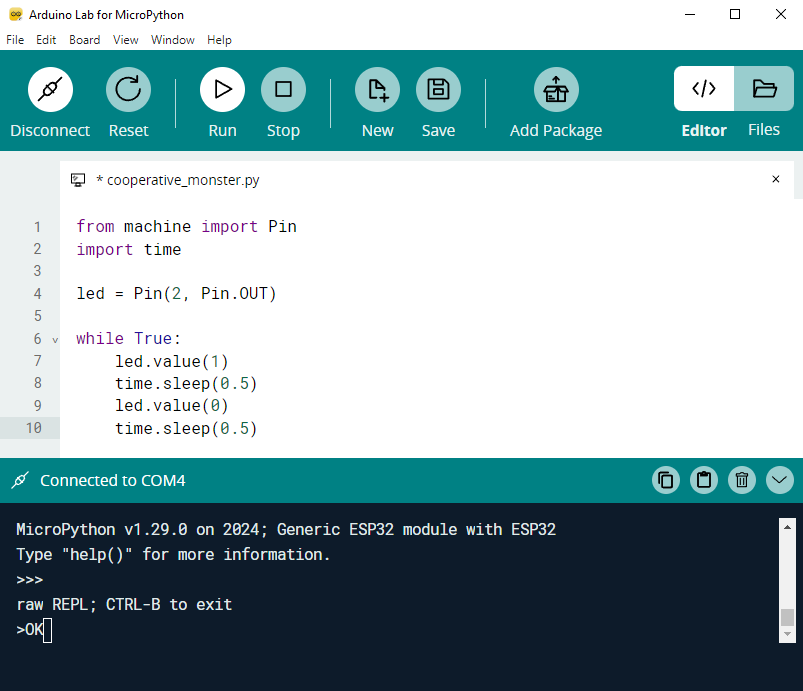
# ESP32 LED Blink using Arduino Lab for MicroPython
# TheoryCircuit.com

from machine import Pin
import time

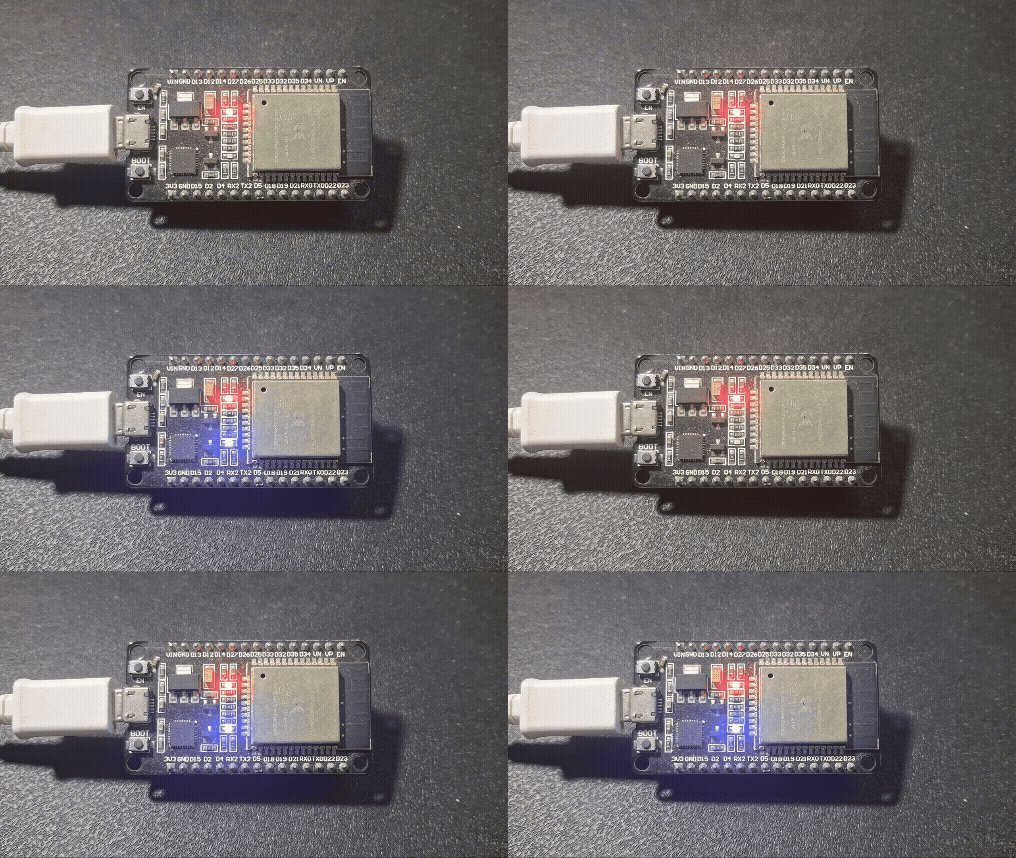
# GPIO 2 is the onboard blue LED on most ESP32 DevKit V1 boards
led = Pin(2, Pin.OUT)

print("Blink started. Press Ctrl+C in the REPL to stop.")

try:
    while True:
        led.value(1)          # LED ON
        time.sleep(0.5)       # wait half a second
        led.value(0)          # LED OFF
        time.sleep(0.5)       # wait half a second

except KeyboardInterrupt:
    led.value(0)              # make sure the LED is off when we stop
    print("Blink stopped.")
To make the code run automatically after power OFF and ON, you must save the code as follow,
| File on board | When it runs | Typical use |
|---|---|---|
| boot.py | First, at every reset | WiFi connection, low-level setup |
| main.py | After boot.py | Your actual application |
| Any other .py | Only when imported | Your own library modules |