Last Updated on October 9, 2024
Touch Sensing allows us to interact with devices through simple touch based input rather than traditional buttons or switches. We can make touch sensor by using Resistive Method, Capacitive Method or Infrared Interruption method, depends on the applications and sensitivity level requirement, we can use any method. Here we are going to Implement single wire touch sensing with ESP32 and to control LED.
As we know ESP32 is a compact and powerful microcontroller board with lot of features required to build embedded applications. It have hidden feature like touch sensitive GPIO pins. Which can detect touch inputs with minimal external hardware. Here we are going to make single wire touch sensor by using ESP32 and control an LED to turn ON or OFF with every touch.
What is Capacitive touch Sensing?
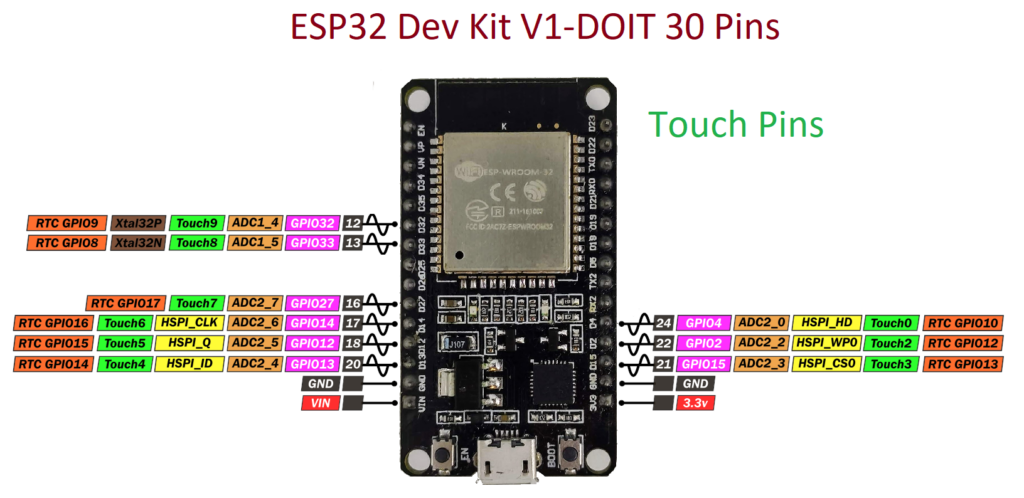
Capacitive touch sensor detects changes in Capacitance when an human finger or stylus comes into contact or proximity with sensing area. This ESP32 supports 10 touch pin (Dev kit V1 with 38 Pins) and 9 touch pins for Dev kit V1-DOIT version with 30 GPIOs (there will be no Touch sensor 1 pin that is GPIO 0).
Here is the list of ESP32 touch read Pins and their GPIO Numbers:
| Touch Pin | GPIO Pin |
|---|---|
| T0 | GPIO 4 |
| T1 | GPIO 0 |
| T2 | GPIO 2 |
| T3 | GPIO 15 |
| T4 | GPIO 13 |
| T5 | GPIO 12 |
| T6 | GPIO 14 |
| T7 | GPIO 27 |
| T8 | GPIO 33 |
| T9 | GPIO 32 |
If you are using 30 pin version ESP32 development board, you can’t find T1 = GPIO 0 touch pin. You have to use other pins.
Touch Sensing with ESP32
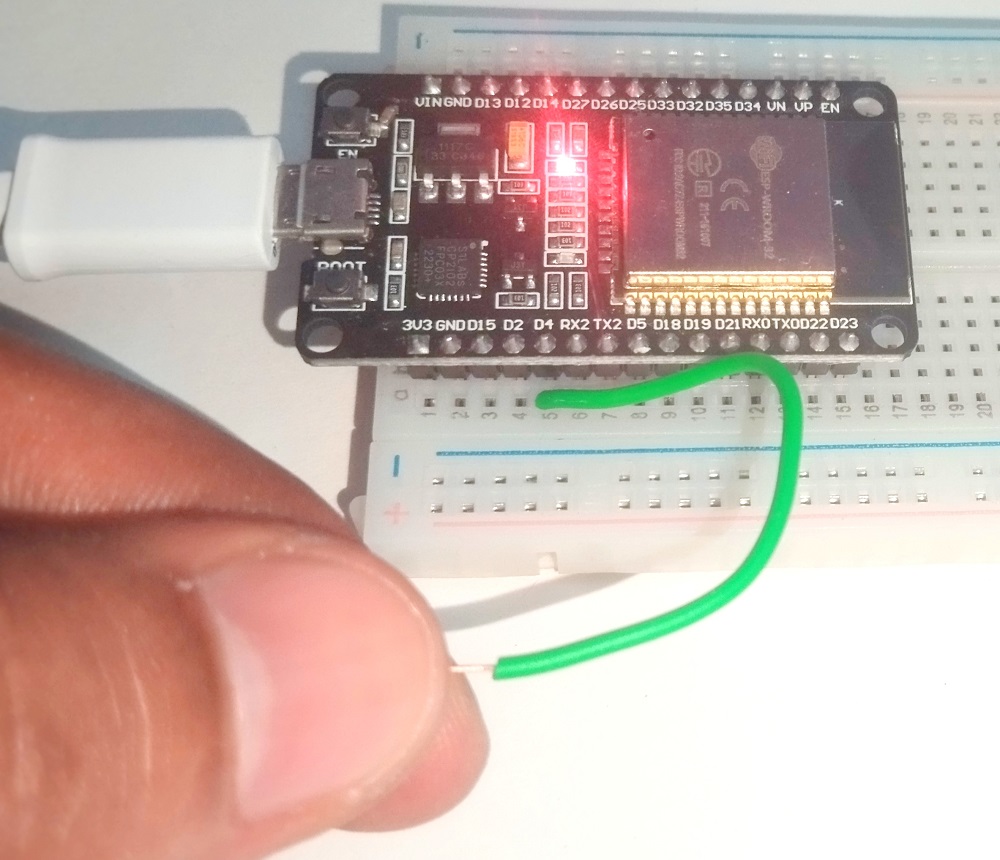
Just connect a sleeveless wire or Jumper wire in GPIO4 (touch pin T0) and then upload the following Arduino Code to read touch values.
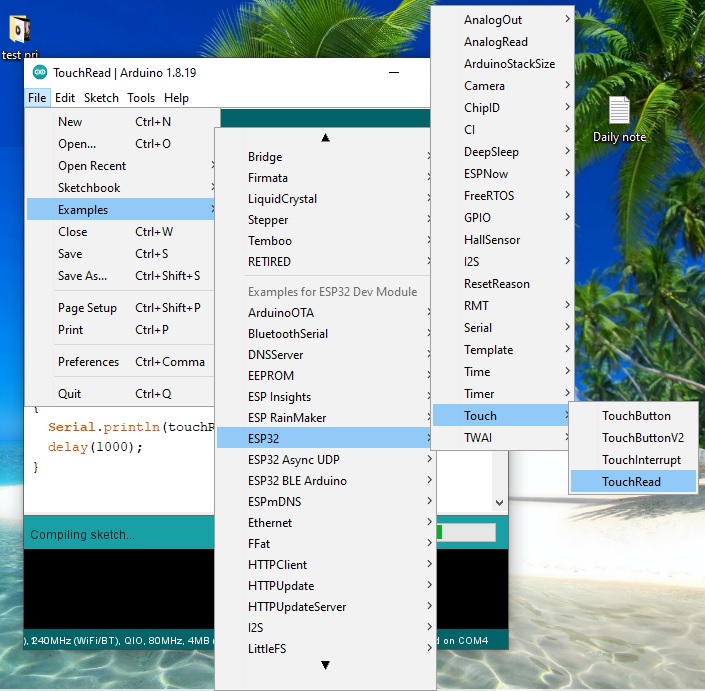
To get the touch sensing Value through Arduino IDE and Code use touchRead( ) function that is touchRead(TOUCH_PIN) or touchRead(T0).
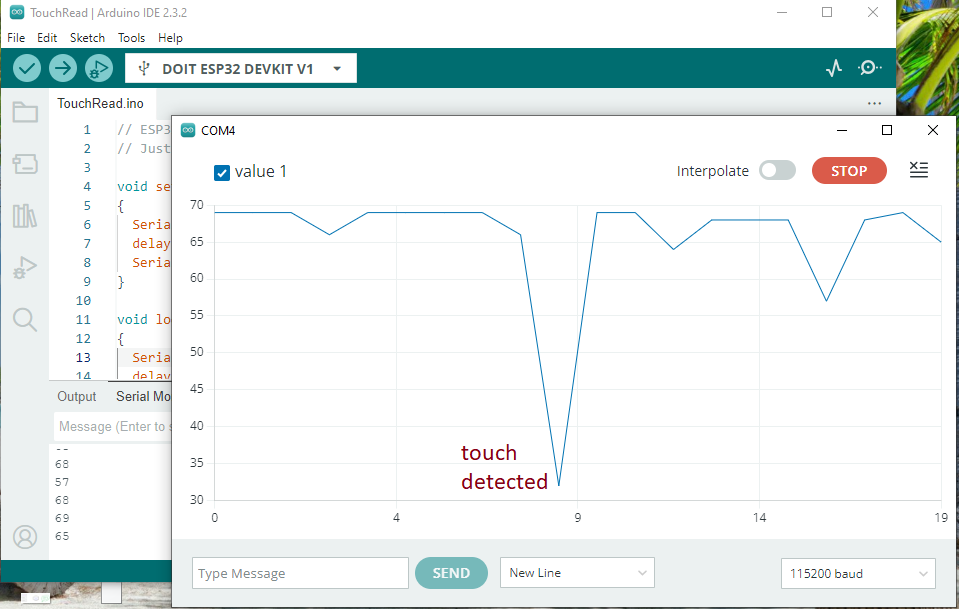
This function is used to read the touchpad or wire value, by monitoring this value in the serial monitor you can determine particular threshold like 40, 50,… for detecting touches. By putting this value in Arduino Code we can control or alter outputs.
In that example
Arduino Code
// ESP32 Touch Test
// Just test touch pin - Touch0 is T0 which is on GPIO 4.

void setup()
{
  Serial.begin(115200);
  delay(1000); // give me time to bring up serial monitor
  Serial.println("ESP32 Touch Test");
}

void loop()
{
  Serial.println(touchRead(T0));  // get value using T0
  delay(1000);
}
Code output in Serial monitor and graph plotter.
To Control LED by Touch
Components Required
- ESP32 Development board
- LED (any color)
- Resistor 330Ω
- Breadboard
- USB Cable (micro B)
- Computer with Arduino IDE
If you are new to ESP32 then read here to get started with ESP32 and Arduino IDE.
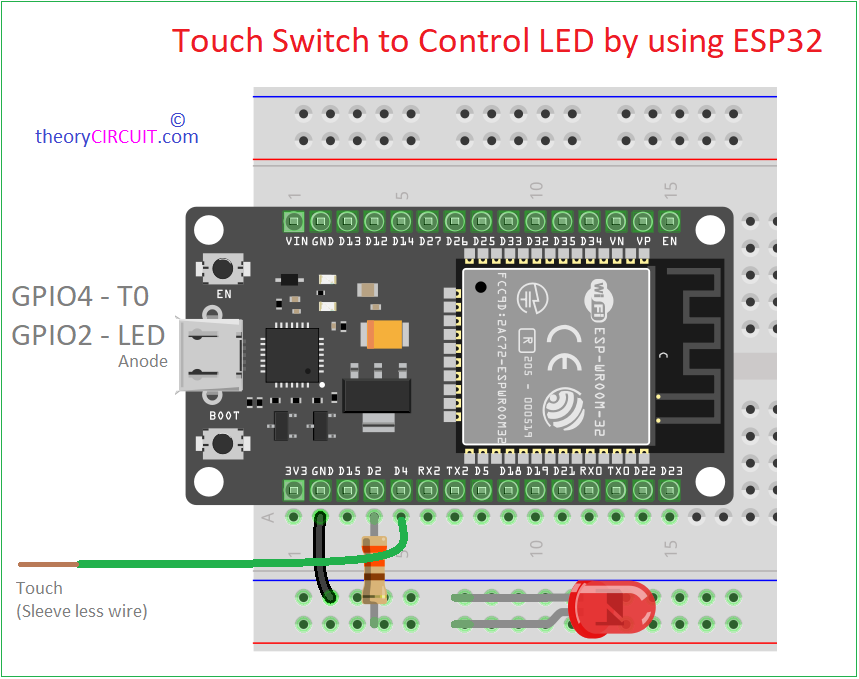
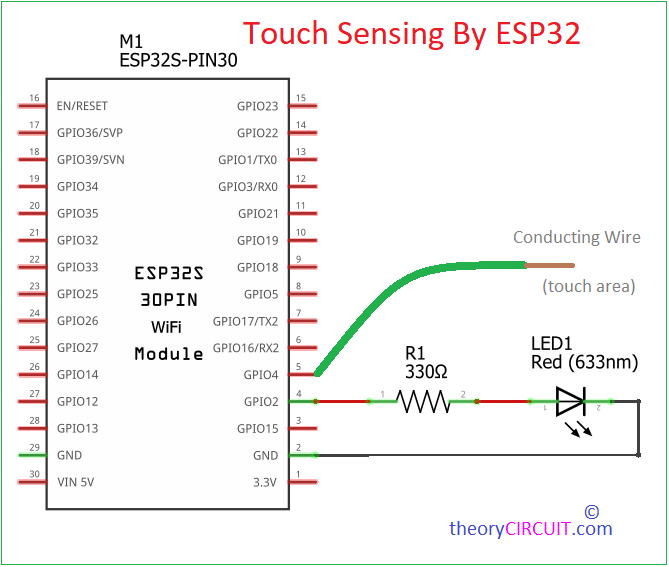
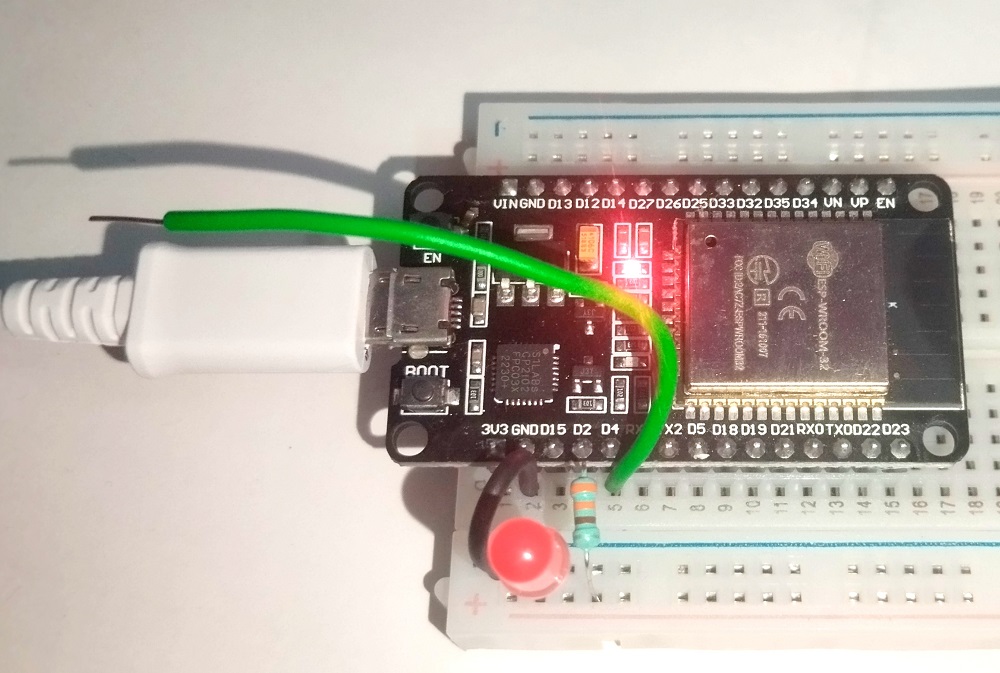
Connect Touch Wire in GPIO 4 pin (T0) then connect LED Anode terminal to GPIO 2 pin through 330Ω Resistor and connect LED cathode terminal to GND pin of ESP32 board.
Make the wiring as mentioned in the schematic diagram and then upload the following Arduino code to get turn ON or OFF LED for every touch in the wire. You can change the threshold depends on your sensitivity level and need.
Arduino Code to Turn ON or OFF by Touch
// Define the touch pin and LED pin
#define TOUCH_PIN T0  // GPIO 4
#define LED_PIN 2     // GPIO 2

int threshold = 40;    // Touch threshold (adjustable)
bool ledState = false; // LED state

void setup() {
  Serial.begin(115200);

  // Set LED pin as output
  pinMode(LED_PIN, OUTPUT);

  // Initial LED state
  digitalWrite(LED_PIN, ledState);

  // Optional: calibrate touch sensor by printing its value
  Serial.print("Touch value at start: ");
  Serial.println(touchRead(TOUCH_PIN));
}

void loop() {
  // Read the touch sensor value
  int touchValue = touchRead(TOUCH_PIN);

  // Debugging: print the current touch sensor value
  Serial.println(touchValue);

  // Check if the touch value is below the threshold
  if (touchValue < threshold) {
    // Debouncing: wait to prevent multiple toggles on one touch
    delay(100);

    // Toggle LED state
    ledState = !ledState;

    // Update LED
    digitalWrite(LED_PIN, ledState);

    // Wait for release
    while (touchRead(TOUCH_PIN) < threshold) {
      delay(10);  // Wait for the finger to be removed
    }
  }

  // Short delay to avoid overwhelming the serial monitor
  delay(50);
}
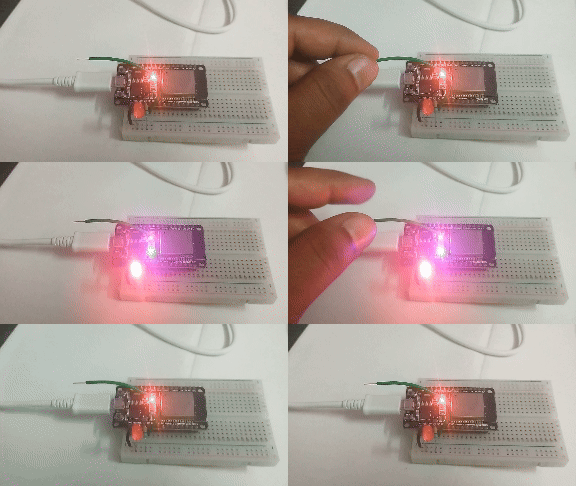
Here is the result,


