Last Updated on April 1, 2024
To measure the frequency of Signal (Here Pulse) we always depend on Oscilloscope, We can’t use expensive frequency counter or Oscilloscope alwys, When there is constant measurement is required. Here is the simple solution to that problem, Pulse Frequency Counter using Arduino. By uploading few lines of code we can measure frequency of pulse up to 1 MHz.
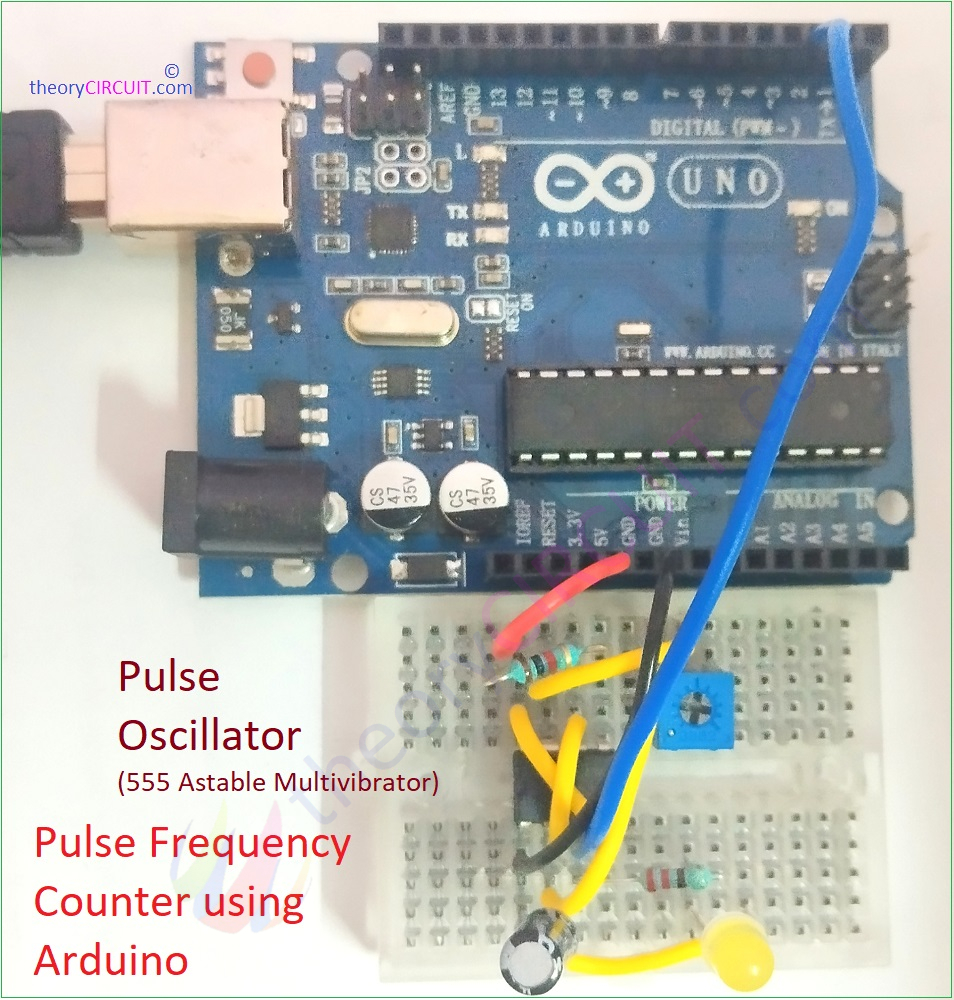
For an experiment we used Timer IC 555 Based Square Pulse Oscillator (Astable Multivibrator), If you have external pulse source then you can skip this part. Remeber to connect Arduino and Signal source Ground (Gnd) pins together for proper frequency counting.
Pulse Frequency Counter using Arduino can be used to measure sine wave or other wave forms but you have to convert those signal into square pulse before connecting it to Arduino board. For that you can use Schmitt trigger Circuit, which can convert any signal into equivalent square signal, and no need to change the Arduino Code.
Wiring
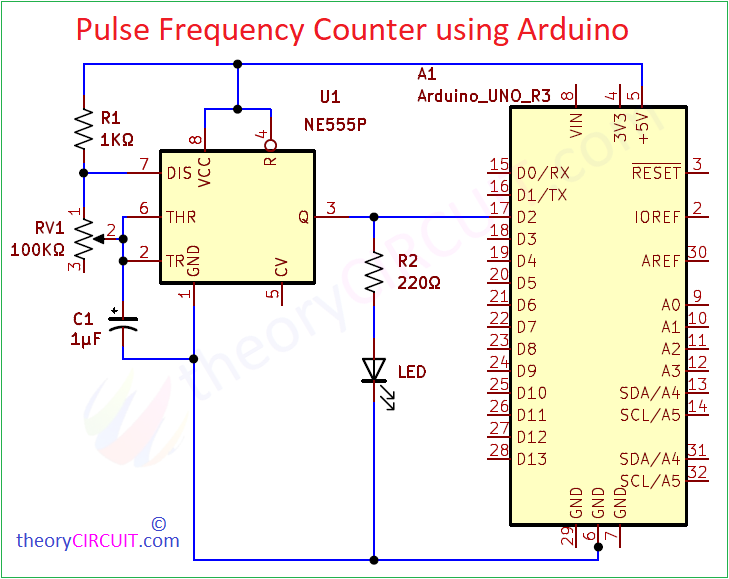
Circuit Diagram
List of Components
- Arduino board
- Hookup wires
- USB Cable (Class B)
- Computer with Arduino IDE
If you have external Signal source then following Components are not required.
- Timer IC 555
- Resistor 1KΩ, 220Ω each one
- Variable Resistor 100KΩ
- Capacitor 1μF
- LED
- Breadboard
- Connecting Wires
Working Video!
Construction & Working
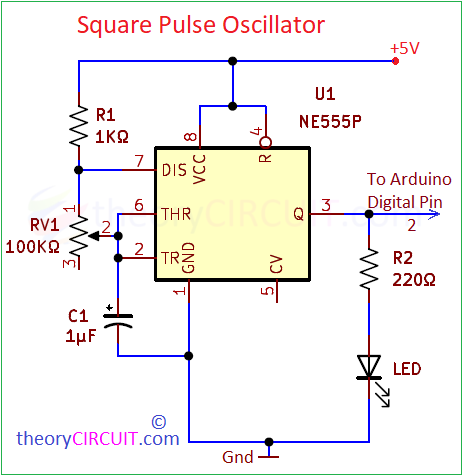
Pulse Frequency Counter using Arduino Schematic starts with constructing 555 Timer Astable Multivibrator and you can use this calculator to calculate the output frequency. Output Pulse duration is depends on Timing Resistor RV1 and Timing Capacitor C1. By adjusting RV1 different level output frequency achieved. To indicate the output pulse we used an LED. Output Pulse through Pin 3 of IC 555 is directly connected with Arduino Digital Pin D2 and there is no external components required for Arduino board.
How to Calculate Frequency from Pulse Duration in Arduino?
Now its time to code the Arduino, Before that we need to use formula to calculate the frequency in Hertz using the input pulse duration.
We use 1/Time is equal to Frequency, here for Arduino we set limit up to 1MHz (1000000 Hz), so the Frequency is equal to 1/Total Pulse duration X 10^6.

Here Total Pulse Duration includes Pulse High + Pulse Low time period.
frequency = 1000000.0 / fullPulse; is used in code.
Here we used Arduino Serial monitor to display the measure frequency of pulse, you can use LCD display to make it standalone.
Pulse Frequency Counter using Arduino Code
const int pulseInPin = 2; // Input pin for the signal
unsigned long fullPulse; // Variable to store total pulse duration
float frequency; // Variable to store frequency
void setup() {
Serial.begin(9600);
}
void loop() {
unsigned long pulseHigh = pulseIn(pulseInPin, HIGH);
unsigned long pulseLow = pulseIn(pulseInPin, LOW);
fullPulse = pulseHigh + pulseLow; // Total Time period of the pulse in microseconds
frequency = 1000000.0 / fullPulse; // Pulse Frequency in Hertz (Hz)
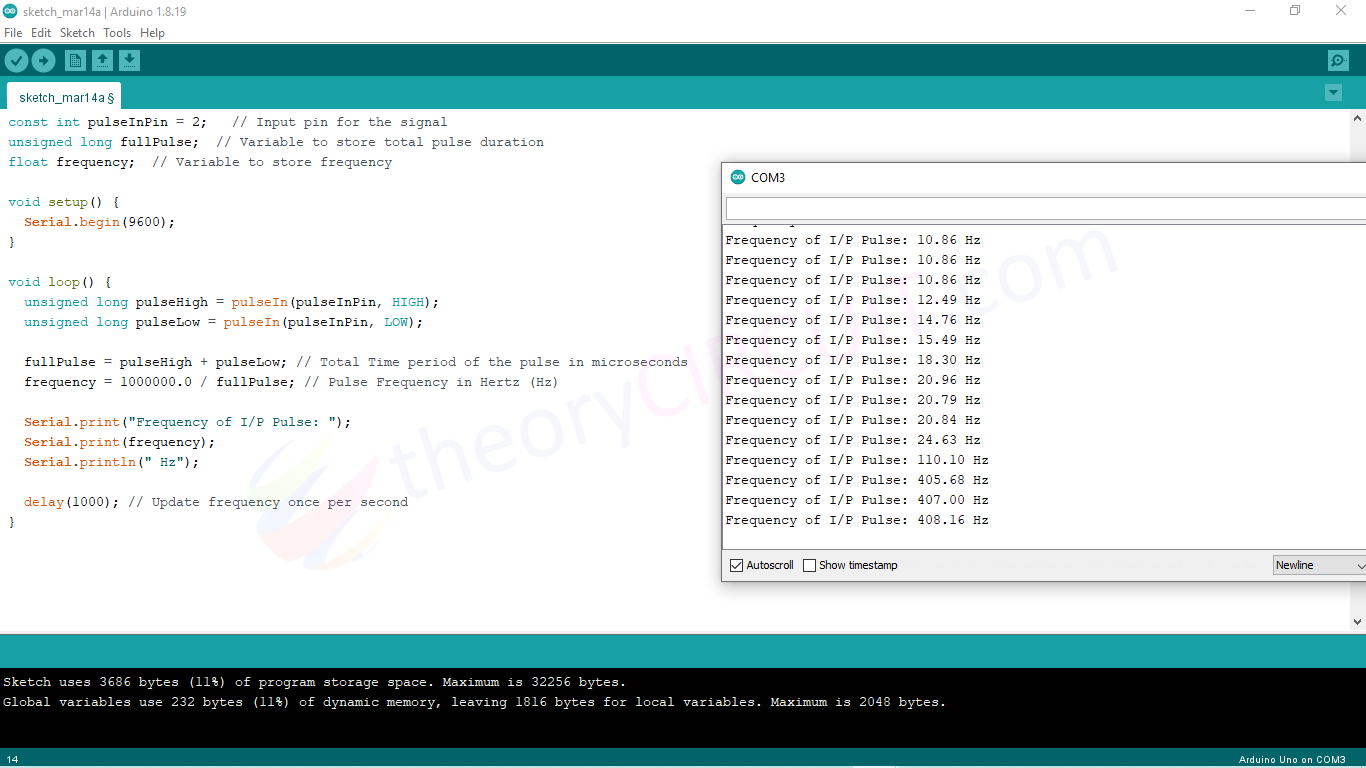
Serial.print("Frequency of I/P Pulse: ");
Serial.print(frequency);
Serial.println(" Hz");
delay(1000); // Update frequency once per second
}
Serial Printer Screenshot